A trash can makes a surprisingly capable composting system. Drill some holes in the bottom, load it with a mix of kitchen scraps and dry yard material, and within 4 to 8 weeks you can pull finished compost out the bottom and use it directly on vegetable beds. If you also collect the liquid that drains out (called leachate), dilute it about 10:1 with water, and you have a basic liquid fertilizer you can water your plants with. That is the whole idea behind trash-can grow fertilizer: cheap, low-effort composting in a contained setup that fits a backyard, patio, or even a garage corner.
Trash Can Grow Fertilizer: Compost and Liquid Guide

Marcus Hendrick
13 Jun 2026
What "trash can grow fertilizer" actually means
People searching this phrase are usually after one of two things, and honestly the best setup delivers both. The first is solid compost: fully broken-down organic matter you dig into garden beds or mix into container soil. The second is liquid feed: either captured leachate (the dark liquid that drains from decomposing material) or brewed compost tea made by steeping finished compost in water. A properly managed trash-can system produces both at the same time if you set it up with a drainage hole and a catch container underneath.
The key distinction worth knowing upfront is that raw leachate is not the same as safe compost tea. Leachate from an immature or anaerobic pile can carry pathogens and should always be heavily diluted or left to mature further before going near edible plants. Finished compost tea, steeped from cured compost, is much safer and more nutrient-stable. I will cover both, and where the line is between safe and risky use.
The best trash-can setup: size, location, and configuration
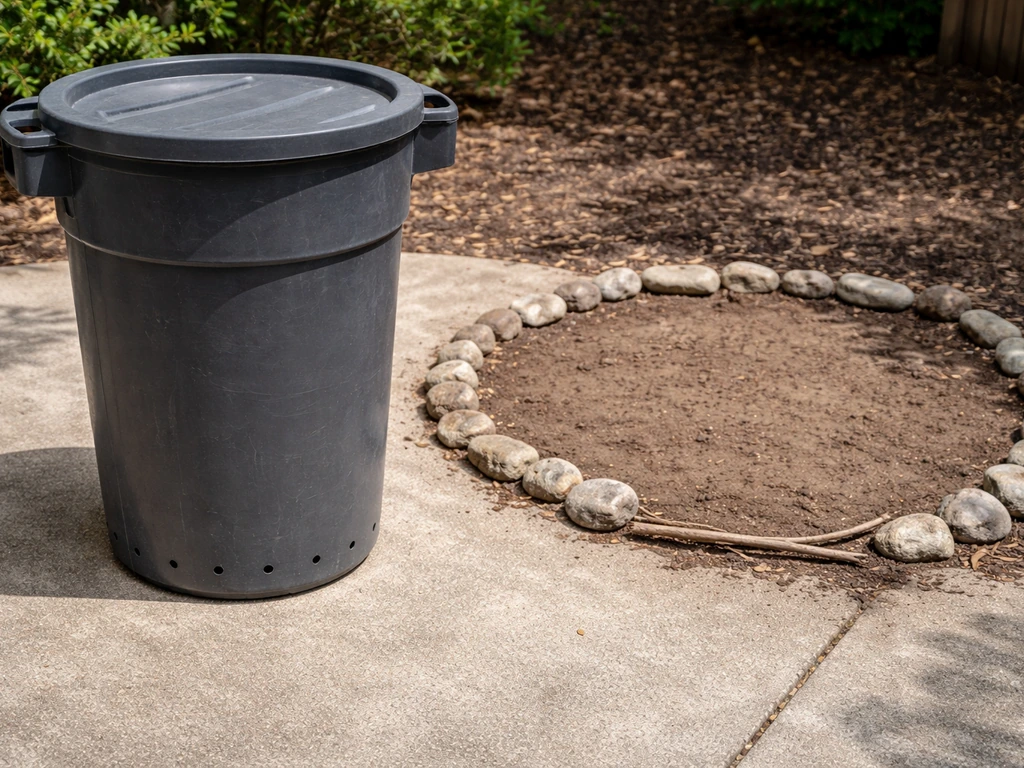
Start with a 20-gallon plastic trash can. That size is large enough to hold a meaningful amount of material and generate the interior heat you need, but small enough to tip and turn without breaking your back. Avoid metal cans because they rust from the inside out once moisture builds up. A lid is important, both to keep pests out and to retain heat and moisture during dry spells.
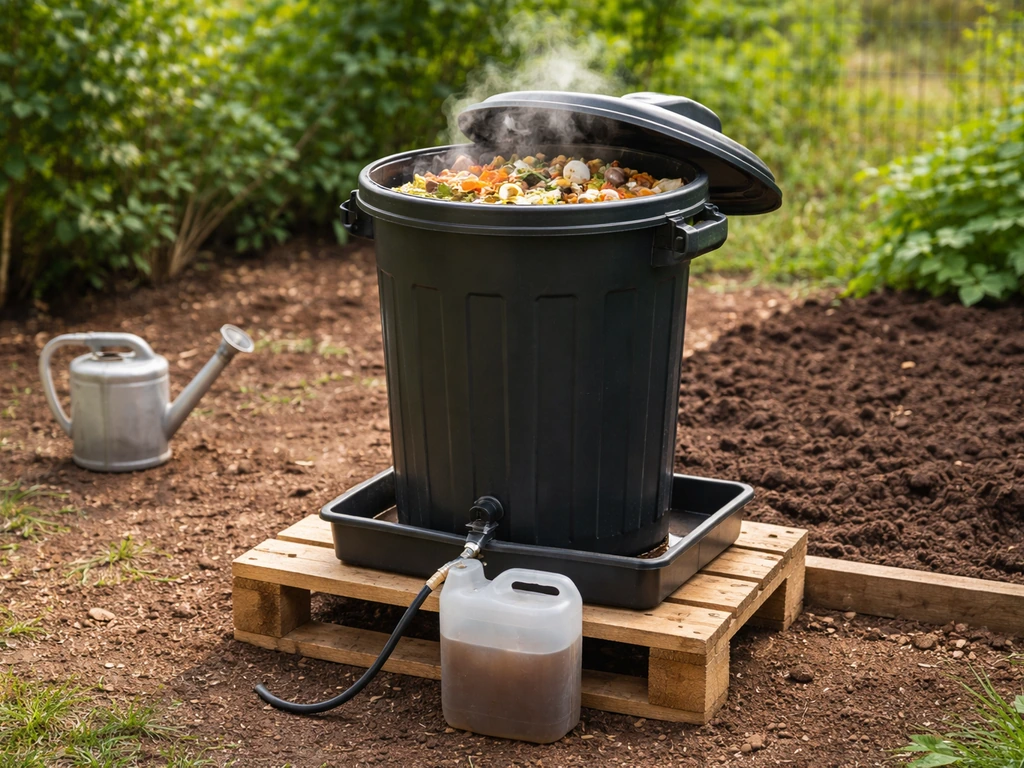
For drainage and aeration, drill 15 to 20 holes through the bottom of the can using a half-inch drill bit. Cornell's composting research specifically recommends this configuration for a 20-gallon bioreactor: the holes let liquid drain out and allow some bottom airflow into the pile. If you want to capture that leachate (and you should), set the drilled can inside a second, undrilled can of the same size. The liquid collects in the outer can and you can ladle or pour it off as needed. This two-can setup is one of the most practical approaches for a home gardener who wants both solid and liquid output from a single system.
Drill an additional 10 to 15 holes around the sides of the inner can, spaced evenly and starting about 4 inches up from the bottom. This is what actually keeps your pile aerobic instead of slimy and anaerobic. No air circulation is the number one reason backyard compost stinks and stalls. Location matters too: put the can somewhere that gets partial shade. Full sun in summer can dry the pile out faster than you can moisten it. A spot near your kitchen door is ideal because you want to actually use it, not walk across the yard in the rain to dump scraps.
| Feature | Recommended Setup | Why It Matters |
|---|---|---|
| Can size | 20-gallon plastic | Large enough for heat, small enough to manage |
| Bottom holes | 15 to 20 holes, 0.5-inch diameter | Drainage and bottom airflow |
| Side holes | 10 to 15 holes, 0.5-inch diameter | Aeration to prevent anaerobic rot |
| Lid | Yes, tight-fitting | Pest exclusion and moisture retention |
| Outer can (optional) | Undrilled 20-gallon | Captures leachate for liquid fertilizer |
| Location | Partial shade, near kitchen | Prevents drying out; encourages consistent use |
| Base surface | Soil or gravel (not concrete) | Allows worm access and overflow drainage |
What to put in (and what to absolutely leave out)
Compost is built on a balance between nitrogen-rich "green" materials and carbon-rich "brown" materials. A rough ratio of 1 part greens to 2 to 3 parts browns by volume is a good working target. You do not need to be precise about it, but if your pile smells or stays wet and matted, it almost always means too many greens and not enough browns.
What to add
- Fruit and vegetable scraps (peels, cores, coffee grounds, tea bags without staples)
- Eggshells (they break down slowly but add calcium)
- Grass clippings (thin layers only, or they mat and block airflow)
- Dry leaves, straw, cardboard torn into small pieces, shredded paper
- Plant trimmings and pulled weeds (as long as they have not gone to seed)
- Wood chips or sawdust from untreated wood
What to leave out
Both the UMN Extension and the US EPA are clear on this: do not add meat, bones, grease, whole eggs, or dairy products. These attract rodents and other animals to your pile and can create real pathogen issues in a home-scale system that rarely reaches the sustained internal temperatures needed to neutralize them. The same goes for pet waste and anything treated with pesticides. Diseased plant material should also stay out unless you are confident your pile is consistently hitting 130 to 150 degrees Fahrenheit in the center, which a small trash-can system may not always achieve.
Layering for fast breakdown
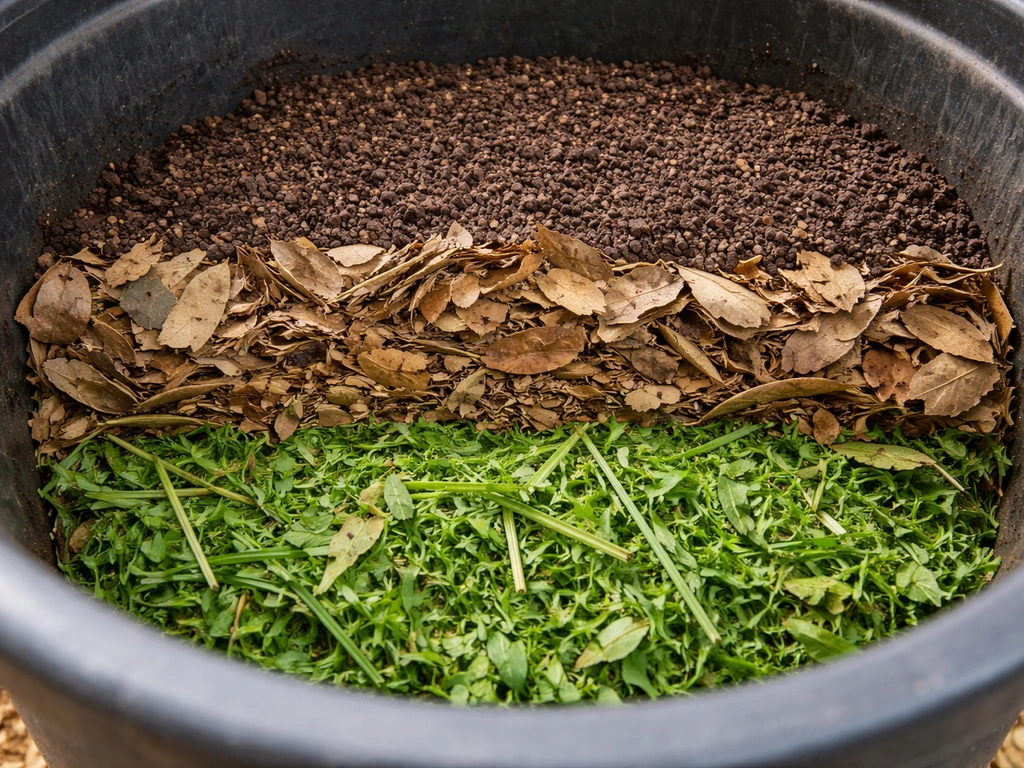
When you load the can, alternate layers: a couple of inches of greens, then 4 to 6 inches of browns, then a thin scattering of finished compost or garden soil to introduce microbes. Repeat. If you are starting fresh with no finished compost, a handful of topsoil from your garden works fine. Every time you add fresh kitchen scraps, cover them with a layer of dry browns. This is the single habit that separates a trash-can system that works from one that smells like a dumpster.
Keeping it hot, moist, and moving
The pile needs three things to decompose quickly: oxygen, moisture, and microbial activity. You get all three through regular turning, the right moisture level, and occasionally checking the interior temperature if you want to be precise about it.
Moisture should feel like a wrung-out sponge, damp but not dripping. If you squeeze a handful and water runs out, it is too wet. Add dry browns and prop the lid slightly to let it breathe for a day or two. If the material is dusty and dry and shows no signs of decomposition after two weeks, drizzle water in while stirring and replace the lid.
For turning, once or twice a week is ideal in warm weather. Use a long-handled garden fork or a compost stirring tool and push material from the outside edges toward the center where it is hottest. In a trash can you can also just tip the entire can onto its side, roll it a few times, and stand it back up. That is the lazy method and it works fine. If turning feels like too much work, you can go the no-turn route: just keep adding material in layers and wait longer, typically 3 to 6 months instead of 4 to 8 weeks for actively managed piles.
Internal temperature in an active pile should reach 90 to 140 degrees Fahrenheit. You can check with a cheap compost thermometer pushed into the center. If the pile is not heating up, it usually means there is not enough nitrogen (add more greens or a small amount of blood meal), not enough moisture, or not enough microbial mass (add a shovel of garden soil). If it is overheating past 160 degrees and smelling like ammonia, you need to turn it and add more browns to cool it down.
Harvesting and using what you made
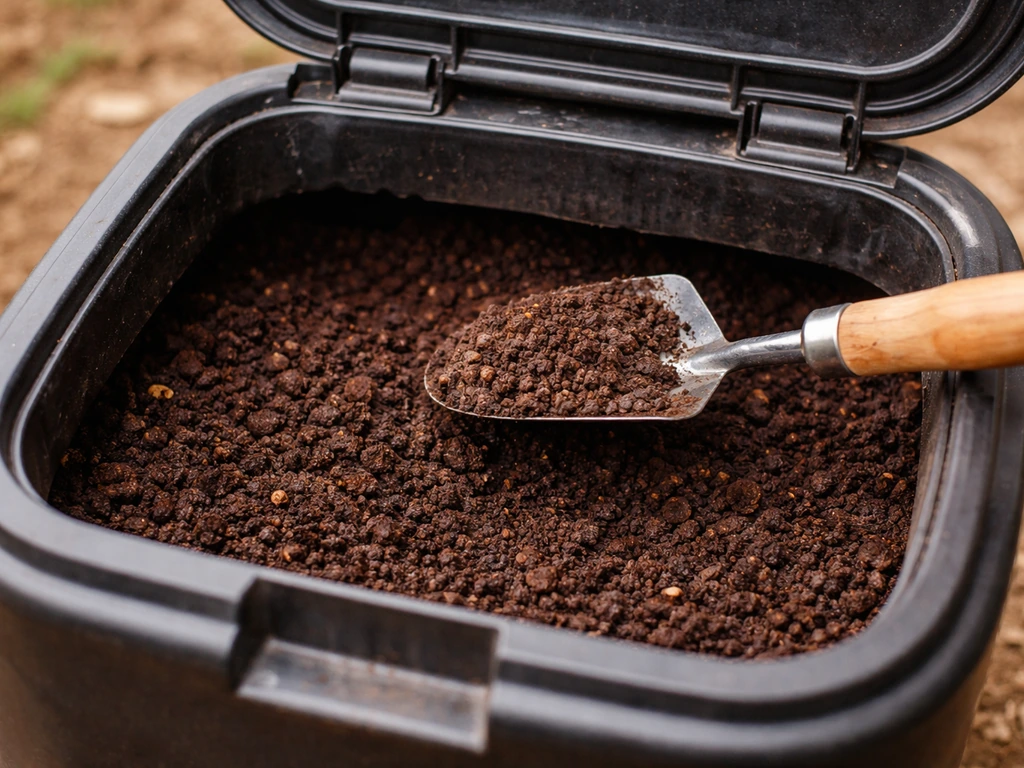
Finished compost
Finished compost looks dark brown, smells earthy (not rotten), and you cannot identify most of the original materials anymore. In a trash-can system, the bottom of the can finishes first. Some cans have a small door at the base for this reason, but most do not, so the easiest approach is to tip the can over, scoop off the top unfinished layers into a bucket or tarp, harvest the dark finished compost from the bottom, then reload the unfinished material back in.
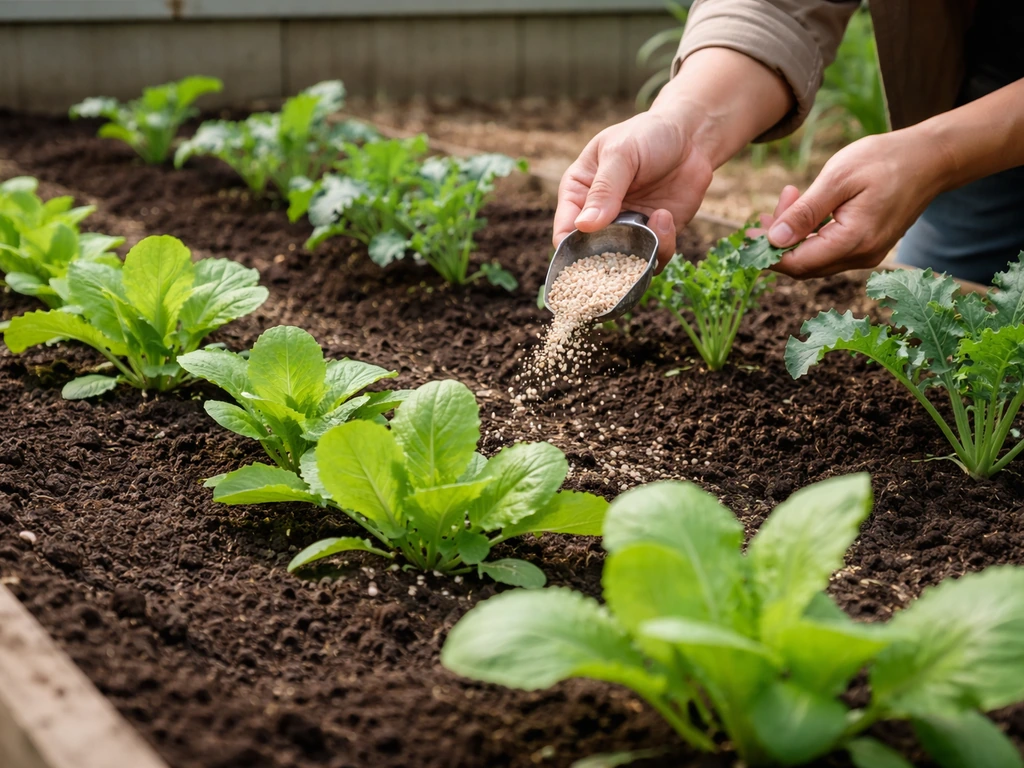
For vegetable beds, work in 1 to 3 inches of finished compost per season. For containers, mix compost at about 25 to 30 percent by volume with your potting medium. For new raised beds, you can go up to 50 percent compost in the initial fill. Compost is forgiving and almost impossible to over-apply when fully cured, but it is also not an instant fertilizer: nutrients release slowly as soil microbes continue to break it down.
Leachate and compost tea
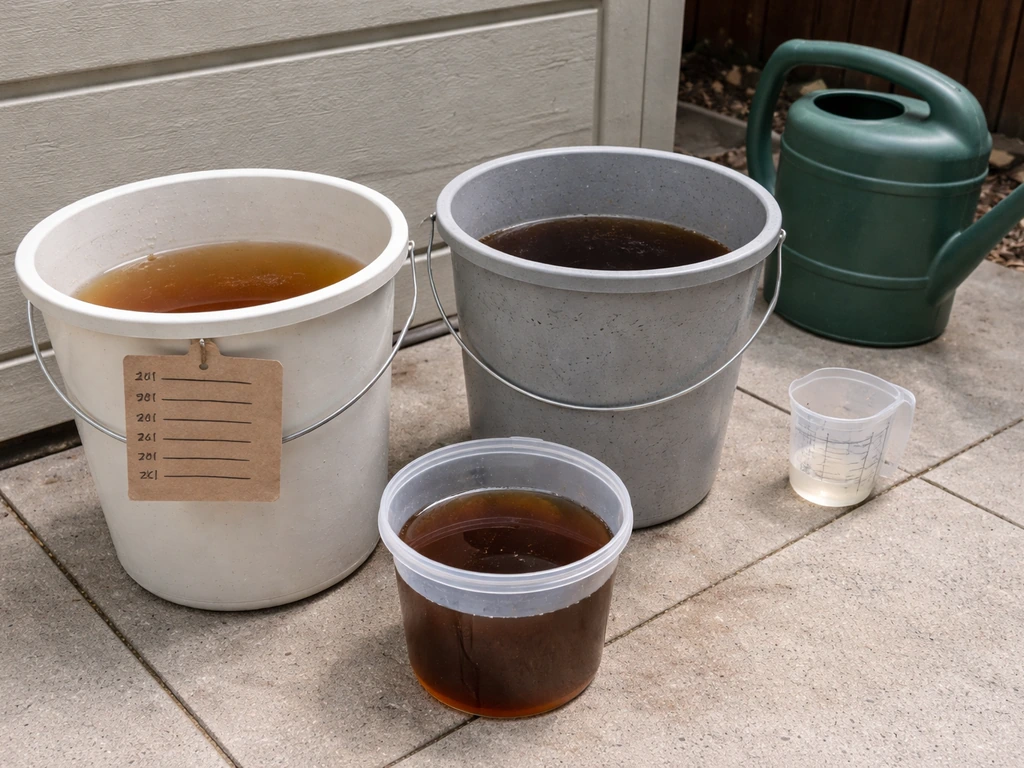
If you are using the two-can setup, you will periodically find liquid collected in the outer can. Always dilute this before using it on plants: a ratio of 1 part leachate to 10 parts water is a safe starting point. Use it on the soil around plants, not directly on leaves or edible parts, and only on established plants, not seedlings. Raw leachate from an active pile can be high in acids and potentially contain pathogens, so treat it as a soil drench rather than a foliar feed.
For proper compost tea, take a few cups of finished, cured compost and steep it in a bucket of water for 24 to 48 hours, stirring occasionally. Strain out the solids, dilute the liquid to a light tea color (roughly 10:1 again), and apply at the base of plants. This is gentler, more predictable, and safer for edible crops than raw leachate. If you want to compare approaches to liquid feeding, the principles behind has-to-grow fertilizer products and branded options like Medina follow similar logic around liquid nutrients from organic sources. Brands like Medina also sell products that follow these same principles behind has-to-grow fertilizer.
When things go wrong: troubleshooting and safety
Bad smell
A rotten or sulfur smell almost always means the pile is too wet and not getting enough air, or someone added meat or dairy. Per the US EPA, when composting at home you should avoid adding meat, dairy, and greasy foods, and bad odors can indicate too little airflow or too much wetness meat or dairy. The fix is to turn the pile, add a significant amount of dry browns (shredded cardboard is great), and check that your side holes are not clogged with matted material. A pile that smells like ammonia has too much nitrogen; add more carbon material and turn it. Per the US EPA, bad odor is a reliable signal of either too little airflow or too much moisture, both of which are easy to correct once you know what to look for.
Fruit flies and pests
Fruit flies are attracted to exposed food scraps, especially fruit. Always bury fresh kitchen additions under several inches of browns and keep the lid on tight. If flies are already present, a layer of finished compost or soil on top of fresh additions helps. Rodents are a bigger problem and the reason you must never add meat, grease, or dairy (both UMN Extension and the EPA emphasize this). If you are in a rodent-active area, consider securing the lid with a bungee cord and placing the can on a hardware-cloth base that lets worms in but keeps diggers out.
Too wet or too dry
Too wet and matted means more browns and more turning. Too dry and inactive means add water slowly while stirring. Both problems stall decomposition. In hot, dry climates, keeping moisture in the pile can be the bigger challenge, so make sure the lid fits well and consider placing the can in shade during peak summer heat.
Pathogens and safety
Home composting at low temperatures does not kill all pathogens. This is why you should never add human or pet waste to a home trash-can system, and why leachate should be diluted and used as a soil drench rather than a foliar spray on edible parts. If your pile is consistently reaching 130 degrees Fahrenheit or above for several days, it will kill most pathogens, but the outer edges of a small pile may not get there. When in doubt, let compost cure for an extra month before applying to food crops.
Leachate runoff rules
In most residential areas there are no specific regulations on composting liquid for personal garden use, but you should not let leachate run off into storm drains or waterways. The two-can system keeps it contained by design. If you are not using the two-can setup, place the can on a flat surface away from drainage channels and dispose of any excess leachate by diluting it heavily and applying it to a non-food area or gravel bed.
When and how much to apply by crop
Timing matters. Apply solid compost to vegetable beds in early spring before planting, or in fall to let it continue breaking down over winter. Mid-season top-dressing (spreading an inch of compost around established plants without digging it in) works well for heavy feeders like tomatoes, squash, and corn. Liquid feed is best applied every 2 to 4 weeks during active growing season, in the morning so roots can absorb it before midday heat. Liquid fertilizers from compost tea or leachate are meant to help your plants keep growing while the soil fertility builds up.
| Crop Type | Compost Application Rate | Liquid Feed Frequency | Notes |
|---|---|---|---|
| Tomatoes, squash, corn | 2 to 3 inches per season | Every 2 weeks | Heavy feeders; compost top-dressing mid-season helps |
| Leafy greens (lettuce, spinach) | 1 to 2 inches per season | Every 3 to 4 weeks | Excess nitrogen can cause bitter, bolting leaves |
| Root vegetables (carrots, beets) | 1 inch pre-planting only | Sparingly | Too much compost causes forked roots; focus on texture not fertility |
| Beans and peas | 1 inch pre-planting | Rarely needed | Fix their own nitrogen; compost improves drainage more than fertility |
| Containers and pots | 25 to 30% of total volume | Every 2 to 3 weeks | Nutrients leach fast in containers; liquid feed compensates |
One thing to watch with liquid feed on leafy vegetables: too much nitrogen too close to harvest makes leaves taste bitter and can push plants to bolt. Back off on liquid applications in the last two to three weeks before you plan to harvest greens. For root crops like carrots and beets, a compost-rich planting mix matters more for soil structure (light, loose, well-drained) than for raw nutrient content, so do not over-apply and skip the liquid feed almost entirely once they are established.
Your next steps starting today
If you want to start right now, here is what to do today: grab a 20-gallon plastic trash can, drill your bottom and side holes, and collect your first load of material. A mix of kitchen vegetable scraps plus dry shredded cardboard or leaves is all you need to start. If you want a practical straw-based way to add carbon and speed up breakdown, you can use a good to grow straw hack in your trash-can layers. If you want the two-can liquid capture setup, nest it inside a second undrilled can and check the outer can weekly. Add a layer of browns every time you add kitchen scraps, turn it once or twice a week, and you will have usable compost in 4 to 8 weeks during warm weather.
- Drill 15 to 20 half-inch holes in the bottom and 10 to 15 in the sides of a 20-gallon plastic trash can
- Optionally nest it inside an undrilled second can to capture leachate
- Add a base layer of 4 to 6 inches of dry browns (cardboard, leaves, straw)
- Add your first kitchen scraps and cover immediately with more browns
- Turn weekly, check moisture (damp sponge feel), and add browns whenever the pile seems wet or smelly
- Harvest dark, earthy-smelling compost from the bottom after 4 to 8 weeks and apply to beds or containers
- Dilute any collected leachate 10: 1 with water and use as a soil drench around established plants
This system is low-cost, low-tech, and genuinely effective. Once you have it running, you will start looking at kitchen scraps and fall leaves as inputs rather than waste, which is exactly the mindset shift that makes home growing more self-sufficient and more economical over time. If you want to go deeper on the grow-your-own-fertilizer approach, there are solid options worth exploring around biointensive growing methods and using cover crops or manure to build fertility on a larger scale. If you are wondering how this connects to organic gardening, learn whether it is grow more fertilizer organic and how to apply it safely grow fertilizer. Biointensive growing methods focus on building and maintaining soil fertility with intensive composting and careful planting, which pairs well with the compost and liquid-feeding approach described here. If you are using manure, focus on growing better cow manure by composting it properly so it becomes safe, nutrient-rich material cover crops or manure. If you want to grow stuff you can use, composting is a great way to build fertility from what you already have grow fertilizer.
FAQ
How much kitchen scraps can I add to a trash-can compost system without it going anaerobic?
Aim for a continuous but not overflowing load, typically 2 to 4 inches of fresh scraps per week for a 20-gallon can. If you add a lot all at once, the pile can go anaerobic, causing stench and low breakdown. Cover every new addition immediately with dry browns to keep the surface from staying wet.
What changes should I make if my compost can is in a very humid or rainy location?
Use the same moisture rule, wrung-out sponge, but compensate for less natural drying by propping the lid slightly more often after adding scraps. In rainier weather, check the bottom drainage and ensure holes are not clogged with matted material, since excess liquid can pool and slow airflow.
Can I harvest compost earlier from the bottom while the rest is still decomposing?
Yes, but only after the compost is clearly finished and smells earthy. “Hot spots” near the bottom can be ready while the rest is still breaking down, so harvest only the dark material and leave the rest inside to cure a bit longer before mixing into food-bed soil.
What should I do if my pile smells like ammonia or turns slimy?
If you get ammonia odor or a slimy texture, stop adding greens for a few days, turn the pile, and add a thick layer of dry browns (shredded cardboard works well). Then monitor moisture and avoid compacting when you add new scraps. If you collect leachate frequently, reduce wetter inputs by adding more browns first.
How strong can I safely use collected leachate, and can I start weaker than 1:10?
For most gardeners, treat leachate as a soil-only input and dilute it the full 1:10 before any plant contact. If you want to be extra cautious, start with half strength (about 1:20) on the edges of established plants, then increase only if growth looks normal.
What leachate quality signs mean I should not use it yet?
Liquid that smells sour or very “vinegary,” or leachate that you never had time to dilute and stabilize, should be avoided for edible beds until you confirm your compost is at least partially mature and the system is aerobic. When in doubt, let the solids cure longer and use only finished compost tea or well-diluted soil drench.
Can I spray trash-can grow fertilizer liquid on leaves, or is it strictly for soil?
Don’t use it as a foliar spray, even if it seems clean. Apply diluted liquid only to soil around the plant base, and keep it off leaves you plan to harvest soon. For leafy crops, pause liquid feeds during the final 2 to 3 weeks before harvest.
Can I compost pet waste or bedding in the same trash-can fertilizer system?
Pet waste is a hard no for home trash-can compost because home systems often do not maintain pathogen-killing temperatures throughout. If you have pet manure, the safer route is separate, higher-control composting methods designed for waste, or keep it out of this system entirely.
My pile isn’t getting hot. What are the most common causes and the quickest fixes?
If the pile is not heating after you’ve set up drainage and you’re getting a good moisture level, add microbial mass by mixing in a shovel of finished compost or garden soil, then add a moderate amount of greens. Avoid overcorrecting with more browns only, because low nitrogen is a common reason small piles stall.
How do I stop fruit flies if they keep coming back even after I cover scraps?
If you see fruit flies, the real fix is surface management: every time you add scraps, bury them under several inches of dry browns. Make sure the lid seals well. For an immediate reduction, scrape off any exposed scraps and top with a fresh layer of browns.
Is it worth chopping scraps and turning more for faster compost, or can I rely on the no-turn method?
Gently. If you want to speed the first batch, chop scraps smaller, keep a steady feed rate, and turn weekly in warm weather. For “no-turn,” expect a longer timeline, usually 3 to 6 months, and consider finishing the last portion longer before harvesting for edible beds.
What should I do if my “finished” compost is still too wet or clumpy?
If your finished compost comes out too wet, it likely needs extra curing before application. Spread it out on a tarp for a short cure period (for example, a week in good air flow) until it is friable and earthy, then use as a soil amendment at normal rates.
Can I use trash-can liquid fertilizer on seedlings or brand-new transplants?
Yes, but do a dilution and patience approach. For new transplants, keep liquid feed light and use it on established root zones rather than directly at stems, and avoid using it during very hot afternoons. Compost solids are usually the safer first choice for new seedlings, because they release nutrients more slowly.
What is a practical feeding schedule for both compost solids and liquid during the growing season?
Aim to apply compost solids based on growth stage, then let soil biology do the work. A common rule is to top-dress before planting in spring or in fall, and only add mid-season when plants are actively growing. For liquid feeds, use every 2 to 4 weeks during the active growing season, morning application is best for root uptake and less leaf exposure.
Next Article
Is Grow More Fertilizer Organic? How to Check and Use It
Learn if Grow More fertilizer is truly organic, how to read labels, verify certs, and use safely in your vegetable garde