Cow manure is one of the best soil amendments you can use in a home garden, but only when you choose the right type, prepare it properly, and apply it at the right rate. Get those three things right and you'll see noticeably better yields, richer soil, and healthier plants. Get them wrong and you'll burn roots, introduce weed seeds, or create a nutrient imbalance that takes a season or two to correct. Here's how to do it right from start to finish.
Grow Better Cow Manure: Safe Prep and Application Guide

Marcus Hendrick
5 May 2026
Why cow manure helps (and what limits it)
Cow manure improves your garden in three ways at once: it feeds soil biology, adds organic matter that improves soil structure and water retention, and supplies a slow-release source of nitrogen, phosphorus, and potassium. That combination is hard to replicate with synthetic fertilizers alone. Soil that gets consistent manure additions over several seasons becomes noticeably easier to work, drains better, and holds moisture longer between waterings.
The catch is that manure's nutrient content varies a lot depending on the animal's diet, the bedding used, how long it's been stored, and whether it's been mixed with urine or run-off. University lab results routinely show that real-world manure deviates significantly from published average values. This matters because applying too little means your plants underperform, while applying too much risks salt toxicity, nutrient lockout, and runoff that harms the surrounding environment. Cow manure can be high in soluble salts including sodium, calcium, magnesium, potassium, chloride, and sulfate, and those salts accumulate with repeated over-application.
It's also worth understanding that not all the nitrogen in manure is immediately available to your plants. Only the fraction called Plant Available Nitrogen (PAN) matters to your crops in any given season. Fresh manure releases nitrogen quickly but unevenly; composted manure releases it more slowly and predictably. This is a key reason why preparation method matters as much as the manure source itself.
Choosing the right manure type: fresh, aged, or composted
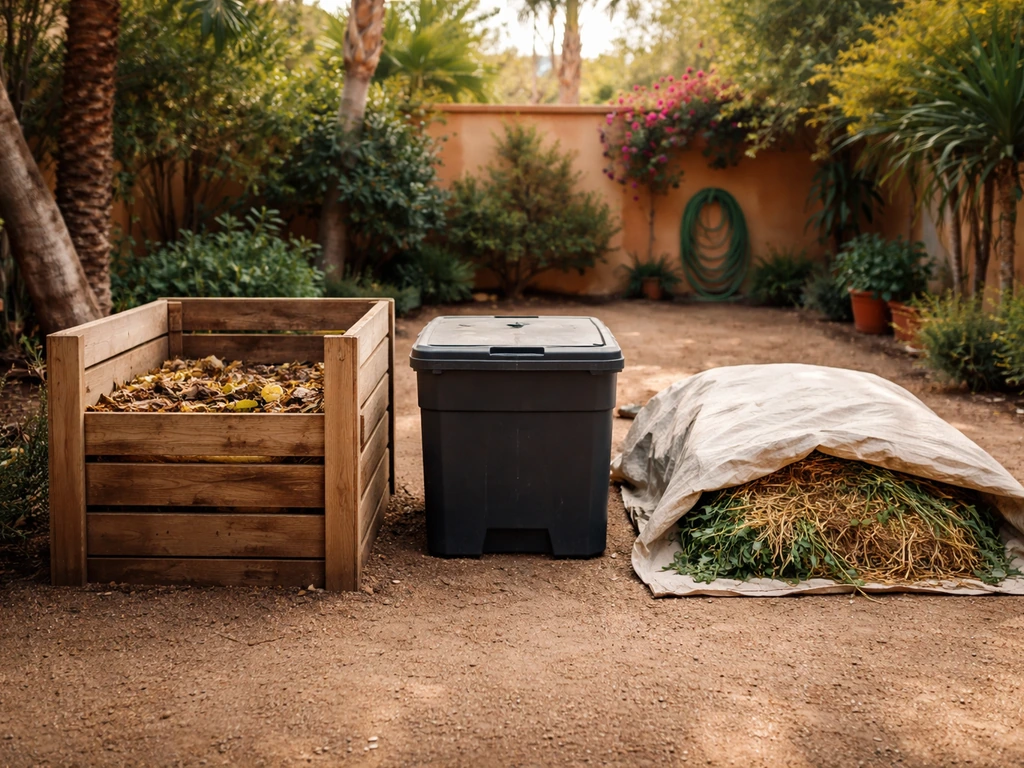
The three forms of cow manure you'll encounter at a farm, feed store, or garden center behave very differently in your garden. Fresh manure is the most potent and the most risky. Aged manure has been stockpiled for months and is safer but inconsistent. Composted manure has gone through a managed heating process and is the most reliable and safest option for direct use near food crops.
| Type | Nitrogen Release | Salt Risk | Pathogen/Weed Risk | Best Use |
|---|---|---|---|---|
| Fresh manure | Fast and unpredictable | High | High | Soil building in fall for spring planting |
| Aged (stockpiled 3-6 months) | Medium, still variable | Medium | Medium | Pre-season bed prep with buffer time |
| Composted manure | Slow and steady | Lower | Low (if properly composted) | Direct amendment before planting, container use, topdressing |
A simple way to judge quality in the field: good composted manure smells earthy, not sharp or ammonia-like. It should crumble in your hand and look dark brown or nearly black. If it still smells like a barnyard or looks fibrous and wet, it needs more time. Manure from pasture-fed animals with straw bedding tends to be lower in salts and more balanced than manure from concentrated feedlot operations, which can be extremely high in salts and nitrogen. If you're sourcing locally, ask about the herd's diet and what bedding is used.
Wisconsin Extension guidance suggests targeting about 0.2 lb of available nitrogen per 100 square feet of garden bed. Because composted manure has a lower percentage of immediately available nitrogen than fresh manure, you'll need to apply more of it by volume to hit the same target. This is one reason bagged composted manure can feel like a lot of product for a small bed. It's not over-application; it's accounting for the slower release rate.
Safe prep: composting, aging, and killing pathogens and weed seeds
If you're sourcing raw manure directly from a farm, you need to compost it yourself before using it anywhere near food crops. This isn't optional for safety reasons. Raw and uncomposted manure carries a real risk of bacterial pathogens like E. coli and Salmonella, and most weed seeds pass through cattle largely intact. Heat is what solves both problems.
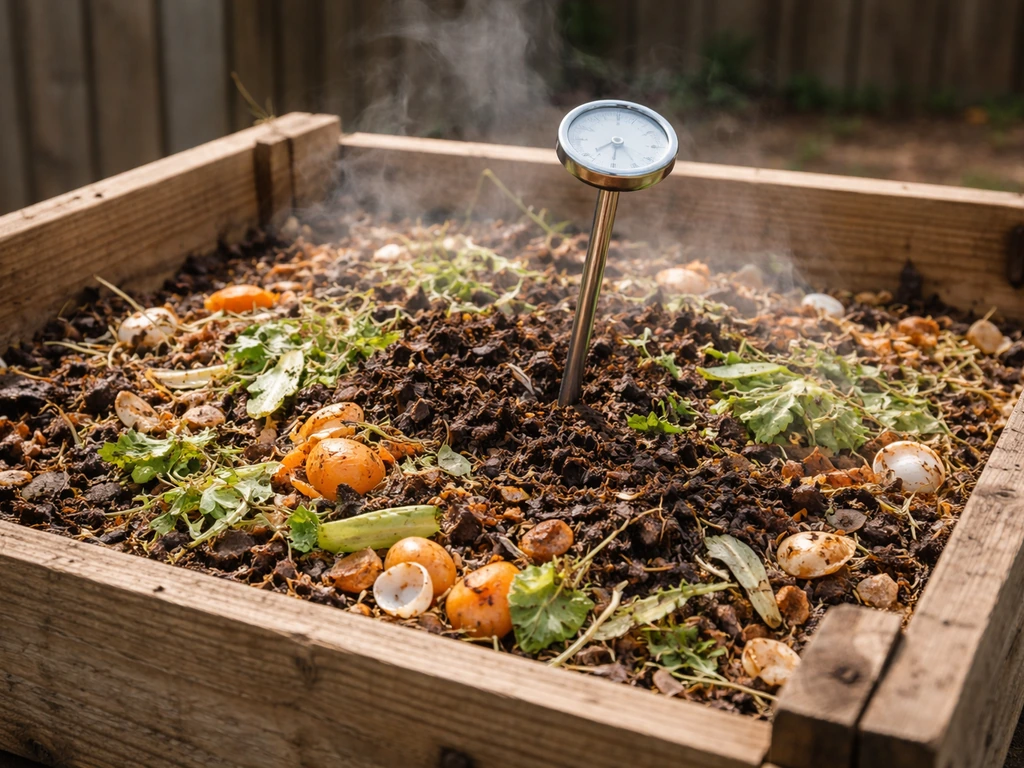
For home composting to achieve genuine pathogen and weed seed reduction, your pile needs to reach and maintain at least 55°C (131°F). Regulatory guidance for windrow composting requires maintaining that temperature for at least 15 days with a minimum of five turnings during that period. An enclosed vessel (like a tumbler) requires 55°C for three consecutive days. The EPA's minimum standard is 40°C for five days with at least four hours at 55°C within that window, but the higher threshold gives you more confidence.
In practice, hit these numbers by building a pile that's at least 3 feet wide and 3 feet tall, mixing the manure with carbon-rich 'browns' like straw, dry leaves, or wood chips at roughly a 1:1 to 2:1 carbon-to-manure ratio by volume. Keep the pile moist (like a wrung-out sponge), and turn it every few days to introduce oxygen and redistribute heat. A compost thermometer is a worthwhile $15 investment. If your pile isn't hitting 55°C, it's likely too dry, too small, or needs more nitrogen-rich material.
If you don't want to compost it yourself, buy bagged composted cow manure from a garden center. It's gone through a controlled process and is much more consistent. For raw or aged farm manure applied directly to a bed, plan around the food-safety interval: USDA organic rules and university extension guidance both point to a 120-day wait between application and harvest for crops whose edible parts contact the soil (roots, leafy greens, strawberries), and a 90-day wait for crops that don't (tomatoes, peppers, corn). Applying raw manure in fall for a spring garden is the simplest way to stay on the right side of that interval.
How to apply it for better yields: timing, rates, and incorporation
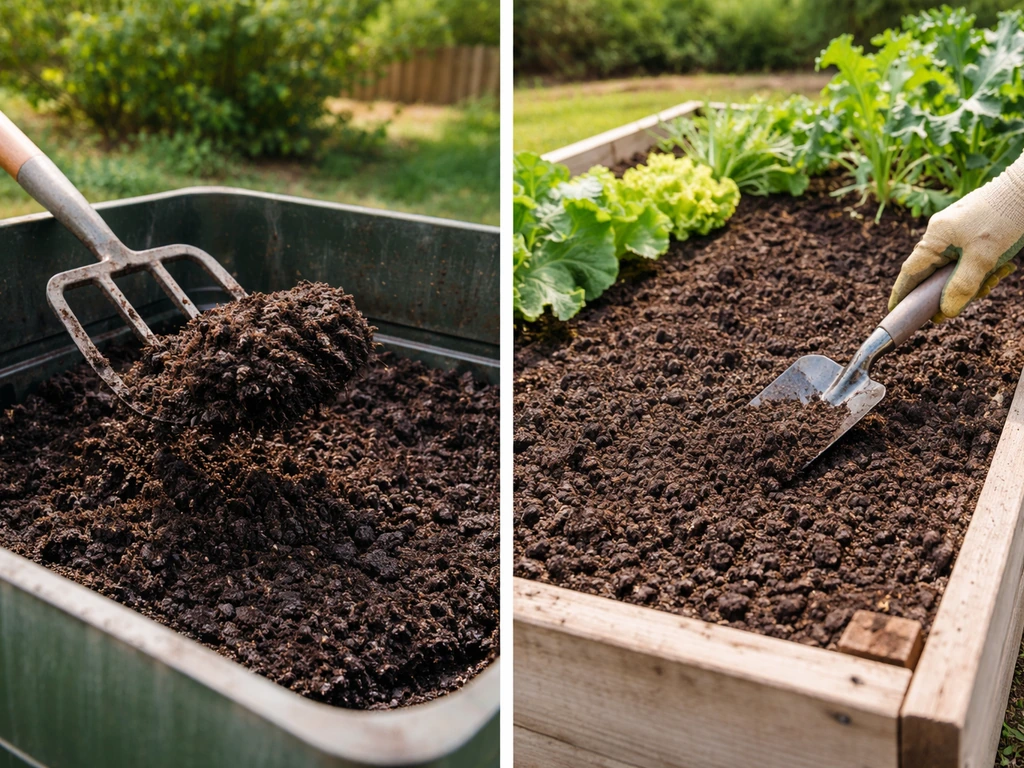
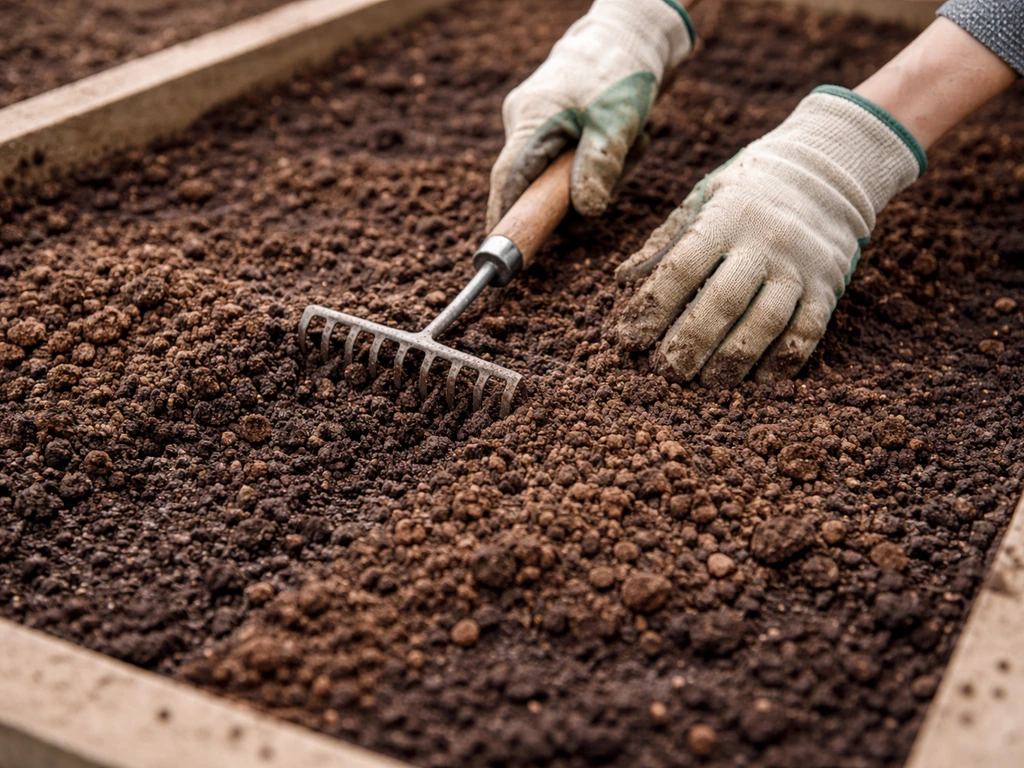
Timing is everything with manure. The most reliable approach is to work composted manure into your beds before planting, not after. For annual vegetable beds, incorporate 1 to 3 inches of composted cow manure into the top 6 to 8 inches of soil two to four weeks before you transplant or direct-seed. This gives any residual salts time to disperse and lets soil biology start converting nitrogen into plant-available forms.
For heavy feeders like corn, squash, tomatoes, and brassicas, you can also side-dress mid-season by scratching a thin band of well-composted manure (about half an inch) lightly into the soil surface 4 to 6 inches away from the plant stem, then watering it in. This mirrors the split-application approach recommended by extension services: some amendment worked in before planting, a smaller top-up mid-season. Avoid piling manure directly against plant stems, which traps moisture and can cause crown rot.
For fruit trees and perennial beds, fall is the best application window. Spread 1 to 2 inches of composted manure under the drip line (not against the trunk), and let it sit as a topdress over winter. Rain and freeze-thaw cycles will work it into the soil naturally by spring. Avoid applying nitrogen-heavy amendments to fruit trees in late summer or early fall, as this can push tender new growth that gets damaged by early frost.
General application rate guidelines
- Composted cow manure for vegetable beds: 1 to 3 inches worked into the top 6 to 8 inches of soil per season
- Fresh or aged manure for fall soil-building: 2 to 3 inches tilled in at least 90 to 120 days before harvest
- Mid-season side-dress (composted only): a thin half-inch band scratched in 4 to 6 inches from stems
- Fruit tree topdress: 1 to 2 inches spread under the drip line in fall
- Annual maximum: don't exceed what a soil test tells you is needed for your crops and current soil levels
Using cow manure in containers vs in-ground beds

In-ground beds can buffer soluble salts more effectively than containers because the soil volume is large and salts can leach down past the root zone with rainfall. Containers have no such buffer. Salt accumulates fast in containers because water evaporates from the surface and salts stay behind. When soluble salt levels get too high, plants can't extract water efficiently even when the growing medium is wet, and you'll see leaf tip and margin burn that looks like nutrient deficiency or drought stress.
For containers, use composted manure only, never fresh or aged. Limit it to no more than 20 to 25% of your total container mix by volume (for example, one part composted manure to three or four parts potting mix). If you notice leaf-tip burn or stunted growth in containers and you've been using manure-enriched mixes, water thoroughly with 15 to 20% more water than the container holds to flush accumulated salts. Do this once, let it drain completely, and monitor the plant over the following week before adding any more amendments.
In-ground beds are far more forgiving, but repeated annual applications of manure without soil testing will eventually push phosphorus and potassium levels into excess, creating imbalances that lock out other nutrients. Grow biointensive method focuses on deep compost integration and careful nutrient management to build soil over time. Rotating between manure applications and other organic approaches (like cover crops and straw mulch) keeps things balanced over the long term. This connects well with broader soil-building strategies like the grow biointensive method, which emphasizes deep compost integration and reduced synthetic input over time.
Manure tea and other liquid options: safety and best practices
Manure tea is made by steeping composted (or, less safely, raw) manure in water and using the liquid as a soil drench or foliar spray. You can also explore safer home ways to capture nutrients, like making fertilizer from a properly managed trash can setup trash can grow fertilizer. It's a popular way to deliver a quick microbial and nutrient boost, and it works, but the safety rules depend entirely on what type of manure you start with.
Use only properly composted manure to make tea for food gardens. Raw manure tea carries a meaningful pathogen risk because it concentrates whatever biological contaminants are in the manure without the heat treatment that kills them. The FDA's guidance on biological soil amendments treats untreated manure as a higher-risk input precisely because it bypasses pathogen reduction.
Cornell and NAGP guidance notes that tea made from properly composted manure and potable water doesn't require a mandatory waiting period, but it should only contact the soil, not the edible portions of plants. USDA’s organic handbook notes that processed manure can be used without a specific interval between application and harvest, as long as the other organic requirements are met [doesn't require a mandatory waiting period](https://www. ams. usda.
gov/rules-regulations/organic/handbook/5006). This is especially important for leafy greens.
Aerated compost tea (ACT) involves bubbling air through the steeping mixture for 24 to 48 hours using an aquarium pump. OSU Extension research confirms that aeration increases dissolved oxygen and shifts the microbial community toward beneficial aerobic organisms. Basic non-aerated tea still has value as a soil drench, but aerated versions tend to have higher microbial diversity and activity.
How to make a basic aerated manure tea
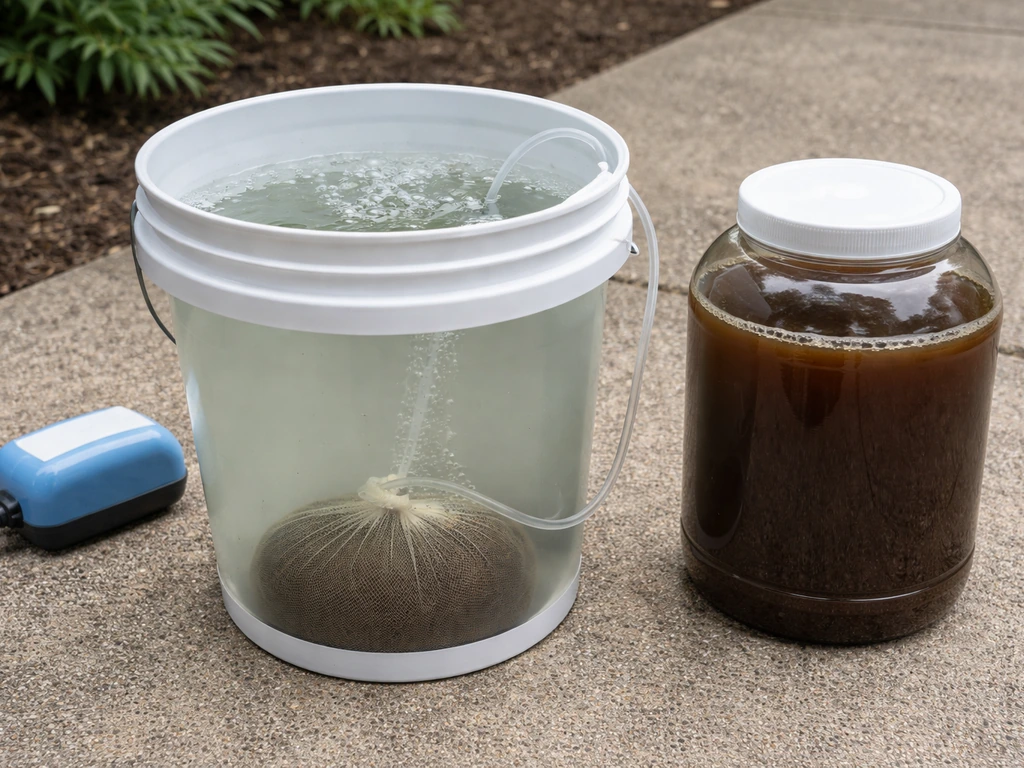
- Fill a 5-gallon bucket with non-chlorinated water (let tap water sit overnight or use collected rainwater)
- Add 1 to 2 cups of finished, fully composted cow manure in a mesh bag or old pillowcase
- Drop in an aquarium air stone connected to a small pump and run it for 24 to 48 hours
- Remove the manure bag and apply the tea immediately as a soil drench around plant bases
- Never store brewed tea for more than a few hours; microbial activity drops fast once aeration stops
- Apply only to soil, not directly to leaves on edible crops, and never use on raw-manure tea on any food crop
Troubleshooting and improving soil results over time
The most common problem with manure use in home gardens isn't under-application, it's over-application. When plants look yellowed, stunted, or show leaf scorch after you've added manure, the instinct is to add more fertilizer. If you already added manure and plants look stressed, you may need to adjust how much fertilizer you apply and make changes based on a soil test. That's often the wrong move.
Excessive nitrogen, phosphorus, potassium, and sodium can create toxicity or lockout symptoms that mimic deficiency. Before adding anything else, get a soil test. If you’re trying to grow more fertilizer effectively, the key is matching the right type and rate to your crops and your soil test results. If you still think you have to grow fertilizer inputs, start with a soil test so you match what your plants actually need add manure or compost.
Your local cooperative extension office can run one for under $30 and tell you exactly what's actually happening in your soil.
If a soil test confirms you've over-applied, the corrective path is straightforward: stop adding manure or compost for one to two seasons and use targeted fertilizer inputs based only on what the test says you're short on. For salt problems specifically, deep watering helps flush excess salts below the root zone. For containers, replace a portion of the mix with fresh, unamended potting soil.
Over the long term, the best approach is to treat manure as one tool in a broader fertility plan rather than the only one. Test your soil every two to three years. Alternate heavy manure seasons with lighter seasons where you rely more on cover crops, mulched straw, or compost from non-manure sources. If you're interested in making your own fertility amendments, exploring liquid fertilizer options like those used in biointensive and organic growing systems can complement a manure-based program without the same salt and pathogen risks. If you want to keep inputs organic, focus on composted manure and other organic fertility amendments rather than switching to synthetic products.
If you're seeing poor yields despite good-looking soil, check whether your nitrogen is actually reaching the plants. In wet, cold springs, microbial activity slows and nitrogen conversion from organic sources stalls. Applying manure earlier in the fall gives it more time to break down before your plants need it. In warm, sandy soils the opposite can happen: nitrogen mineralizes fast and leaches before plants can use it. In that case, split applications and organic mulch to slow leaching give you better season-long results.
Cow manure is genuinely one of the most practical and affordable ways to build productive garden soil over time. It rewards consistency and patience more than any single heavy application. Start with composted manure, apply it at modest rates, test your soil periodically, and adjust from there. That cycle of observe, test, adjust is the backbone of any well-fed garden, whether you're growing in raised beds, a homestead field, or a few containers on a back porch.
FAQ
What should I do if I cannot confirm whether the manure is fully composted?
If you are unsure whether the manure you have is fully composted, do not use it for any planting space where edible parts touch soil. The safe decision is to treat it as raw, keep it out of beds, and either compost it yourself until it clearly hit the time and temperature targets or switch to bagged, labeled composted manure for that season.
Can I apply cow manure mid-season on beds with vegetables that touch the soil (leafy greens, strawberries)?
For food-contact crops, avoid top-dressing with fresh or aged manure during the growing season. If you want to feed during mid-season, use composted manure for side-dressing, and keep it several inches away from stems to reduce moisture trapping and crown rot risk.
How do I choose an initial manure dose if I’m worried about over-application?
Start with the smaller end of the recommended application range, then reassess after 4 to 8 weeks. If your plants show vigor and no burn, you can increase later. If they show leaf-tip burn, dark green foliage with slowed growth, or salt-related scorch, stop adding manure and rely on compost already in the bed plus soil-test-guided nutrients.
Is it better to add a lot of manure at once instead of smaller repeated applications?
Yes, but expect inconsistent results. Amending heavily in one year can cause a “flush” of nutrients and salts, then a lull, which makes plant performance look erratic. The safer approach is to apply modest amounts more consistently across seasons, and only add extra when a soil test shows a real shortfall.
How can I estimate manure amounts when nutrient labels are missing or the manure analysis varies?
The most practical way is to compare your source type and how it was processed, then back-calculate volume using the available nitrogen target. Bagged composted manure often has lower immediately available nitrogen than fresh, so you may need more by volume than you expect, but you should still avoid exceeding what your soil and crop can handle.
Can I use manure tea as a foliar spray on edible plants?
Manure tea should not be used as a blanket spray for food plants, especially on leaves of leafy greens. If you make tea, contact should be limited to soil where possible, and you should use only properly composted manure to avoid concentrating pathogens in an untreated brew.
What symptoms indicate manure is causing salt problems rather than general nutrient deficiency?
Watch for symptoms that point to salts and nitrogen imbalance: leaf margin or tip burn, crispy edges, stunting despite wet soil, and unusually dark green growth followed by poor new growth. If that happens, the corrective move is a thorough deep watering and, for containers, flushing and partial mix replacement rather than adding more manure or fertilizer.
Do sandy or high-rainfall soils change how I should time manure applications?
Yes. If you have sandy soils or heavy rainfall, salts and nitrogen can move unpredictably. Split applications (some before planting, some mid-season with composted manure) and mulching help slow movement and keep nutrients available longer.
What’s the best way to use cow manure in containers without damaging plants?
Containers build up salts quickly because evaporation concentrates them. Use only composted manure, keep it to about 20 to 25% of the container mix by volume, and if you notice burn, flush with 15 to 20% more water than the container holds, then wait and monitor before adding anything else.
What should I check if my plants look healthy but yields are still poor after applying composted manure?
Not necessarily. If yields are low, nitrogen availability may be the issue, but in cold or wet weather the microbial conversion of organic nitrogen can stall. The practical test is timing and conditions: apply composted manure earlier for fall breakdown, then consider split feeding, especially in seasons that stay cool.
Are there special precautions for manure use near slopes, driveways, or drainage areas?
If you are near waterways or have heavy runoff potential, prioritize incorporation into soil, avoid applying before storms, and keep manure away from drainage paths. For safety and environmental protection, consider using composted manure rather than raw inputs, even if you plan to follow wait intervals.
What if my soil test shows phosphorus and potassium are already high?
Yes. If soil tests show high phosphorus and potassium, continuing manure can worsen nutrient lockout even if the soil “looks” rich. In that case, reduce manure input for one to two seasons, rely on targeted fertilizer only for the nutrients you are short on, and consider cover crops to support soil biology without adding more P and K.
Next Article
Medina Has to Grow Fertilizer: DIY Home Options and Plan
Home DIY plan to grow fertilizer on site using compost, manure, worm bins, and green manures with clear dosing and fixes