Yes, farmers grow their own crops, and so can you. The phrase "were farmers and we grow it" gets at something real: the idea that growing food isn't some mysterious professional skill locked away on industrial operations.
Were Farmers and We Grow It: A Home Guide to Growing Like Farmers

Marcus Hendrick
21 May 2026
The same fundamentals that drive a family farm's harvest, picking the right crop for the climate, preparing soil properly, timing planting correctly, managing water and nutrients, and dealing with pests, translate directly to a backyard garden, a few raised beds, or a small homestead plot. Small family farmers and smallholders produce roughly a third of the world's food supply, and a significant chunk of that never even leaves the farm household.
That's proof that ordinary people growing food at a manageable scale is how the world has always fed itself. You don't need 500 acres. You need a plan.
What "were farmers and we grow it" actually means for home growers
The question behind this phrase is really two questions at once. First: do farmers literally grow their own food, or do they just sell commodity crops? Second: can "we" (home gardeners, families, self-sufficient folks) use the same approach farmers use to grow real food at home? The answer to both is yes.
USDA data defines family farms as operations where the principal operator and their relatives own most of the business. The vast majority of farms in the U. S. are family farms.
Many of those families eat what they grow, preserve what they can, and sell the rest. That model isn't different in kind from what a serious home gardener does. If you want a simpler mental model for who grow crops for us, start by focusing on the repeatable practices behind their harvests and apply them at your scale. It's different only in scale.
The mindset shift worth making is this: stop thinking of farming as something other people do and start thinking of it as a set of repeatable practices you can apply at whatever scale you have. Whether you're growing tomatoes in five-gallon buckets on a balcony or running a quarter-acre kitchen garden, the same core decisions apply. What crop fits your climate? Is your soil ready? When do you plant? How do you feed and water without wasting? How do you manage pests without losing your harvest? That's the farmer's checklist, and it works at any size. If you want to start from the basics, see where do we grow crops for choosing the right plants by climate and season.
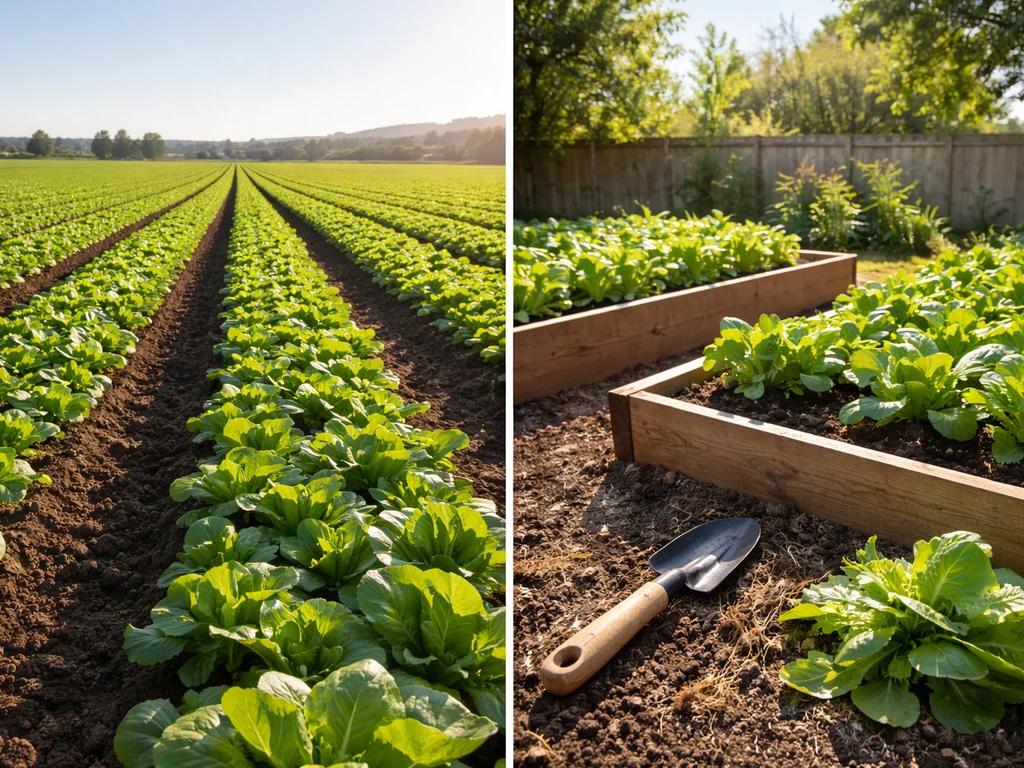
Choose crops like a farmer would: climate, space, and season
Farmers don't just plant whatever they feel like. They match crops to climate, available land, and market windows. You should do the same. The first practical tool is the USDA Plant Hardiness Zone Map, which divides the country into zones based on average annual extreme minimum winter temperatures in 10°F increments with 5°F half-zones. The 2023 version uses 30 years of weather data, so it reflects real climate patterns, not a single cold snap. Find your zone, then check which crops are rated for it. That's your starting filter.
Beyond zone, think about season length and heat accumulation. Cool-season crops like lettuce, spinach, carrots, and brassicas prefer air temperatures in the 45°F to 70°F range and can handle light frost. Warm-season crops like tomatoes, peppers, squash, beans, and corn need sustained warmth and can't handle frost at all. Growing Degree Days (GDD) give you a more precise way to track this than just watching a calendar.
GDD is a measure of heat accumulation above a base temperature threshold, and it tells you more accurately when a crop will reach key stages than a date alone. Iowa State University Extension offers resources on using GDD for home garden timing, and Oregon State's Croptime program uses degree-day models to schedule vegetable plantings. If you're new to this, start simple: use your local last frost date as your anchor and count forward or backward from there.
For most home growers, picking two to five crops to focus on is the right move. Start with what your household actually eats and what grows reliably in your zone. Tomatoes, beans, leafy greens, squash, and carrots cover a lot of nutritional ground and are all well-suited to home production. Then think about space: containers work for tomatoes, peppers, herbs, and greens. Larger root vegetables and corn need ground space. A single 4x8 raised bed can produce meaningful yields of salad greens or beans if managed well.
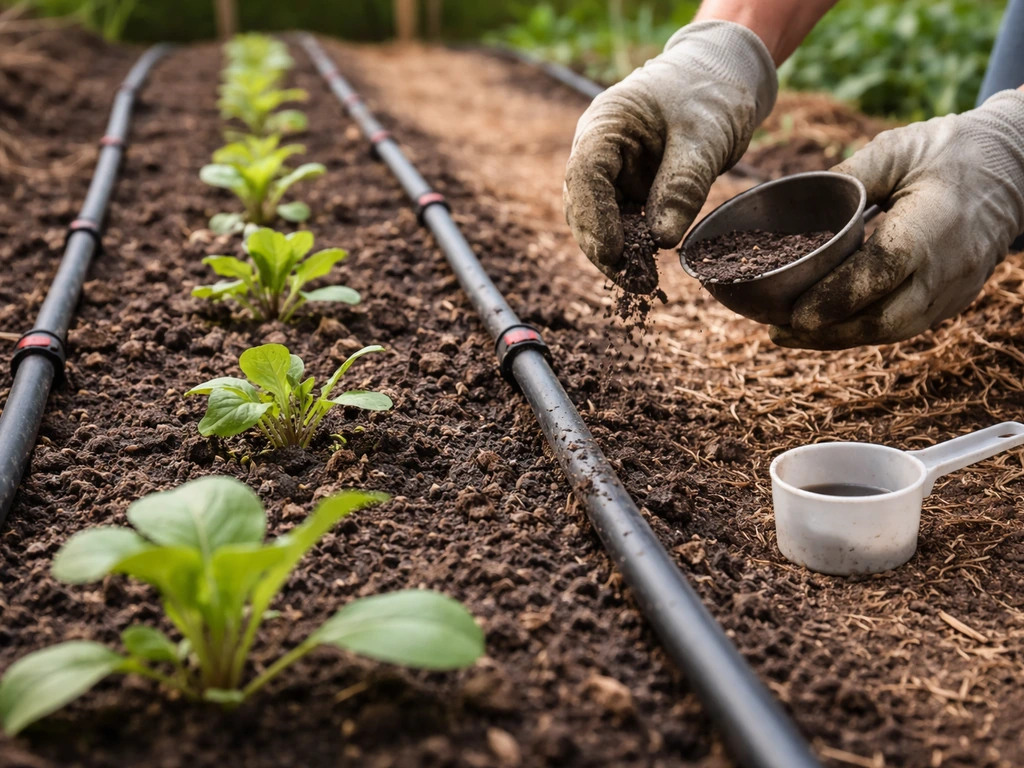
Get your soil right before you plant anything
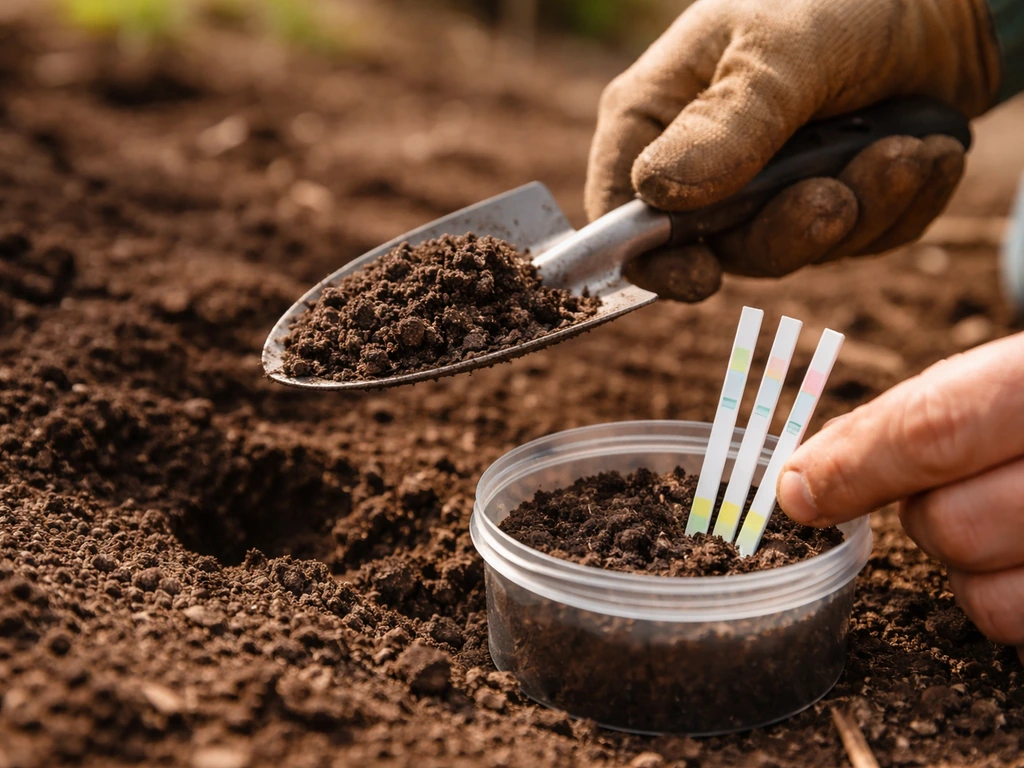
Farmers test their soil. You should too. A basic soil test, available through most land-grant university extension services for around $15 to $25, tells you your pH, phosphorus (reported as P2O5), potassium (reported as K2O), and organic matter percentage. University of Maryland Extension and University of Minnesota Extension both explain that these numbers tell you what your soil has and what it lacks, and that nutrient recommendations are based on whether adding more will actually produce a yield increase. If your P and K are already high, adding more phosphorus does nothing for your plants and can cause runoff problems. Add only what the test says you need.
For vegetable gardens, you want a pH between 6.0 and 7.0 for most crops. Organic matter is your best long-term investment: well-established vegetable beds can reach organic matter levels above 12%, which dramatically improves drainage, water retention, and biological activity. If you're starting from scratch, incorporate 3 to 4 inches of compost into the top 8 to 12 inches of soil. For raised beds, a mix of topsoil, compost, and a draining amendment like perlite or coarse sand gives you a structure you control. For containers, use a high-quality potting mix, not garden soil, which compacts and drains poorly in pots.
Carrots are a good example of why soil texture matters. University of Maryland Extension recommends loose, well-drained soil for carrots specifically because dense or rocky soil produces forked, stubby roots regardless of how well you water and fertilize. If your native soil is heavy clay, raised beds or containers are your best shortcut to the right structure without years of amendment work.
Seeds vs. transplants, and when to plant what
Some crops want to be direct-seeded into the ground. Others need a head start indoors as transplants. Knowing which is which saves time and prevents disappointing results. Carrots, beans, corn, beets, radishes, and leafy greens generally do best direct-seeded because they either dislike root disturbance or germinate quickly enough that transplanting offers no advantage. Tomatoes, peppers, eggplant, and most brassicas benefit from starting indoors 6 to 10 weeks before last frost, then transplanting once temperatures and soil conditions are right.
Soil temperature is the real trigger, not air temperature or calendar date. Leafy greens will germinate in soil as cold as 32°F to 35°F according to USU Extension, though their optimal range is 55°F to 70°F. Carrots want at least 45°F soil to germinate reliably, and tomatoes and peppers want soil above 60°F, ideally 65°F to 70°F, before going in. A cheap soil thermometer costs about $8 and removes all the guesswork. Plant before the soil is warm enough and seeds sit, rot, or germinate unevenly. Wait for the right temperature and they jump out of the ground.
Succession planting is one of the most underused farmer tricks for home growers. Instead of planting all your lettuce at once and drowning in it for two weeks before it bolts, plant small batches every two weeks. West Virginia University Extension recommends two-week intervals for quick-maturing crops like radishes and salad greens. USU Extension notes that leafy greens mature in 40 to 60 days, so staggered sowings give you steady harvests across the whole season rather than a single flush.
| Crop | Direct Seed or Transplant | Min Soil Temp | Days to Maturity | Notes |
|---|---|---|---|---|
| Tomatoes | Transplant | 60°F | 60–85 days | Start indoors 6–8 weeks before last frost |
| Peppers | Transplant | 65°F | 70–90 days | Slower than tomatoes; start 8–10 weeks early |
| Beans (snap) | Direct seed | 60°F | 50–60 days | Avoid transplanting; sow after last frost |
| Carrots | Direct seed | 45°F | 70–80 days | Cover seed 1/4 to 1/2 inch; keep seedbed moist |
| Lettuce/Greens | Either | 35°F | 40–60 days | Succession plant every 2 weeks |
| Sweet Corn | Direct seed | 60°F | 70–90 days | Needs block planting for pollination |
| Winter Squash | Direct seed or transplant | 60°F | 85–110 days | Needs space; direct seed after frost danger passes |
Watering and feeding for consistent, real yields
Most home garden failures come down to inconsistent watering or misapplied fertilizer. Farmers manage both carefully because the economics demand it. At home, you can do the same with simple systems. Drip irrigation is the most efficient approach available to home growers: Penn State Extension notes that drip improves yields through better water and fertility management, reduces disease pressure by keeping foliage dry, and limits weed germination compared to overhead sprinklers. A basic drip system for a 4x8 bed costs under $40 and takes an afternoon to set up. If you're growing in containers, consistent hand watering works, but you need to check moisture daily in warm weather because containers dry out fast.
On fertilizing: your soil test tells you what you need. If phosphorus and potassium are already adequate, you mainly need to manage nitrogen, which leaches out over the season. University of Maryland Extension advises using nitrogen-only fertilizers when P and K are already high. Side-dressing with a nitrogen source like blood meal, fish meal, or a balanced granular fertilizer at key growth stages (for tomatoes, that's at transplanting and again when fruit sets) keeps plants fed without overloading the soil.
UMass Amherst's CAFE program emphasizes not running irrigation longer than necessary to wet the root zone, because excess water leaches nitrogen away from roots. Deep and infrequent watering, reaching 6 to 8 inches into the root zone, beats frequent shallow watering for most crops.
Pest, disease, and weed control that actually works
The farmer's approach to pest management isn't "spray everything" any more than a good home gardener's should be. Integrated Pest Management (IPM) means you scout, set thresholds, and act with the least disruptive method that works. University of Maryland Extension gives a practical example: with bean leaf beetles or Mexican bean beetles, the action threshold is roughly 20% defoliation or about one beetle per plant before intervention is warranted. Below that threshold, the plant outpaces the damage and control isn't worth it. Scouting your garden twice a week takes 10 minutes and prevents a lot of unnecessary spraying.
Physical barriers are your first line of defense. Floating row covers, installed at planting time, physically exclude insects and work especially well for brassicas, squash family crops, and leafy greens. Wisconsin Horticulture Extension notes they must go on at planting and need to come off for insect-pollinated crops like squash during bloom. For brassica caterpillars like imported cabbageworm, Bt (Bacillus thuringiensis var. kurstaki), sold under names like Dipel or Thuricide, is highly effective and safe for beneficial insects, according to University of Maine Cooperative Extension. It's the same biological control approach commercial growers use.
Disease management is largely about prevention. Tomato early blight is a good case study: Colorado State University Extension recommends removing infected leaves promptly because fungal spores splash from leaf to leaf with water. OSU Extension adds that early blight thrives in warm (78°F to 84°F), wet conditions and recommends rotating tomatoes and all other solanaceous crops (peppers, eggplant, potatoes) out of the same bed for at least two years. That two-year rotation rule is as important for the home gardener with four raised beds as it is for a commercial grower. Moving crops around is free and dramatically reduces disease and pest pressure year over year.
Weed control starts with prevention. Mulching beds with 2 to 3 inches of straw, wood chips, or shredded leaves after planting blocks most weed germination, retains moisture, and moderates soil temperature. What gets through is manageable with hand weeding while weeds are small. Letting weeds mature and set seed creates a problem that compounds every season.
Harvest at the right time, store it properly, and plan your rotation
Knowing when to harvest is a skill that comes with attention and a little practice. University of Minnesota Extension gives practical markers: snap beans should be harvested while flower buds are still tight and the pods are green and firm. Sweet corn is ready when kernels release milky sap when pressed (confirmed by University of Missouri Extension, which describes pressing kernels to check maturity as the standard field test). Peppers can be harvested green or left to ripen to red, yellow, or orange depending on variety. Winter squash needs to be left on the vine until the skin is hard enough that a fingernail won't easily pierce it, then cured at room temperature before long-term storage.
Storage matters as much as harvest timing. UMN Extension notes that corn shouldn't be stored near apples or tomatoes, which give off ethylene gas. Sweet corn can be cured at room temperature for two to four weeks before storage if needed. Most root vegetables store best in cool, humid conditions (a root cellar, basement, or even a cooler). Tomatoes and peppers store poorly below 50°F and should not go in the refrigerator if you want full flavor.
Saving seed closes the loop on the whole farming model. Tomatoes, peppers, beans, and peas are ideal starting points because they self-pollinate and stay true to type. University of Minnesota Extension outlines the key steps: select your best-performing plants, harvest seed at full maturity, clean and dry seed thoroughly, and store it in a cool, dry, dark place over winter. This is exactly how farmers have maintained crop varieties for generations, and it's how you reduce input costs and build seed stock that's adapted to your specific conditions.
Your next steps today
You don't need to overhaul everything at once. The farmer's approach is incremental: each season you learn something, adjust, and do better. Here's a practical starting sequence you can begin right now.
- Look up your USDA hardiness zone and your local average last frost date. Write both down. These are your two anchor points for everything else.
- Pick two to five crops you actually eat that fit your zone and current season. Don't try to grow everything in year one.
- Order or collect a soil test from your local extension service. While you wait for results, start amending with compost if you haven't already.
- Decide what to direct seed and what to start as transplants based on the table above. If you're past your transplant window for warm-season crops, check whether direct seeding is still viable or shift your focus to fall crops.
- Set up a simple planting calendar using your last frost date and days-to-maturity numbers. Mark succession planting intervals for quick crops like greens and radishes.
- Sketch a rotation plan across your beds or containers so no solanaceous crops return to the same spot for at least two years.
- Check your beds or containers twice a week once plants are established. Catch pest and disease problems early, before thresholds are reached.
- At season's end, save seed from your best performers and note what worked and what didn't. That record is your most valuable farming tool.
The gap between "farmers grow it" and "we grow it" is smaller than most people assume. The fundamentals are the same at any scale. What changes is the acreage, the equipment, and the volume. The decision-making process, matching crop to climate, preparing soil, timing planting, managing water and nutrients, controlling pests, and rotating beds, is identical whether you're running 10 acres or 100 square feet.
The more you think like a farmer about those decisions, the more food you'll actually produce. In USDA ERS farm typology, family farms with less than $350,000 in annual gross cash farm income are classified as “small farms. ” [USDA ERS classifies small farms as those with less than $350,000 in annual gross cash farm income](https://www. ers.
usda. gov/index. php/topics/farm-economy/farm-household-well-being/farm-household-income-estimates). Thinking like a farmer includes learning how those who grow crops in the field match crops to their conditions.
FAQ
Do farmers grow all of their own food, or only the crops they sell?
Not always. Many farms grow specialty crops for specific markets, and some sell commodity crops while still keeping a household garden or small livestock feed plots. A practical way to use the “we grow it” mindset is to plan your garden around what you would actually buy every week, then expand one success crop at a time rather than trying to produce everything immediately.
How many different crops should I try the first season?
Start by budgeting your effort, not just your space. If your goal is “grow it,” pick crops that are both dependable and useful to your household, then choose only 1 to 2 new crops per season. This prevents the common mistake of overplanting unfamiliar crops and having no time for scouting, watering checks, or harvesting at the right stage.
If I already know my USDA zone, do I still need last frost dates and soil temperature?
Use both. Zone tells you what can survive typical winters, but the right planting window depends on soil temperature and your season length. A simple decision aid is: find the zone for crop choice, then use last frost and (when possible) a soil thermometer to choose the actual planting day.
What’s the easiest way to decide direct-seed vs start indoors?
Yes, and the fix is to match the method to the crop. Seeds like carrots, radishes, beans, and leafy greens often do better direct-seeded, while tomatoes, peppers, eggplant, and many brassicas usually perform better from transplants. Mixing methods incorrectly is a frequent reason for poor stands.
Can I fertilize without doing a soil test?
Yes. If the label says “fast-acting” or includes phosphorus and potassium, applying it blindly can create excess nutrients, especially phosphorus. A safer approach is to follow your soil test, and if P and K are adequate, use nitrogen-focused fertilizer and side-dress at growth stages instead of broadcasting heavy doses early.
Why did my plants look like they needed fertilizer, but fertilizer didn’t help much?
Correct timing matters more than product. Even with good fertilizer, plants struggle if watering is inconsistent, because nitrogen leaches with excess water and plants also can’t take up nutrients under water stress. Use deep watering practices (aiming to wet the root zone) and check moisture before rewatering, particularly in containers where drying happens quickly.
Are there common side-dressing mistakes I should avoid?
Keep fertilizer away from direct contact with tender roots or stems, and don’t side-dress right before heavy rainfall or overwatering. Another common issue is applying too much too early, which can push leafy growth while reducing flowers and fruit. If you side-dress, do it at the stage you actually want to support (for example, transplanting or when fruit sets for tomatoes).
What’s the best way to control weeds without spending all my time weeding?
Use the same logic as pest management, prevention first. Mulch reduces weed germination, but you still need to prevent weeds from setting seed. A practical routine is to hand-weed only what you find when small, then re-mulch or top up after a few weeks to close gaps where weeds manage to sprout.
Is drip irrigation worth it for small gardens and containers?
In most home gardens, yes, and drip tends to reduce disease risk by keeping leaves drier. The edge case is when you cannot design tubing safely for your layout, or when plants are in very different microclimates, like a sun-walled container area. In those cases, drip may still work, but you may need separate lines or careful hand checks so no pots or corners dry out.
How do I scout pests and diseases at a practical cadence?
Scouting twice a week works, but you should also look after weather events. After hot spells or heavy rain, check the same hotspots where pests and disease usually start, because thresholds can be exceeded quickly. Don’t wait until plants are badly damaged, especially with leaf-eating insects and early fungal symptoms.
What if I only have one raised bed, can I still rotate crops?
Avoid planting the same crop in the same bed every year, especially for families prone to shared diseases. The article mentions rotating tomatoes and other solanaceous crops for at least two years, and the same idea applies broadly: move brassicas, squashes, and beans to different beds when you can. If you only have one bed, use a rotation plan with cover crops and careful crop-family grouping over multiple seasons.
How can I tell when slow-maturing crops are actually ready to harvest?
Not in the same way as leafy greens or radishes. Longer-maturing crops (like winter squash or some brassicas) need patience, and harvesting too early can reduce storage quality or sweetness. A good rule is to use specific maturity cues, like skin hardness for winter squash, and then cure when recommended for better shelf life.
What storage mistakes most often ruin a good harvest?
Yes, and it’s more about temperature and room conditions than the crop alone. Many roots store best cool and humid, while tomatoes and peppers lose quality if stored too cold. Also, keep fruit separated when storing because ethylene-producing produce (like apples and some tomatoes) can shorten the quality window of nearby crops.
Can I save seed from any plant and expect it to stay true?
Saving seed is easiest with self-pollinating crops, like tomatoes, peppers, beans, and peas, but cross-pollination can happen with wind-pollinated or insect-pollinated plants. If you want seed that stays true to type, control what’s nearby (space isolation or timing) and save only from your best-performing plants, not your biggest or earliest growers.
My plants keep failing, what should I check first before changing everything?
Most likely, it’s a mismatch of water needs, soil structure, or the crop’s real temperature requirements. Ask three quick questions: Was the soil warm enough at planting, did watering keep the root zone consistently moist without soaking too long, and is the crop suited to your space type (ground, raised bed, or container)? Fixing those usually beats replacing the entire approach.
Next Article
Who Grow Crops for Us: From Farms to Home Gardens
Learn who grows your food and how to start home crop growing with beginner picks, planning, soil, yields, and tips.