Anyone can grow grain, not just the commercial farmer with a thousand acres and a combine. Backyard gardeners, homesteaders, survivalists, budget-conscious families, and community growers are all doing it right now on plots ranging from a 4x8 raised bed to a few acres. The phrase “who grow crops for us” often points to the people behind our food supply, including home growers, community farmers, and commercial operations Backyard gardeners, homesteaders, survivalists, budget-conscious families, and community growers. The key is matching the grain to your scale, your climate, and your goals, then following a simple plan that commercial operations figured out long ago but adapted for your situation.
Who Grow Grains and How to Start Growing Grain at Home

Marcus Hendrick
20 May 2026
Who typically grows grain (and what kind of setup you actually need)
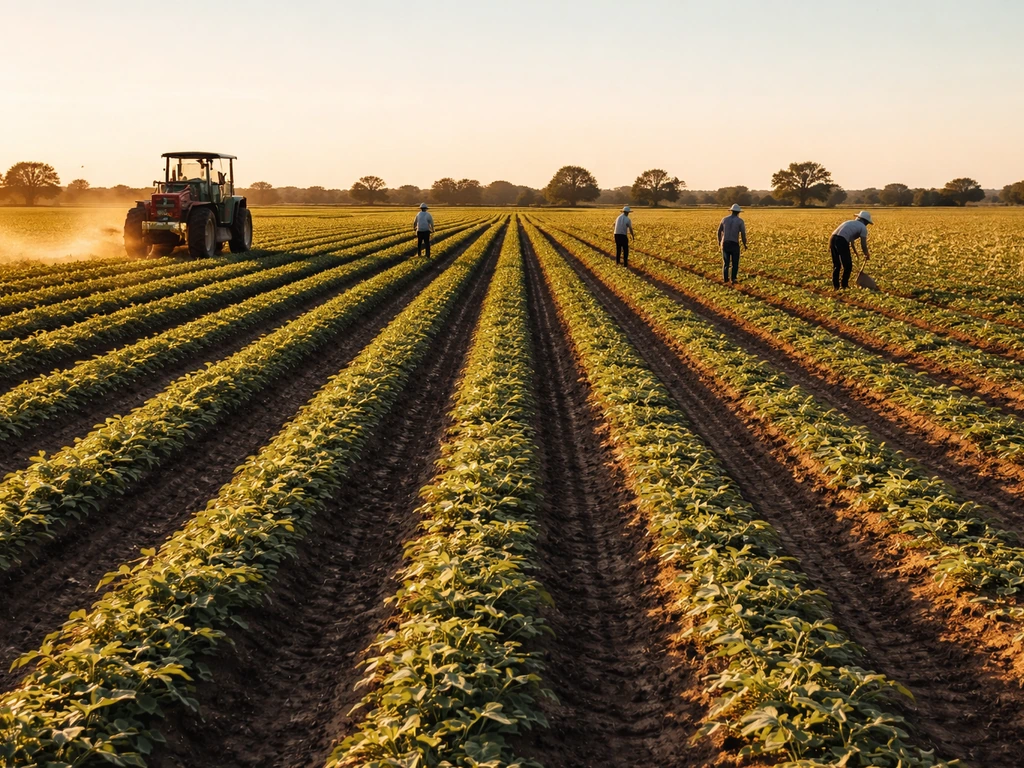
At the commercial end, large-scale family farms dominate grain production. USDA data shows that large-scale family farms make up only about 4% of U.S. farms but account for roughly 31% of agricultural land and nearly 48% of total production value. These operations run tractors, grain drills, and combine harvesters, which dramatically cuts per-acre labor and makes the economics work at scale. That's the world most people picture when they hear 'grain farmer,' but it's not the only world.
Below that commercial tier, you have a wide range of smaller operations. Midsize family farms have actually declined in number over recent decades as the industry has polarized toward very large and very small farms. That gap is where home growers, homesteaders, and small market gardeners fit in. Globally, the FAO recognizes that smallholder and family farms are a massive presence and that their production is often household-oriented, relying on family labor and local exchange networks rather than expensive machinery.
For our purposes, here are the realistic grain-grower types and what each one looks like in practice:
- Backyard grain gardener: A 100 to 1,000 sq ft plot, hand tools, broadcast or row seeding, manual threshing. Grows for the experience, food security, or specialty grain you can't buy locally.
- Homesteader: 1/4 to 2 acres, possibly a small tractor or walk-behind tiller, hand harvest or small stationary thresher. Grows to genuinely offset purchased grain costs for bread, porridge, or animal feed.
- Self-sufficient/survivalist grower: Focuses on calorie-dense grains like wheat, corn, or oats as a core food reserve. Prioritizes storability and yield per square foot.
- Community or market grower: Grows specialty or heirloom grains for local sale, farmers markets, or grain CSA shares. Often 1 to 5 acres, may use equipment rental or cooperative harvesting.
- Cover crop / soil-building grower: Grows grains like oats, winter rye, or barley primarily for soil health, with grain harvest as a bonus. Common in vegetable operations.
You don't need a grain drill or a combine to get started. A hand rake, some seeds, and a clear patch of ground is enough for a test plot. The commercial equipment advantage is real, as drilled seeding achieves 80 to 90% emergence under normal conditions compared to broadcast seeding which can be more variable, but hand-drilled or hand-pushed row seeders close that gap considerably for small plots.
Which grains make the most sense for home growers
Not every grain is equally beginner-friendly. Some need specialized equipment to process, others are finicky about climate, and a few are genuinely easy wins for a first-time grain grower. Here's a practical rundown of the main options for home and small-plot production.
| Grain | Best for | Climate fit | Processing difficulty | Typical yield (home scale) |
|---|---|---|---|---|
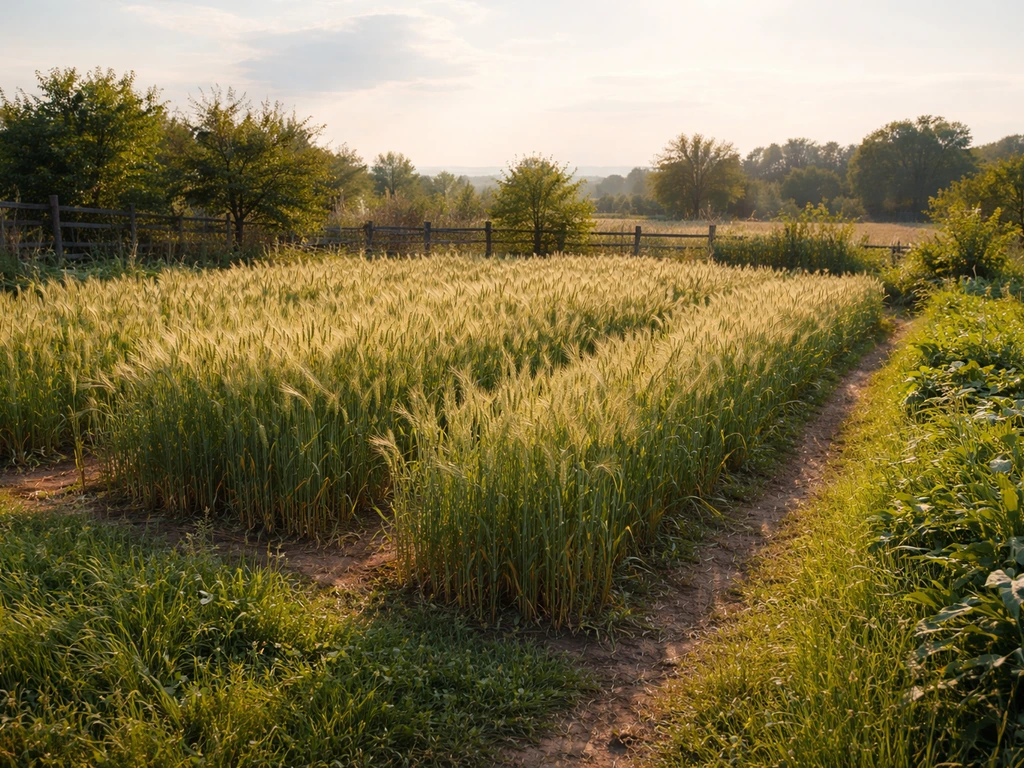
| Winter wheat | Bread flour, self-sufficiency | Most of U.S., zones 4-9 | Low to moderate (hand threshing works) | ~25-40 lbs per 1,000 sq ft |
| Oats | Porridge, animal feed, cover crop bonus | Cool climates, zones 3-8 | Low (hull loosens easily) | ~20-35 lbs per 1,000 sq ft |
| Barley | Soups, beer, animal feed | Wide range, does well in cool/dry | Low to moderate | ~25-40 lbs per 1,000 sq ft |
| Corn (dent/flour) | Cornmeal, animal feed, calorie density | Zones 4-10, needs frost-free days | Low (hand shelling) | ~50-100 lbs per 1,000 sq ft |
| Proso millet | Dry/dryland conditions, bird feed | Short-season, drought tolerant | Low | ~15-25 lbs per 1,000 sq ft |
| Grain sorghum | Hot and dry climates, zones 6-10 | Drought tolerant, heat-loving | Moderate (threshing heads) | ~40-60 lbs per 1,000 sq ft |
My personal recommendation for a first-time grain grower: start with winter wheat or oats. Both are forgiving, widely adapted, and don't require anything exotic to process at home. If you're in a short-season northern climate, oats are the safer bet. If you want something you can actually bake with immediately, winter wheat is the more satisfying choice. Corn is the easiest to process by hand (shelling off the cob beats threshing any small grain), so if you're in a warm enough zone, that's another solid first crop.
Choosing your site: sun, soil, and climate fit
Grains are full-sun crops, no exceptions. You need at least 6 to 8 hours of direct sunlight per day, and more is better. Shaded plots produce weak, spindly plants that lodge (fall over) and yield poorly. Pick the most open spot you have.
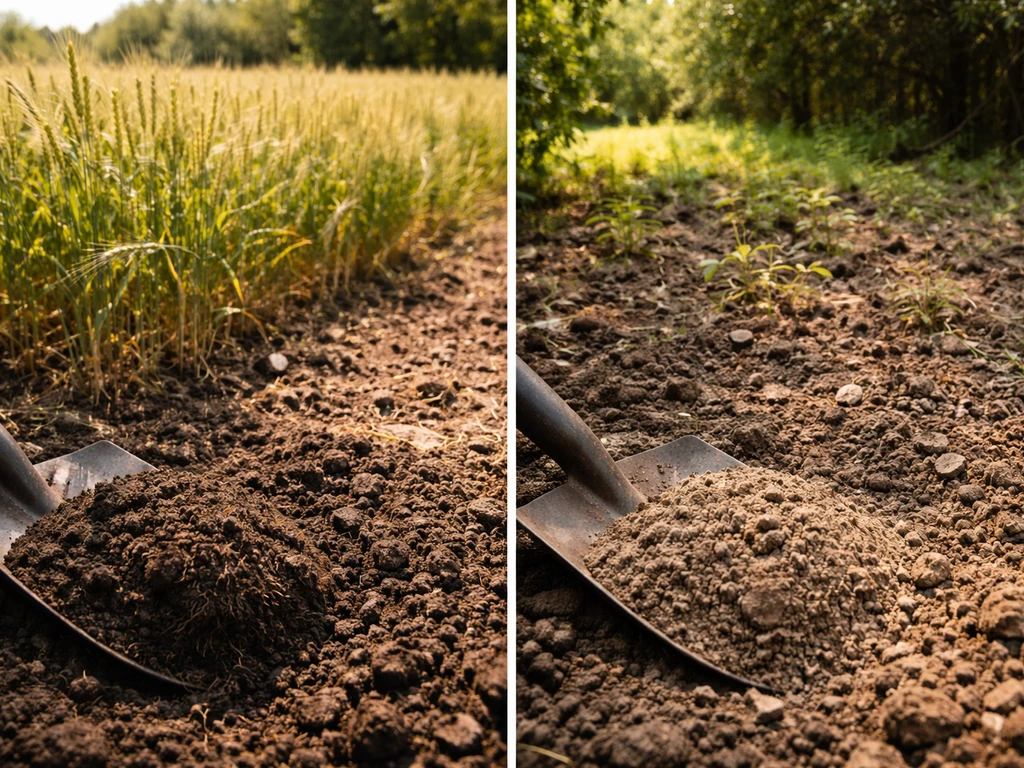
Soil pH is one of the most important and most overlooked factors. Wheat and barley prefer a pH of 6.3 or above, while oats are slightly more tolerant down to about 6.0. If your soil pH drops below 5.5, you'll see dramatically reduced stands and nutrient uptake problems regardless of how much fertilizer you apply. Get a cheap soil test from your local extension service before you plant, and if your pH is low, work in garden lime a few months before planting to give it time to react.
Beyond pH, small grains need decent drainage and reasonable fertility. Phosphorus is a commonly limiting nutrient, especially in western and high-altitude soils. A soil test will tell you exactly what to add. As a general baseline, good loamy soil that drains well and hasn't been heavily depleted is your target. Heavy clay soils can work but need amendment; sandy soils drain too fast and dry out seed before germination unless you have irrigation or plant into moisture.
Climate fit matters more than people realize. Winter wheat is planted in fall and harvested in early summer, which works beautifully across most of the continental U.S. but requires you to know your local frost dates and fly-free date (the date after which Hessian fly pressure drops enough for safe planting). Spring oats and barley go in as soon as the ground can be worked in early spring. Grain sorghum and proso millet need warm soil (60°F or above) and are better suited to dry, hot climates where other grains struggle.
Your planting plan: varieties, timing, seed rates, and spacing
Picking varieties
Use locally adapted varieties whenever possible. Your state extension service's variety trial results are the fastest way to find what performs best in your county. For small plots and home saving, open-pollinated (OP) or heritage varieties are great because you can save seed year to year. For wheat, look for varieties bred for your region's disease pressure. For oats, look for high-test-weight varieties that perform well in your zone.
Timing
Timing is critical. For winter wheat, planting at or slightly before your local optimum planting date (typically early to mid-fall, depending on your region) gives plants time to establish before winter dormancy. Planting more than two weeks past the optimum window increases your risk of reduced yield and quality. If you plant late, bump up your seeding rate by about 10% per week of delay. Spring grains like oats go in as early as the soil is workable, often 4 to 6 weeks before the last frost date.
Seeding rates and spacing
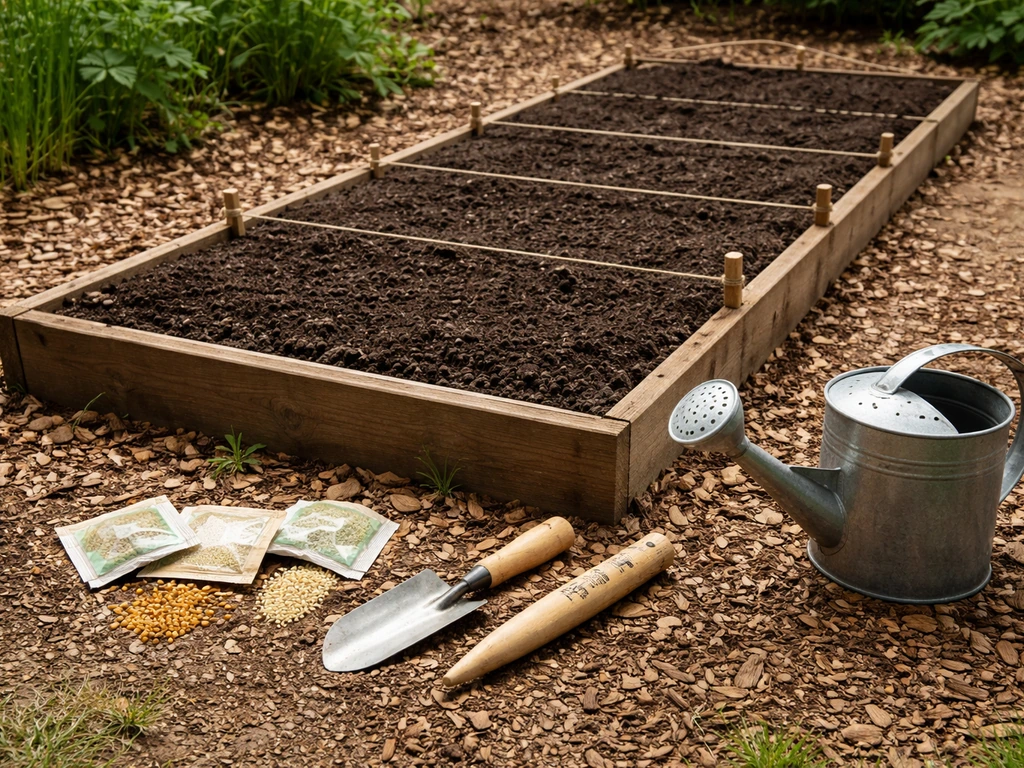
For oats, a typical seeding rate is 75 to 100 lbs per acre for grain production (lower, around 40 to 60 lbs per acre, if you're using them as a cover crop). For winter wheat, standard seeding rates run 1 to 1. 5 million seeds per acre depending on planting date and conditions. For a home-scale test plot, think in terms of about 2 to 3 lbs of seed per 1,000 sq ft for wheat or oats.
Seed depth should be 1 to 1. 5 inches for winter wheat (firm soil contact is essential) and no deeper than 3 inches for oats. Row spacing of 6 to 7 inches works well, matching standard grain drill row widths. If you're hand-seeding, broadcast the seed and rake it in firmly, then tamp down the soil to improve seed-to-soil contact.
If your seedbed is poor or you're planting no-till into heavy residue, increase your seeding rate by about 15 to 20% to compensate for lower seed-to-soil contact and expected reduced emergence. That single adjustment saves a lot of heartbreak on a thin stand.
Keeping the crop healthy: weeds, water, and pests
Weed control
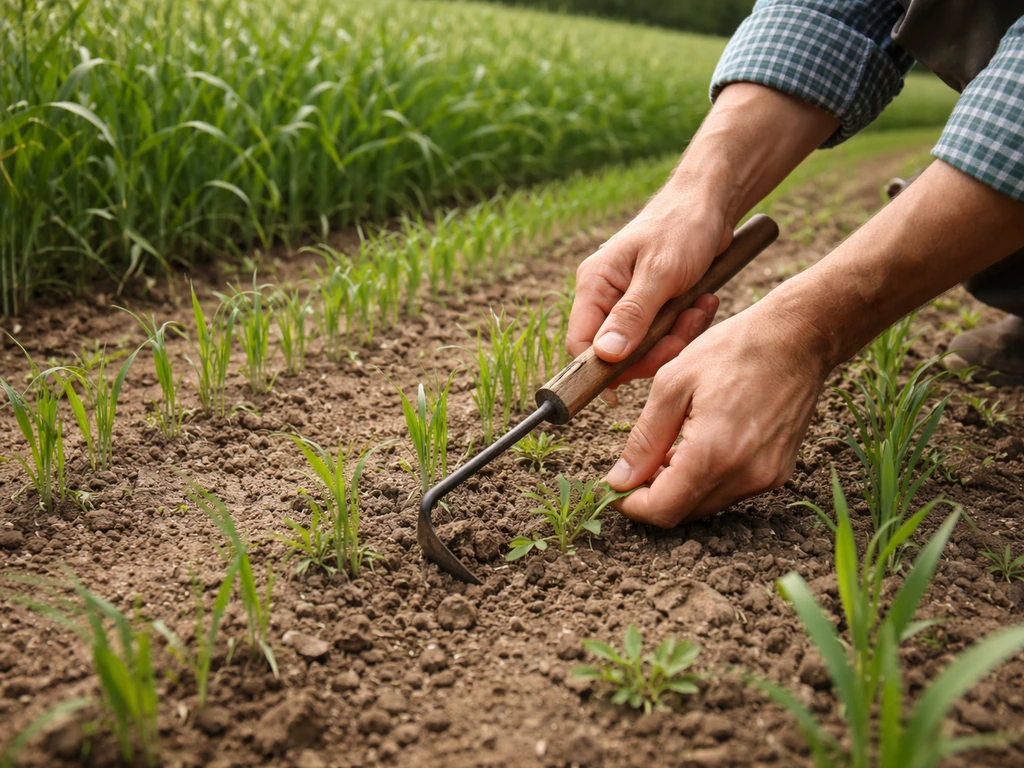
Weed control in small grains is most effective early. Once the grain canopy closes and plants reach the jointing stage (where the first stem node becomes detectable), your options narrow significantly and many herbicide programs must be applied before this point. For home growers without herbicide, the practical strategy is: start with a clean seedbed (till or solarize the area), plant at high enough density for the grain to compete, and hand-weed aggressively in the first 4 to 6 weeks. If you are thinking like farmers and want to grow it more reliably, focus first on site fit, timing, and soil preparation. After canopy closure, small grains shade out most annual weeds reasonably well on their own.
Watering
Most small grains are relatively drought-tolerant once established, especially wheat and barley. With the right sunlight, soil pH, and timing, these are the kinds of conditions under which crops grow well when they are well matched to their environment Most small grains are relatively drought-tolerant once established. The most moisture-critical windows are germination/emergence and the grain fill period (when the heads are forming and filling).
If you're getting regular rainfall (1 inch per week or more during these stages), you may not need to irrigate at all. In dry spells, prioritize getting water down during emergence and then again as heads emerge. Proso millet and grain sorghum are the most drought-tolerant options and are typically grown under dryland (non-irrigated) conditions.
Pest and disease awareness
For beginners, you don't need to memorize every pest, but you should walk your plot weekly and know the big threats. For [beginner pest monitoring checklists](https://ipm. ces. ncsu.
edu/ipm-small-grains/), NC State Extension’s Small Grains IPM guidance covers insects, mites, diseases, and scouting steps you can use to spot and manage major threats. The main diseases to watch for in wheat are powdery mildew, leaf rust, Fusarium head blight (scab), Septoria nodorum blotch, and barley yellow dwarf virus. Most of these show up as discolored leaves, spotting, or shriveled heads.
The best beginner defense is choosing disease-resistant varieties, planting at the right time (late planting increases disease risk), and not overwatering. Insects like aphids and Hessian fly are the most common insect problems, and again, planting timing is your best tool against Hessian fly specifically.
Harvesting and storing your grain
Harvest timing comes down to grain moisture. For safe storage without artificial drying, you want grain moisture below 13 to 14%. At that level, grain can be stored in sealed containers without spoiling. If you harvest earlier when moisture is higher (say 18 to 25%), the grain needs to be spread thin in a warm, well-ventilated space or run through a grain dryer before going into storage. Grain sorghum harvested above about 25% moisture tends to have threshing problems and cracked grain, so patience at harvest pays off.
A practical field test: when the plants have fully browned and the heads are nodded over, grab a handful of grain and bite it. If it dents easily and feels soft, it needs more time. If it's hard and crunchy, you're at or near harvest moisture. On a dry weather day, heads can reach 13% moisture or below by afternoon. Try to harvest in the mid-morning to early afternoon when dew has dried off.
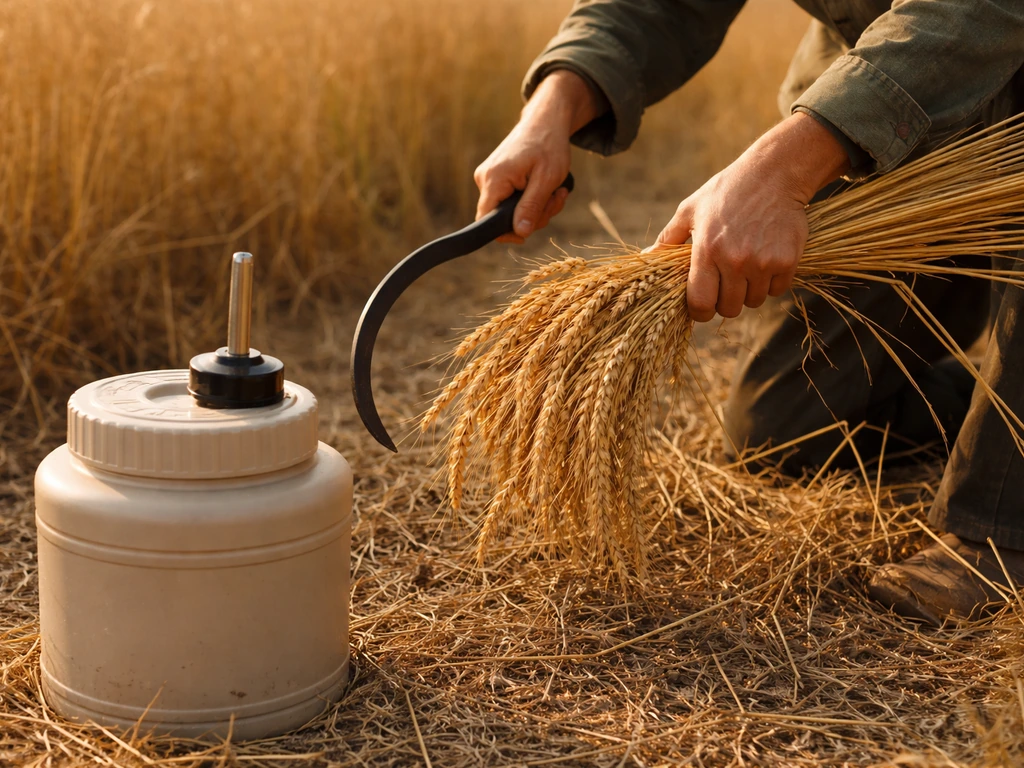
For small batches, threshing can be done by hand. The classic method is to bundle stalks and beat them against the inside of a barrel or a tarp. Winnowing (pouring grain between two buckets in a breeze, or using a box fan) removes the chaff. It's slow but satisfying, and it works perfectly for the quantities a home grower produces. Store cleaned, dry grain in airtight buckets or glass jars in a cool, dark place. Properly dried grain stored this way stays viable and edible for 2 to 5 years easily.
Yield planning, cost-benefit, and how to start a test plot today
Realistic yields for home plots
Commercial wheat fields average around 40 to 60 bushels per acre (roughly 2,400 to 3,600 lbs), but home-scale plots with proper care can hit that range or better on a per-square-foot basis. A well-managed 1,000 sq ft plot of winter wheat should yield 25 to 40 lbs of clean grain, which translates to roughly 20 to 30 lbs of flour. That's enough for a good number of loaves of bread. Oats and barley will be in a similar range. Corn is the overachiever: a well-grown 1,000 sq ft plot of corn in good conditions can yield 50 to 100 lbs of dry grain.
Cost-benefit for a beginner test plot
Let's run real numbers for a 500 sq ft test plot of winter wheat. You'll need about 1 to 1. 5 lbs of seed (roughly $3 to $8 depending on variety and source), a soil amendment if your pH needs adjustment (lime is cheap, usually $5 to $10 for a small bag), and basic hand tools you likely already own. Total investment: under $20 in most cases.
Expected yield from 500 sq ft: 12 to 20 lbs of grain, or roughly 10 to 15 lbs of flour. At current store prices for quality whole wheat flour (often $1. 50 to $3. 00 per lb for stone-ground or specialty flour), that's $15 to $45 worth of flour from a $20 investment.
The economics get better as your plot size grows, since your seed and soil amendment costs scale slowly while your yield scales faster.
Your action plan: starting today
- Pick one grain that matches your climate (winter wheat or oats for most of the U.S.; sorghum or millet if you're in a hot, dry region).
- Get a soil test. Your local cooperative extension office usually does this for $15 to $25. You need to know your pH before anything else.
- Choose a sunny, well-drained spot of at least 100 to 500 sq ft for your test plot. This is enough to learn without a huge commitment.
- Source seed from a local farm supply store, a regional seed company, or an online heritage seed supplier. Specify your region when asking for recommendations.
- Prepare your seedbed by tilling or forking the soil 4 to 6 inches deep, removing large clumps and debris, and applying any lime or phosphorus your soil test recommended.
- Plant at the right depth (1 to 1.5 inches for wheat, no more than 3 inches for oats), firm the soil over the seed, and mark your planting date so you can track growth stages.
- Walk the plot weekly, especially in the first month. Hand-weed aggressively early, note any disease symptoms, and water during dry spells at germination and head fill.
- Harvest when grain is hard and dry (below 13 to 14% moisture), thresh and winnow by hand, and store in sealed containers in a cool, dry spot.
- Record your yield and your costs. Use that data to plan next year's expansion or grain selection.
Growing grain at home puts you in the same category as farmers who grew crops in fields long before industrial agriculture existed, and it connects to the broader question of where and how food crops are grown. The scale is different, but the fundamentals are identical: right seed, right time, right soil, and attention during the critical windows.
If you’re comparing yourself to who grow crops in the field, think of this as the small-plot version of that same planning mindset. Even if you are not a commercial operation, you can be were farmers and we grow it by planning for scale, climate, and your goals. Crops grow well when they are matched to your climate, planted at the right time, and given the right soil.
Start with one small plot this season, learn what works in your specific soil and climate, and expand from there. If you're wondering, can you grow crops in the end, the answer is yes, as long as you match the crop to your climate, space, and schedule. One successful 500 sq ft grain harvest is worth more than any amount of reading about it.
FAQ
How do I tell if my yard is suitable for grains without buying a lot of supplies first?
Do a quick “fit check” before you spend on seed. Confirm you can get 6 to 8 hours of direct sun, then observe drainage after a heavy watering or rain (within 24 to 48 hours). If the soil stays muddy or water pools, you will likely need raised rows or amendments because wheat and oats will fail from poor aeration even if fertility is good.
Can I grow grain in a small raised bed, or do I need field soil?
Yes, you can, but expect lower yields than ideal field conditions unless you manage drainage and fertility tightly. Use a depth of at least 8 to 12 inches for small grains, pack the soil firmly before sowing for good seed-to-soil contact, and be realistic about weed control because hand-weed windows are narrower in containers or beds.
What’s the safest first grain to try if I want food this season and I don’t know my frost dates yet?
Oats are usually the lowest risk for timing mistakes because you can sow in early spring once the ground is workable. Winter wheat also works well for many climates, but if you misjudge your fall planting window you can lose the stand. If you cannot get reliable frost dates, start with oats and keep records of emergence and heading dates for next year.
Is it a problem if my soil test is slightly low, like pH 5.8 for wheat?
For wheat and barley, pH around 5.8 can still produce some crop, but you will likely see weaker stands and less nutrient availability. If you are planting soon, lime will not fully react immediately, so consider choosing a more tolerant option like oats. If you are planting next season, apply lime a few months ahead as the article suggests to get better results.
Do I need to mow or cut anything before harvest if the heads are browning unevenly?
Wait until most heads have fully browned and grain feels hard when bitten. If you have uneven maturation due to patchy soil moisture, harvest the plot in passes (pick the most mature areas first) and keep harvested heads separate. This reduces the chance of mixing wetter grain into your stored batch.
What should I do if my harvest moisture is higher than 14% but I do not have a grain dryer?
Spread the grain thin in a warm, well-ventilated space, use a fan for airflow, and stir periodically. Moisture removal is slower for small batches than people expect, so plan for multiple drying sessions and avoid sealing the grain until it is truly at safe moisture. If you cannot reach 13 to 14%, prioritize using it sooner rather than storing it.
Can I save seed from my first plot, and how do I avoid surprises next year?
You can save seed, especially with open-pollinated or heritage varieties as the article notes. The key caveat is isolation. If you grow multiple related grasses nearby (or volunteer plants show up), you can get cross-pollination and change variety performance. Even in a home setting, label your plot, rogue off-types early, and store saved seed dry and cool.
How much weed pressure can grains tolerate if I cannot weed every week?
Small grains compete best after canopy closure, but the early window is the critical one (first 4 to 6 weeks). If you cannot commit to early weeding, compensate by starting with a cleaner seedbed (till or solarize) and increasing seeding density so the canopy closes faster. If you skip that early phase, weeds can permanently reduce yield because they also steal water and nutrients.
What’s the most common mistake that causes a thin stand in wheat or oats?
The most common causes are poor seed-to-soil contact and incorrect timing. If the soil is loose, dry, or unfirmed, germination can be uneven. If seeding happens too late, plants may not establish enough before winter or before pest pressure rises. Improve by raking in firmly, tamping, and using the seeding rate bump for poor seedbeds.
How do I prevent pests like Hessian fly when growing at home on a very small plot?
At small scale, management is mostly about timing and crop choice rather than spraying. Hessian fly pressure drops after your fly-free date, so align sowing accordingly and avoid late plantings. Also, do not leave volunteer wheat or grass hosts around your growing area, because they can support insect carryover.
Do I need to fertilize, or can I rely on compost?
Compost helps soil structure and some nutrients, but for grains you still need to match what your soil test says, especially phosphorus. If your test shows low phosphorus, you may need a specific amendment rather than relying on compost alone. Also, avoid overdoing nitrogen, because lush growth can increase lodging and disease risk.
What’s the easiest way to thresh and clean grain without making a mess?
Use a tarp or a container with a high-sided surface for the beat-and-separate step, then clean with a fan or careful bucket winnowing. Clean grain should not have visible chaff, dust, or floaters. Let cleaned grain fully dry before storage to prevent mold and to keep it viable for later use.
Next Article
Who Grow Crops in the Field and How It Works
Learn who grows field crops, from tenant farmers to laborers, and how to choose your best model for starting.