Throw-and-grow food plots work best when you broadcast seed onto a lightly prepared surface, get good seed-to-soil contact, and pick crops that germinate quickly without babysitting. UGA Extension also cautions that broadcasted seed may not have sufficient seed-to-soil contact, which can contribute to throw-and-grow or minimal-till broadcast failures blank" rel="noopener noreferrer">broadcasted seed may not have sufficient seed-soil contact. To get the best throw and grow food plots, focus on fast-germinating crops and make sure seed-to-soil contact is solid so you avoid weak stands. Done right, you can have edible greens in as little as 5–7 days and full harvests within 30–60 days depending on what you planted. Done wrong, you get a patch of weeds and a lot of bird feed. The difference comes down to a handful of decisions: which crops you pick, how well your seed actually touches soil, and whether you hit the right moisture window.
Throw and Grow Food Plot Tips: Step-by-Step Success Guide

What a throw-and-grow food plot really is and when to use it

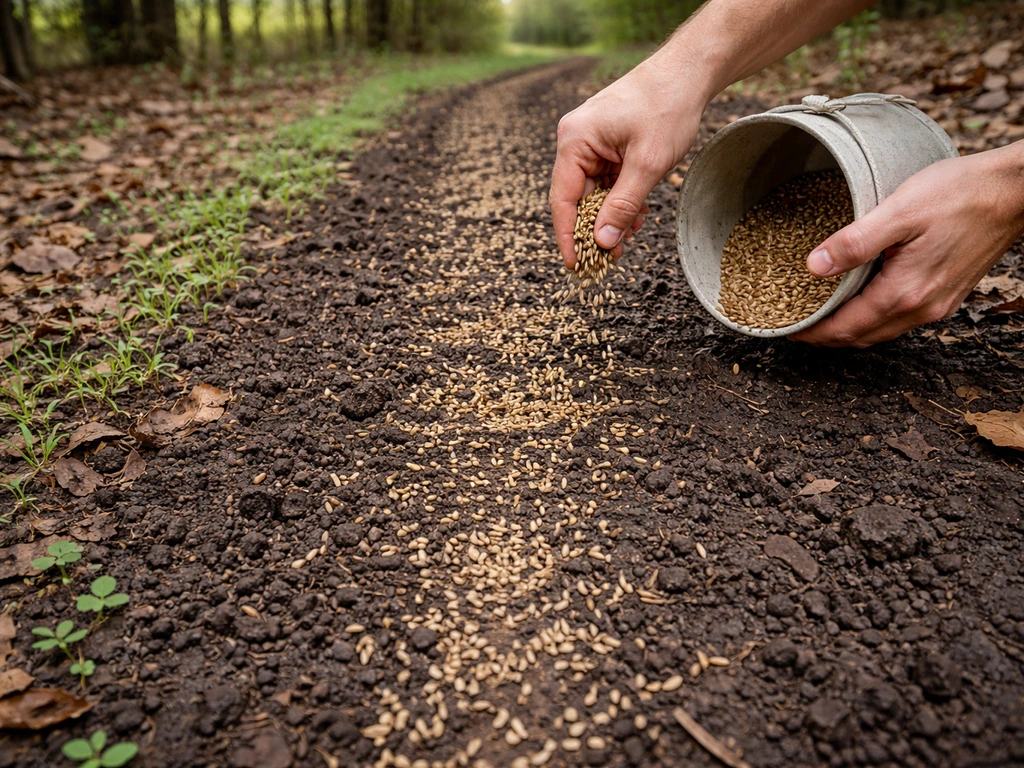
A throw-and-grow food plot is exactly what it sounds like: you broadcast seed over a prepared or semi-prepared surface instead of drilling rows, transplanting starts, or running a full till operation. The goal is fast establishment with minimal equipment and labor. You're relying on nature to do some of the work, which means the method has a real ceiling, it works beautifully in the right conditions and fails quietly in the wrong ones. If you're wondering whether does throw and grow food plot work for you specifically, focus on whether your site hits those right-conditions requirements like seed-to-soil contact and a good moisture window in the right conditions.
This approach makes the most sense in a few situations: when you're working a large area (a quarter acre or more) where row planting is impractical, when you need to fill in bare patches fast, when you're using cover crops or nurse crops alongside your main food plants, or when you simply don't have access to a tiller or drill. It also shines in late-season plantings where there's no time for careful bed preparation, and in frost seeding scenarios where you distribute seed over frozen ground in late winter and let the freeze-thaw cycle work the seed into the soil.
Where it struggles: dense existing vegetation, clay soils that crust after rain, very dry climates without irrigation, and small seeds that need precise depth control (like carrots or very fine herbs). If you're in a wetter climate with reasonable soil and you've chosen the right crops, broadcast seeding is genuinely efficient. If you're in a dry zone, you'll need to be strategic about timing and moisture. Zone 9 growers in the southeast have a different throw-and-grow calendar than zone 5 growers in the upper midwest, and that matters a lot for which crops and which months you target.
Pick crops that germinate fast and match your conditions
The single biggest reason throw-and-grow plots fail is choosing crops that need precision planting depth or slow, careful establishment. Broadcast seeding is forgiving for larger-seeded fast-germinators and small seeds that just need surface contact, but it's brutal for anything that needs consistent half-inch placement or a carefully controlled moisture environment during germination.
For a home food garden, your best broadcast bets fall into a few categories. Cool-season leafy crops like radishes, turnips, mustard greens, and kale scatter and germinate in 5–10 days and thrive broadcast in fall or early spring. Legumes like cowpeas and field peas handle broadcast well in summer, though you'll use more seed than if you drilled them. Grains and grain stand-ins like buckwheat, oats, wheat, and millet establish reliably from broadcast in the right season. Quick root vegetables like beets and Swiss chard also broadcast reasonably well. Warm-season options like grain sorghum and sunflowers can be broadcast but need warmer soil, with sunflower timing as late as early June in northern climates.
| Crop | Broadcast Seeding Rate (approx.) | Season | Days to Germination |
|---|---|---|---|
| Oats | 50 lb/acre | Cool (spring/fall) | 5–10 days |
| Wheat | 50 lb/acre | Cool (fall) | 5–10 days |
| Buckwheat | 40 lb/acre | Warm (summer) | 4–7 days |
| Millet | 20 lb/acre | Warm (summer) | 5–10 days |
| Grain Sorghum (milo) | 8 lb/acre | Warm (summer) | 7–14 days |
| Soybeans | 40 lb/acre | Warm (summer) | 5–10 days |
| Cowpeas (iron-clay) | 75–100 lb/acre | Warm (summer) | 5–7 days |
| Turnips/Radishes | 4–6 lb/acre | Cool (fall/spring) | 3–7 days |
| Corn | 12 lb/acre | Warm (summer) | 5–10 days |
Notice that cowpeas broadcast at 75–100 lb/acre versus 50 lb/acre when drilled. That's a consistent pattern with broadcast seeding: you seed heavier to compensate for uneven placement and variable soil contact. Always think in terms of pure live seed (PLS) rather than bulk bag weight. If your seed bag lists 85% germination and 95% purity, your PLS is around 80% of the bulk weight, meaning you actually need more physical seed to hit your target population. Most home gardeners skip this math and then wonder why their stands are thin.
Match crops to your actual soil and climate. Heavy clay that crusts? Lean toward larger seeds like cowpeas, oats, or buckwheat that can push through better than tiny mustard seeds. Sandy, fast-draining soil in a dry summer? Choose drought-tolerant options like millet or grain sorghum and seed just before expected rain. Cool, wet spring in the north? Oats and turnips are nearly foolproof. Hot, humid southeast summer? Cowpeas and millet are your workhorses. The planting windows shift quite a bit by region: an April 15 to June 15 window for warm-season annuals applies reasonably across the southeast but would be too early in northern states where soil temps are still cold.
Minimal site prep: soil contact without heavy tilling
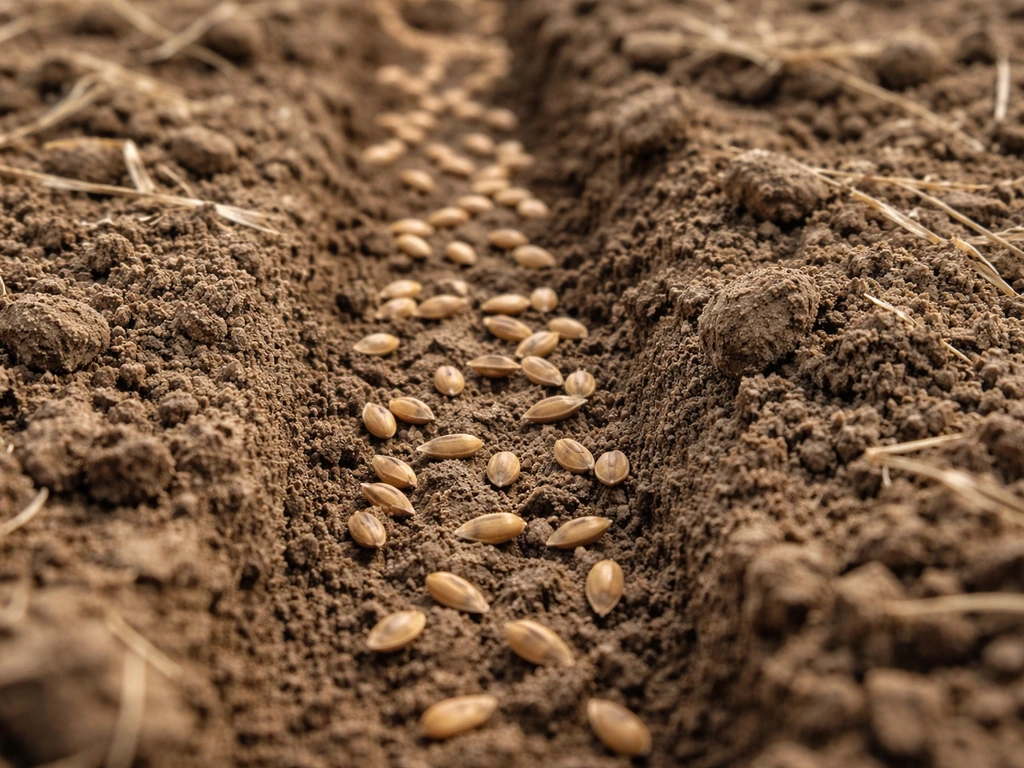
Here's the honest truth about no-till and minimal-till broadcast seeding: seed-to-soil contact is everything. Penn State Extension puts it plainly: good seed-to-soil contact is essential for optimal and uniform germination. The reason most throw-and-grow plots underperform isn't bad seed or bad timing, it's seed sitting on top of residue, thatch, or loose soil without actually touching mineral soil. When that happens, the seed dries out between rains and germination rates drop dramatically.
You don't need to till the whole plot, but you do need to deal with existing vegetation and residue. Here are the practical options, from least to most disturbance:
- Mow and leave clippings flat: Works if residue is thin. The seed falls through to soil on its own, especially with rain.
- Mow and rake or blow clippings away: Better for thicker residue. Gives seed a cleaner path to soil.
- Tarping or solarizing: Cover the area for 4–6 weeks before seeding to kill existing vegetation. Leaves a flat, damp surface that accepts seed well. Works great for home-scale plots.
- Shallow scratch-till (1–2 inches): Use a rake, hand cultivator, or drag harrow to rough up the surface without full inversion. This is the sweet spot for most throw-and-grow situations.
- Spot-kill with herbicide then broadcast: Option for larger areas with thick grass competition, though not appropriate for all gardening philosophies or certified operations.
After you broadcast, the job isn't done. You need to get that seed covered lightly and firmed. Lightly harrowing after broadcast (dragging a chain, a piece of chain-link fence, or even a bundle of branches across the seeded area) covers seed to roughly the quarter-to-half-inch depth that most broadcast crops want. After that, if you can firm the soil with a lawn roller or cultipacker, do it. A cultipacker is genuinely one of the best tools for broadcast seedings because it presses seed into soil without burying it too deep. Rolling with a water-filled lawn roller achieves a similar effect on home-scale plots. Even walking across a freshly seeded area helps.
One thing to keep in mind if you're reducing tillage for the first time: the weed seed bank in the soil is still there. Full tillage actually brings dormant weed seeds to the surface where they germinate and compete. Reduced tillage leaves more weed seeds buried where they stay dormant longer. There's a trade-off either way, but in terms of weed pressure, minimal-till often wins in the second and third year as fewer weed seeds get activated.
Seeding methods: timing, seeding rates, and how to broadcast for best results
Broadcast seeding is simple in concept but sloppy in practice if you don't approach it deliberately. The three main tools for home-scale broadcasting are a handheld rotary spreader (crank spreader), a walk-behind push spreader, or hand broadcasting for very small areas. For anything over 2,000 square feet, a rotary spreader gives you far more consistent coverage than hand broadcasting, which tends to be heavy in some spots and bare in others.
Timing is as important as the equipment. Ideal broadcast conditions are: soil temperature in the target range for your crop (cool-season crops want 45–65°F soil, warm-season crops want 60°F minimum, ideally 65–70°F), rain expected within 24–48 hours of seeding, and no high winds that will blow light seed off-target. Early morning broadcasting reduces wind and gives seed maximum time to settle before midday drying. Frost seeding is a specific exception: you broadcast in late winter over frozen ground, and the freeze-thaw cycles physically work small seeds into the soil surface over several weeks, resulting in excellent contact without any mechanical action.
For broadcast rate, always seed heavier than you would if drilling. The general rule is 25–50% more seed by weight for broadcast versus drilled plantings. For small home plots, translate per-acre rates to your actual square footage (one acre is 43,560 square feet). A 1,000 square foot plot is about 2.3% of an acre, so multiply your per-acre rate by 0.023. For turnips at 5 lb/acre, that's about 0.11 lb (roughly 1.75 ounces) for 1,000 square feet. It sounds tiny, and it is. Small seeds go a long way.
For even coverage, split your seed into two equal batches and broadcast in perpendicular passes: one pass north-south, the second east-west. This criss-cross pattern smooths out the uneven distribution that comes from any single-direction pass. After broadcasting, drag or rake lightly, then firm.
Germination boost: watering, mulch, and protecting seed and seedlings
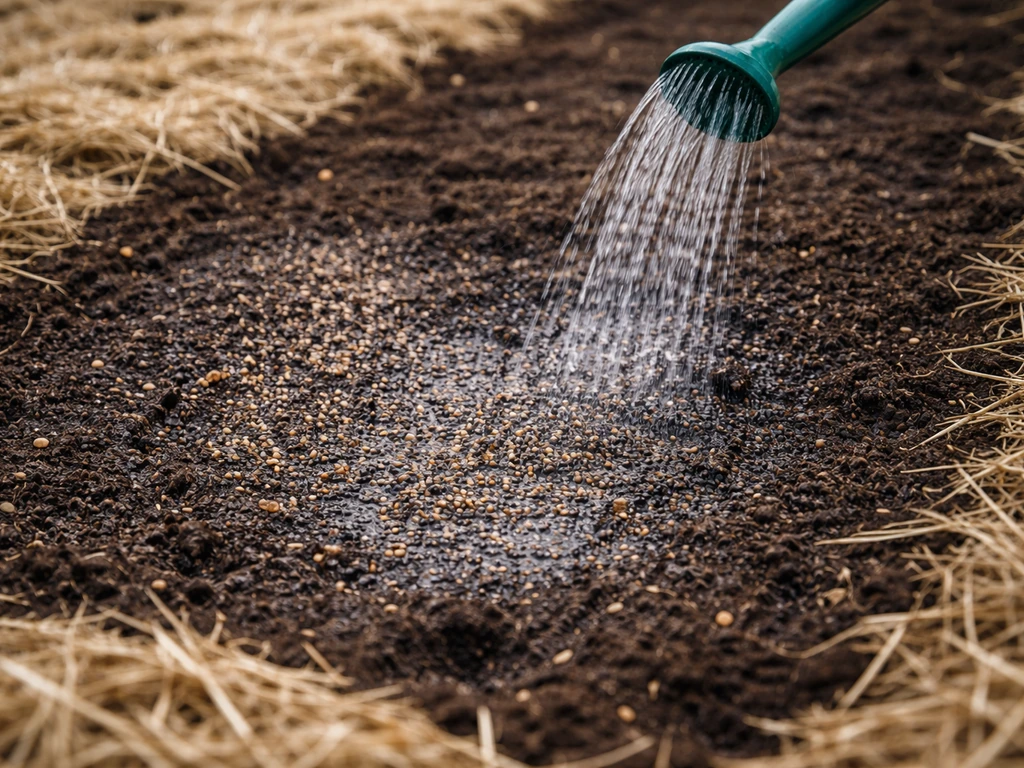
If you don't have rain coming within a day or two of seeding, you need to water. The goal in the first 7–14 days is to keep the top half-inch of soil consistently moist. Light, frequent watering (a fine mist twice daily if you can manage it) beats one heavy soaking that crusts the surface and then lets it dry out completely. A crust formed after a hard rain can physically block emergence, especially for small seeds. If you see a surface crust forming, gently break it with a light raking before seedlings push through, being careful not to bury seed too deep or drag it out of position.
Mulch helps with moisture retention but has to be applied correctly. A light layer of weed-free straw (not hay, which is loaded with weed seeds) at about a quarter inch thick lets light through for small seeds while holding moisture. Any thicker and you're blocking the light that some surface-germinating seeds need, and you're creating a mat that seedlings have to fight through. Hay bales are convenient and cheap but they will introduce weeds into your plot. Stick to certified weed-free straw or use a thin application of mature compost as your surface dressing instead.
Birds are a real problem with broadcast seeding, especially for larger seeds like oats, wheat, corn, and legumes. A single morning of feeding can strip a freshly seeded patch. Row covers or bird netting laid directly over the seeded area for the first 7–10 days is the most reliable protection for home-scale plots. Once seeds have germinated and seedlings are a few inches tall, birds generally lose interest. For small seeds like turnips or mustard, bird pressure is lower but insects (especially flea beetles on brassicas) can hammer seedlings in the first two weeks. A floating row cover solves both problems simultaneously.
Weed, pest, and failure-point troubleshooting
Poor germination is the most common complaint, and it almost always traces back to one of three things: seed sitting on residue without touching soil, seed buried too deep by overly aggressive raking, or seed that dried out during the critical first week. Run through those three before assuming bad seed. Most commercial seed is surprisingly viable. The seed itself is rarely the problem.
Weeds are your next big challenge, and minimal-till broadcast planting does give weeds a window to compete. The best weed management in a throw-and-grow system is speed: get your crop up fast enough that it shades out weed seedlings before they establish. This is one reason experienced broadcast planters love buckwheat, turnips, and cowpeas: they are aggressive enough to compete with weeds once they're established. Nurse crops (fast-germinating grains like oats or millet seeded alongside slower main crops) can serve the same purpose, covering the soil quickly and reducing weed establishment while the main crop catches up.
If weeds do get ahead of your crop, your cleanest option in a no-till system is hand-pulling or cutting at soil level rather than hoeing (which disturbs soil and activates more weed seeds). A sharp hoe used very shallowly, just clipping weed stems at the surface, works well in the first few weeks without bringing up a new flush of weed seeds from deeper in the soil.
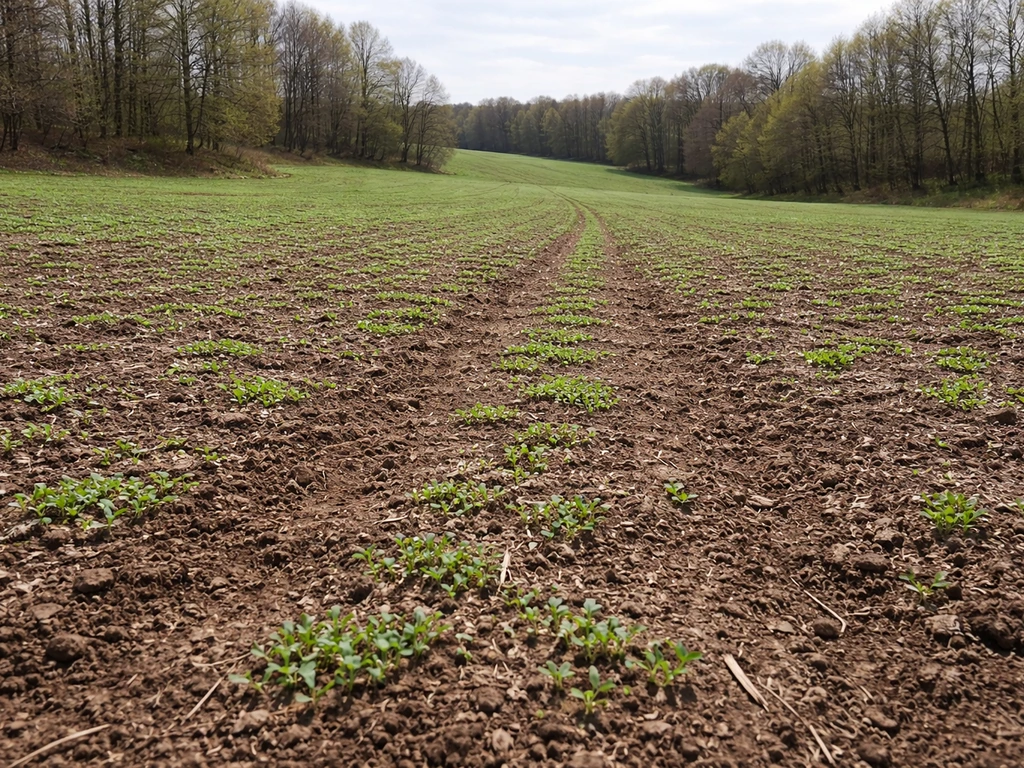
Uneven emergence is normal in broadcast plots. Don't panic if germination looks patchy at first. Give it 14 days before writing off a section. Cool soil slows germination even when conditions otherwise look good. If a patch genuinely fails after two weeks, overseed it directly, scratch in a little soil, and water. Most broadcast crops can tolerate a second seeding into a partially established stand without much conflict.
For pest management beyond birds, the main threats vary by crop. Brassicas attract flea beetles and aphids. Legumes get Mexican bean beetles and aphids. Grains face aphid pressure and occasional grasshopper damage in dry years. For a food-focused home plot, physical barriers (row cover) and hand removal are usually enough. For deer, a good throw-and-grow food plot focuses on fast-germinating, deer-friendly crops and timing them so they establish quickly after seeding. Insecticidal soap handles aphid pressure on seedlings without disrupting soil biology in a minimal-till system.
Ongoing care and harvest planning: thinning, feeding, succession, yield expectations
Once your broadcast plot is up and growing, the management shifts to keeping it productive. Thinning is often overlooked in broadcast plantings because it feels counterintuitive after you worked hard to get the seed to germinate. But overcrowded plants produce less food per plant and are more vulnerable to disease from poor air circulation. For root vegetables like turnips and beets, thin to 3–4 inches apart when seedlings are 2 inches tall. For greens like kale and mustard, thin to 6 inches. Those thinnings are edible, so nothing is wasted.
Feeding in a minimal-till system works best through surface applications rather than incorporated fertilizer. A light top-dressing of compost (half an inch across the plot) applied after thinning gives a slow, steady nutrient boost without disturbing the soil or the root systems you've established. For faster results, a diluted liquid fertilizer (fish emulsion or liquid kelp) watered in works well. If you soil-tested before planting and your nitrogen was low, a light broadcast of a granular nitrogen fertilizer raked into the surface at germination time helps, especially for heavy feeders like corn and grain sorghum.
Succession planting is how you turn a throw-and-grow plot into a real food system rather than a one-time harvest. Every time you clear a section, broadcast the next crop immediately into the cleared area. Cool-season growers can do turnips and mustard in fall, transition to oats in late winter via frost seeding, then shift to cowpeas or buckwheat when soil warms in late spring, then back to cool-season crops in late summer. That's three to four distinct harvests from the same ground in a single year with minimal inputs.
On yield expectations: broadcast planting is not as productive per square foot as precision row planting, but it scales well to area. A 1,000 square foot turnip plot broadcast at 5 lb/acre equivalent will produce somewhere in the range of 100–200 lb of roots and greens combined under decent conditions. A similar buckwheat plot will give you 30–50 lb of grain if you let it mature fully, or a continuous supply of greens and shoots if you cut it early. Cowpeas in a 500 square foot broadcast patch can produce 10–20 lb of dried beans or 20–40 lb of fresh shell beans. These aren't numbers to build a farm around, but for a household looking to extend their food supply and lower their grocery bill, they're real and meaningful numbers.
The honest thing about throw-and-grow food plots is that your first attempt will teach you more than any article can. If you want more detail on what to expect, look up throw and grow food plots reviews from gardeners who have tried these methods this method. If you want step-by-step guidance, focus on seed choice, moisture timing, and how you cover and firm the broadcast afterward throw-and-grow food plots. You'll find out exactly how your soil crusts, where your drainage is worst, which birds are aggressive in your area, and which crops your specific microclimate favors. Treat the first season as a learning run and seed generously knowing some will fail. By the second season, you'll have a working system dialed to your actual conditions, and that's when this method really starts paying off.
FAQ
Can I throw and grow on top of thick grass or heavy residue without tilling?
Yes, but treat it as a separate tool. For broadcast seedings, you generally want just enough disturbance to break residue and make mineral soil available, then you immediately cover and firm. If you use a rototiller, do not repeatedly go over the same area because you create a loose, drying layer that can worsen seed-to-soil contact.
What should I do if it doesn’t rain within 48 hours after I broadcast seed?
Use a “surface moisture” plan. Keep the top half-inch evenly moist for the first 7 to 14 days, using short, light watering cycles rather than one deep soak. If you get a hard crust after rain, lightly rake or scratch the surface before seedlings emerge, to avoid physically blocking small seeds.
How deep should I cover seed when I throw and grow, and how do I avoid burying it too deep?
Not unless the crop needs it. Many broadcast crops want shallow cover (about a quarter to half inch) and consistent contact, so deep burial can cut germination dramatically. If you find yourself burying seed with a thick rake, switch to gentler coverage plus a cultipacker or roller to press the seed down without burying it.
Do I really need a cultipacker or roller after broadcasting seed?
A cultipacker (or a roller that firms without pushing seed too far) helps seed-to-soil contact, especially on loose soil or when residue is present. Walking over the area is a weak substitute, it can help slightly but it is inconsistent. If your ground is already hard and dry, rolling after watering is often more effective than rolling first.
Why do broadcast plots come up patchy, and when should I overseed?
It’s common, and you should wait before re-seeding everywhere. Give the plot about 14 days, then check for emergence across a range of spots (sunny, shady, and wetter areas). If one area truly fails, overseed that patch directly and lightly scratch in contact, then water consistently.
How do I figure out how much seed to broadcast if my bag shows purity and germination?
Aim to use pure live seed calculations, especially for legumes and pellets or low-germination lots. If you have purity and germination percentages on the bag, compute PLS and increase physical seed accordingly. This prevents thin stands that look like “bad method,” when the real issue is under-seeding by using bulk weight only.
What throw-and-grow crops work best if my soil crusts after rain?
Yes, seed choice can be adjusted, and timing is more forgiving than people think. If crusting happens, choose larger seeded crops that can emerge through barriers better and ensure you cover lightly and firm. You can also time seeding so it finishes before heavy rain events that cause crusts, then water gently to avoid surface sealing.
Can I throw-and-grow very small seeds like carrots or fine herbs?
For tiny seeds like carrots or very fine herbs, throw-and-grow often underperforms because they require consistent placement and shallow, controlled moisture. If you still want to use the approach, consider mixing the seed with an inert carrier (like clean sand) for distribution, but expect more failure than with radishes, turnips, oats, or buckwheat.
How should I choose crops and planting dates if I’m doing throw-and-grow specifically for deer?
For deer control, your “best” crop is the one that establishes quickly and survives the time window when deer are most likely to browse. Pair fast-germinating, deer-accepted options with planting dates that get seedlings up fast. Also check fencing and scent pressure, because without establishment speed, deer can wipe out seedlings before they get large enough to tolerate browsing.
What’s the best way to protect broadcast seedings from birds and insects at the same time?
Yes. Floating row cover is usually the simplest fix for early bird damage and can also reduce insect pressure on tender seedlings. Use it immediately after seeding, secure the edges, and remove or vent once seedlings are established enough that you can manage pests with less exclusion.
Do I need to thin broadcast seedlings, and how do I avoid wasting time or plants?
Plan thinning before you feel “done.” Overcrowding reduces yield per plant and increases disease risk from poor airflow. Thinning is especially important for root vegetables, where spacing affects bulb size. Since thinnings are edible for many crops (like turnips and mustard), you can treat thinning as part of harvest, not waste.
How should I fertilize a throw-and-grow plot if I used minimal tillage?
If your soil test shows low nitrogen, start with a surface feeding strategy after establishment, not right at broadcast time. Top-dressing compost after thinning gives slow release, and diluted liquid nitrogen sources (like fish emulsion or kelp) can help when you need faster growth. For heavy feeders, a light granular nitrogen broadcast into the surface at germination time can work, but avoid thick layers that block emergence.
Throw and Grow Food Plot Reviews: What You Get and If It Works
Real throw and grow food plot reviews: what seeds and instructions include, timeline, seeding steps, results, costs, pro