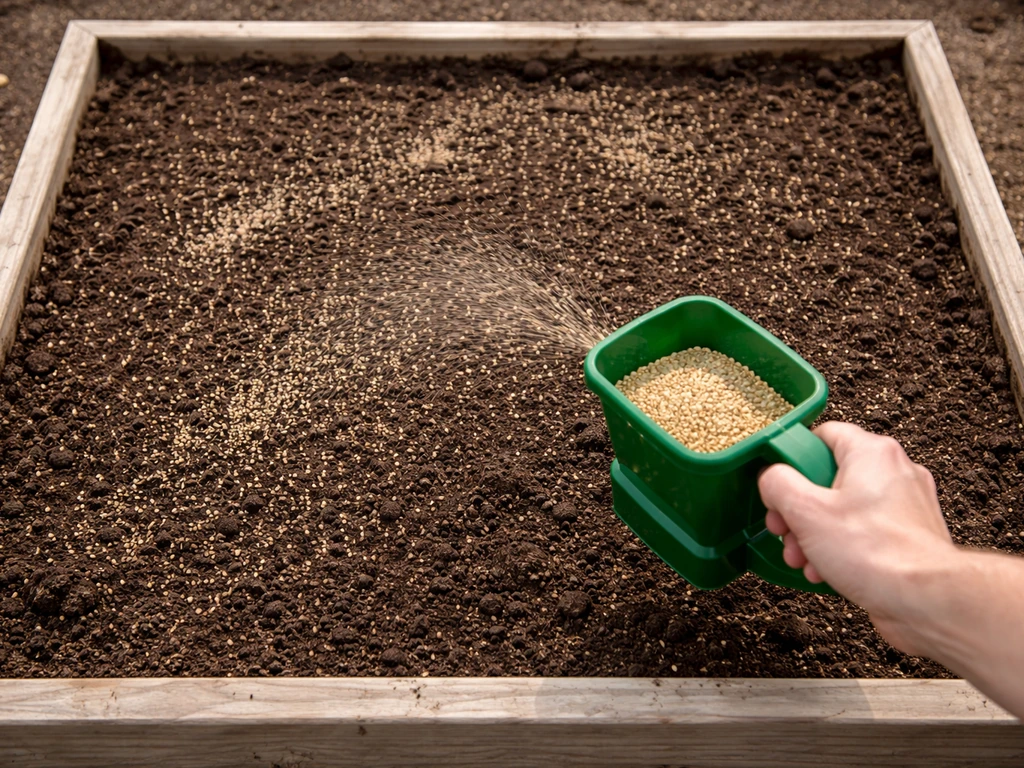
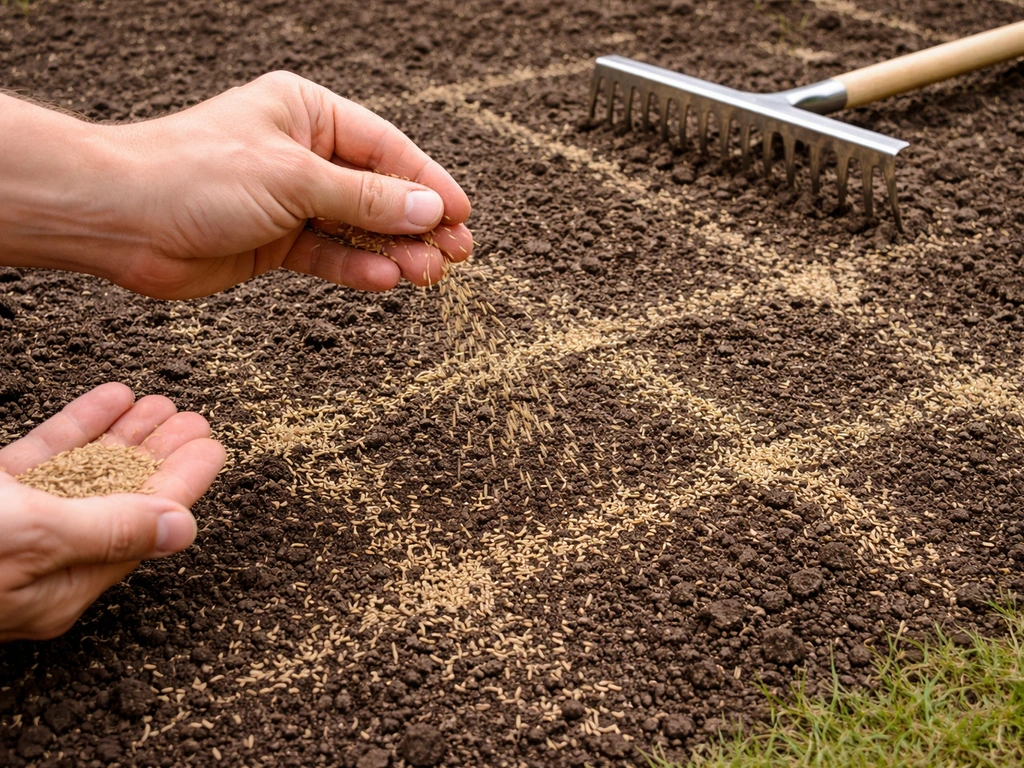
Throw and grow works like this: you broadcast seed directly onto prepared or lightly disturbed ground, rake or press it in just enough to get seed-to-soil contact, and let the crop establish with minimal fuss. It is not magic, but it does work reliably for the right crops when you nail a few basics: decent sunlight, loose enough soil at the surface, the right seeding rate, and consistent moisture until germination. Skip any one of those and you will get a patchy stand at best.
How to Use Throw and Grow Food Plot: Step by Step

Marcus Hendrick
13 Jun 2026

What 'throw and grow' really means for a food plot
The phrase 'throw and grow' has a specific meaning in the food-plot world: you are broadcasting seed by hand or with a spreader instead of drilling it into the ground with precision equipment. Broadcast seeding is the oldest planting method there is, and it is appropriate anywhere the soil is unprepared, the terrain is uneven, or you simply do not have access to a drill seeder. That covers most home gardeners and homesteaders perfectly.
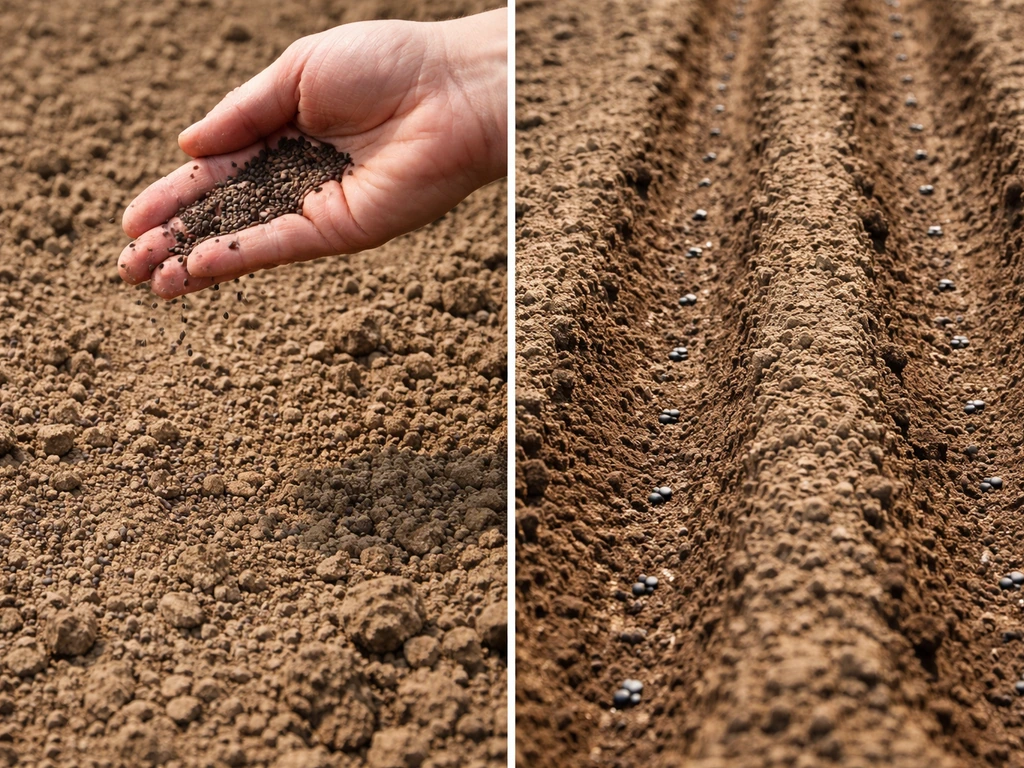
The honest trade-off is that broadcast seeding is less precise than drilling. Seeds land on the surface rather than in a consistent furrow at a controlled depth, so you lose some to birds, some dry out before they sprout, and some never make soil contact at all. The standard fix is simple: use a higher seeding rate than you would if you were drilling, and then firm the seed into the soil surface after broadcasting. Extensions like OSU recommend doubling the normal drill rate for broadcast applications to account for this seed loss. That one adjustment makes the method far more reliable.
Pick crops that match the low-effort method (and avoid mismatches)
Not every crop performs well when broadcast. The winners are small-seeded, fast-germinating annuals that do not need precise placement to establish. Think of crops that were literally grown in broadcast fields for centuries: peas, cowpeas, radishes, turnips, mustard greens, buckwheat, annual ryegrass, oats, and forage-type kale or rape. These germinate quickly even with imperfect seed-to-soil contact, tolerate some competition, and produce usable food or forage within 25 to 90 days depending on the species.
Radishes are a standout starter crop because varieties like Cherry Belle can be ready in as few as 21 days, with most reaching maturity in 25 to 35 days. Leaf lettuce runs 35 to 40 days from seed. Peas take 60 to 70 days for most varieties, though southern cowpeas can hit 50 to 55 days with fast varieties. These timelines matter for planning succession rounds, which I will cover later.
Crops that tend to fail with throw and grow are large seeds that need precise depth (like corn or squash), crops that are highly sensitive to seed depth (like carrots, which need a very shallow, firm, consistently moist seedbed), and anything that needs a full soil amendment program before it will produce. You can level up with amendments over time, but for your first broadcast plot, stick to the forgiving fast-producers.
| Crop | Days to Maturity | Works for Broadcast? | Notes |
|---|---|---|---|
| Radish | 25–35 days | Excellent | One of the fastest broadcast crops; re-seed every 3 weeks for continuous harvest |
| Leaf lettuce | 35–40 days | Excellent | Needs coolish temps; best for spring and fall windows |
| Peas | 60–70 days | Good | Emerge in 7–10 days at 55–65°F soil; needs legume inoculant for best yield |
| Cowpeas/Southern peas | 50–90 days | Good | Warm-season; high-protein forage and food; drought-tolerant once established |
| Turnips/forage kale | 45–60 days | Good | Cold-hardy; great for fall plots that last into frost |
| Oats/annual ryegrass | 60–90 days | Good | Quick cover and forage; not a primary food crop but pairs well in mixes |
| Corn | 70–100 days | Poor | Needs precise depth and spacing; broadcast results are very uneven |
| Carrots | 70–80 days | Poor | Tiny seeds need perfectly firm, smooth, consistently moist seedbed |
One practical note on seed mixes: if you are combining grasses and legumes in one blend, broadcast them separately rather than pre-mixing them. Penn State Extension flags this specifically: legume seeds are denser and distribute differently than grass seed in a spreader, leading to uneven stands. Spread one type, then pass over again with the other.
Site and timing: sun, soil basics, and when to sow
Sunlight requirements
Most food-plot crops need at least 6 hours of direct sun per day, and honestly 8 or more is better for most of them. Radishes, peas, cowpeas, and greens will all underperform in deep shade. Leaf lettuce is the most forgiving and can tolerate partial shade, especially in summer when full sun can actually cause bolting. Pick your site accordingly: a south-facing open patch beats a shaded corner every time.
Soil basics without going overboard
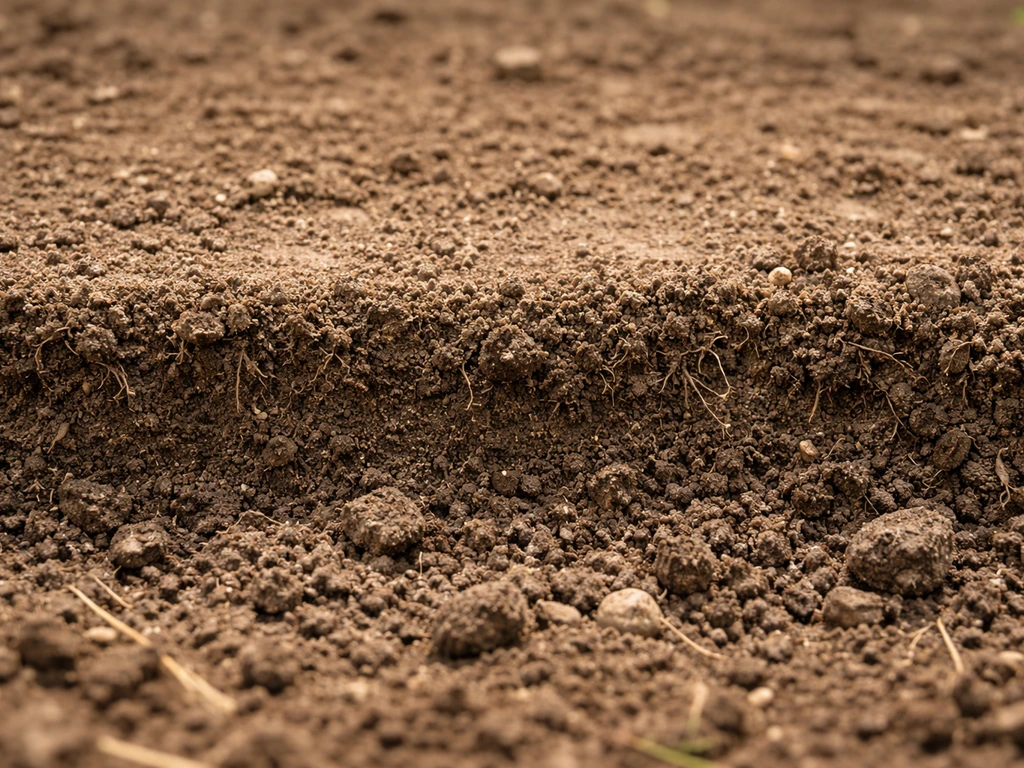
You do not need to till the entire plot deeply for a throw and grow setup, but you do need the top inch or two of soil to be loose and not bone-hard. If the ground is compacted, seeds will sit on the surface, dry out, and get eaten by birds. A single pass with a rake or a light drag is often enough. If you are working a patch that has never been disturbed, scratch up the surface with a garden fork or a hoe before broadcasting. That is your minimum soil prep.
For better results, take a soil sample to your county extension office before you plant. Missouri DOC is emphatic about this step: knowing your pH and nutrient levels lets you add lime or fertilizer exactly where needed rather than guessing. Most fast-growing greens and legumes do best in pH 6.0 to 7.0. If your soil is very acidic, lime applied 4 to 6 weeks before planting makes a real difference in germination and early growth.
Level-up tip: if you are planting peas or cowpeas, use a legume inoculant (a powdered or liquid Rhizobium product available at most garden centers). Coat the seed before broadcasting. This allows the roots to fix atmospheric nitrogen, improving yields significantly, especially in soils that have not grown legumes before.
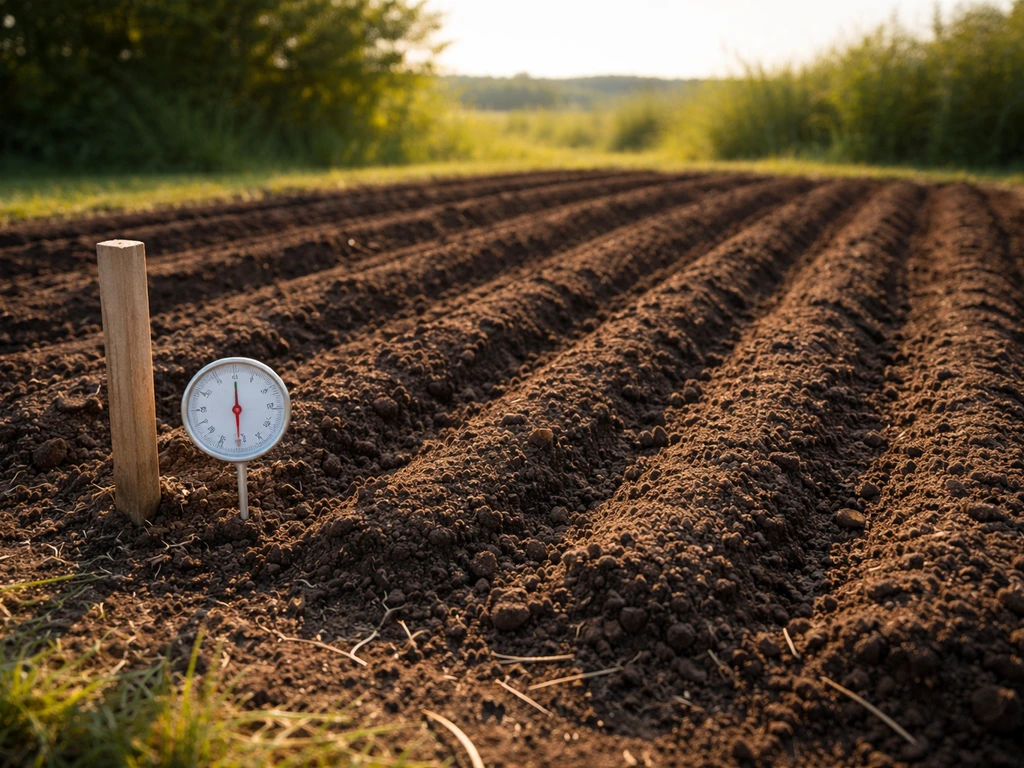
When to sow by season
Timing is where most throw and grow attempts succeed or fail. Each crop has a soil temperature window where it germinates reliably, and broadcasting outside that window wastes seed. Peas emerge best when soil is 55 to 65°F. Lettuce germinates across a wide range of 40 to 80°F soil temperature. Radishes and most cool-season brassicas prefer soil under 75°F. Cowpeas and warm-season legumes want soil above 65°F, ideally 70 to 85°F.
- Early spring (soil at 45–60°F): peas, leaf lettuce, radishes, spinach, mustard greens, oats
- Late spring through summer (soil at 65–85°F): cowpeas, buckwheat, summer forage blends
- Late summer to early fall (8–10 weeks before first frost): turnips, forage kale, radishes, overwintering greens
- Frost seeding (late winter into thawing soil): overseeding grasses and clovers using freeze-thaw cycles for soil contact, though stands are less uniform than spring seeding
Frost seeding is a real technique used for overseeding forages, but Wisconsin Extension is clear that it produces less uniform stands than drilling or conventional broadcast because seed-to-soil contact is inconsistent. For a food production plot, I would stick to spring or fall windows where you can actually firm the seed in after broadcasting.
Seed amount and broadcasting technique for even coverage
The single biggest beginner mistake is using too little seed. Because broadcast seed always has higher losses than drilled seed, you need to start with more. The standard guidance from OSU Extension is to double the recommended drill rate when broadcasting. For a practical example, cowpeas drilled at 50 lbs per acre should be broadcast at 75 to 100 lbs per acre. For small patches, convert to pounds per 1,000 square feet: divide the per-acre rate by 43.56.
For hand broadcasting, the most reliable technique is to divide your total seed into two halves. Walk the plot in one direction broadcasting the first half, then walk perpendicular and broadcast the second half. This cross-pattern gives you much more even coverage than a single pass. For anything larger than about 2,000 square feet, a hand-crank broadcast spreader or an ATV-mounted rotary spreader speeds things up and improves consistency.
On seeding depth: most food-plot grasses and legumes should be placed no deeper than 1/4 to 1/2 inch. Small-seeded greens like lettuce and radish want to be near the very surface, around 1/8 to 1/4 inch. You are not trying to bury the seed; you are trying to get it in contact with moist soil. Broadcasting followed by firming achieves that depth range naturally. For some seedings, PNW709 (Oregon State Extension catalog PDF) describes broadcast-and-cover seeding using a harrow or cultipacker, with grass seed placed about 1/2 inch deep or less Broadcasting followed by firming achieves that depth range naturally..
How to get germination: light covering, mulching, and watering
After broadcasting, your one job is getting seed into firm contact with moist soil and keeping it there until the roots take hold. Here is the sequence that works:
- Broadcast your seed at the correct rate using the two-pass cross-pattern method
- Rake lightly across the entire area to work seed into the top 1/8 to 1/4 inch of soil, covering most seeds without burying them
- Firm the surface by rolling with a lawn roller, driving over it with an ATV, walking with flat boards under your feet, or even pressing a piece of cardboard down by stepping on it in small areas; a cultipacker is ideal if you have access to one
- Apply a thin mulch layer of straw or fine wood chips no more than 1/4 inch thick if you are seeding in summer or into dry soil; skip heavy mulch in cool moist conditions
- Water gently but thoroughly immediately after planting, wetting the top 2 to 3 inches of soil without washing seed away; a fine mist setting on your hose nozzle works well for small areas
The firming step is the one people skip and then wonder why germination is poor. Seed sitting loose on the surface dries out between rain events and either fails to germinate or produces sprouts that die before they root. A cultipacker or even just rolling the area with a filled lawn roller presses seeds into firm contact with moist soil particles, which dramatically improves germination rates. It sounds like a small thing but it makes a big difference.
Keep the seedbed consistently moist until germination is complete. For radishes this means staying on top of watering for about 5 to 7 days. For peas, plan on 7 to 10 days. Utah State University Extension reports pea seedlings emerge in 7 to 10 days when planted in soil at 55 to 65°F For peas, plan on 7 to 10 days.. Lettuce typically sprouts in 7 to 14 days. If the surface crusts over before seedlings emerge (common in clay-heavy soils after rain), very gently break the crust with a light rake pass or your fingers. Crust is a germination killer for small-seeded crops.
After sprouting: weed control, thinning (or not), and protection from pests
Weeds: your biggest competition after germination

Weed competition is the number one cause of broadcast stand failure after germination. When you disturb soil and add moisture, weed seeds germinate right alongside your crop. Your planted crop has a head start if you seeded at the right rate and got good germination, but a thick flush of annual weeds can outcompete slower-establishing plants quickly.
For small food plots, hand weeding in the first few weeks is the most practical option. Focus on removing weeds before they flower or set seed. For larger plots, a post-emergent herbicide labeled for your specific crop can knock back weeds without harming the established stand, but read labels carefully since most herbicides are species-specific. Mississippi DWF&P notes that post-emergent herbicides must contact actively growing foliage to work, so apply them on a calm, dry day when weeds are growing fast.
A practical low-chemical approach: mow or weed-whack the plot to the height of your crop about 2 to 3 weeks after emergence if weeds are getting out of control. This tops the weeds without damaging most low-growing food crops. Thick broadcasting (slightly higher seed rates) naturally crowds out weeds through canopy closure as plants mature, which is one of the real advantages of the throw and grow density.
Thinning: when it helps and when to skip it
For forage-type crops like clovers, cowpeas grown for bulk biomass, or oat/rye blends, thinning is not necessary. Let them grow thick. For food production crops where individual plant size matters, such as radishes, turnips, or head-type lettuce, thinning to 2 to 4 inches between plants lets each root or head develop properly. Radishes left crowded will grow all top and no root. If you are growing greens just for leaf harvest, thick stands are actually fine and give you more cut-and-come-again material.
Pest and bird pressure
Birds are the enemy in the first week after broadcast seeding. They can take out a shocking percentage of surface-lying seed before it germinates. The firming and light covering steps reduce this significantly because seeds are no longer visible on the surface. For small plots, lightweight row cover fabric laid directly on the surface immediately after seeding protects from birds and also retains moisture and moderates temperature, improving germination rates on multiple fronts. Remove it once seedlings are a few inches tall.
Deer and rabbits can hammer young seedlings, especially in the first 2 to 4 weeks. If pressure is high in your area, temporary fencing or chicken wire hoops over new plantings buys time until plants get established and can handle some browsing. On a larger scale food plot, acceptable browse pressure depends on your purpose: if you are growing food for yourself, protect the stand; if you are growing food to attract wildlife to your property, moderate browse early on is part of the plan. If you are aiming for the best throw and grow food plot for deer, plan your crop mix and timing around browse pressure during establishment food to attract wildlife.
Harvest plan and succession planting for steady food output
One throw and grow planting will produce a single harvest window unless you plan for succession. The best approach for continuous production is to sow new seed every 2 to 3 weeks for quick-maturing crops like radishes and salad greens. WVU Extension specifically recommends succession planting at roughly 2-week intervals for radishes and fast greens to maintain a steady supply rather than getting everything at once. Missouri Extension's approach is the same: re-seed when you harvest, if temperatures still permit.
For a practical harvest and succession plan by crop type:
- Radishes and fast greens: harvest at 25–35 days, re-seed that section immediately; 3 to 4 rounds possible in a single spring or fall season
- Leaf lettuce: begin harvesting outer leaves at 35–40 days, leaving the center; continue cut-and-come-again for 4 to 6 more weeks before re-seeding
- Peas: pick pods continuously over 2 to 3 weeks once first pods set; pull plants when production drops and follow with a warm-season crop like cowpeas
- Cowpeas: harvest at 50–90 days depending on variety; let some pods dry fully on the plant for saved seed or dry bean storage
- Turnips and forage kale: harvest leaves through the season and roots after first frost sweetens them; these hold in the ground for weeks as a standing storage crop
Scaling up is straightforward with the throw and grow method because you are not dependent on equipment. Start with a 500 to 1,000 square foot test patch to learn your specific soil and microclimate, then expand to a quarter acre or more once you know which crops establish reliably in your conditions. To go after the best food plots to grow big bucks, focus on quick, repeatable greens and legumes that you can keep producing through succession. A quarter acre plot at broadcast rates requires roughly 5 to 25 lbs of seed depending on species, which keeps startup costs low.
Your starter checklist before you throw a single seed
- Choose a site with at least 6 hours of direct sun and accessible water for the first 2 weeks
- Take a soil sample and get pH and nutrient results; add lime 4 to 6 weeks early if needed
- Pick 1 to 2 crops appropriate to your current season and soil temperature (see table above)
- Calculate your seed rate: use double the drill rate, then convert to lbs per 1,000 sq ft
- Lightly rake or disturb the soil surface so it is loose in the top inch or two
- Broadcast seed in a two-pass cross-pattern for even coverage
- Rake lightly to cover seed 1/8 to 1/4 inch, then firm the surface by rolling or pressing
- Apply a thin straw mulch (no more than 1/4 inch) if seeding in hot or dry conditions
- Water gently to wet the top 2 to 3 inches; keep consistently moist until germination
- Plan your succession sow dates before you even plant the first round
Recommended starter crops by climate
| Climate/Region | Spring Sow | Summer Sow | Fall Sow |
|---|---|---|---|
| Cool climates (zones 3–5) | Peas, leaf lettuce, radishes, oats | Buckwheat, cowpeas (short season), summer greens | Turnips, forage kale, spinach, winter rye |
| Moderate climates (zones 6–7) | Peas, radishes, mustard greens, lettuce | Cowpeas, buckwheat, summer forage blends | Turnips, kale, radishes, clovers |
| Warm/hot climates (zones 8–10) | Cowpeas, radishes, Southern peas | Cowpeas, warm-season forage mix, summer squash greens | Radishes, mustard greens, brassicas, clover overseeding |
The throw and grow method works because it removes the barriers that stop most people from planting at all. You do not need a tractor, a drill seeder, or a perfectly prepared bed. You need the right crop for the season, enough seed, a firm seedbed surface, and consistent moisture for the first couple of weeks. Get those four things right and you will have food in the ground and growing faster than almost any other method. Yes, throw and grow food plots can work, especially when you match the crop to your setup and focus on firming the seed into moist soil. Start small, learn what works in your specific soil and climate, and scale from there. If you want to judge how well this approach performs in real life, it helps to read throw and grow food plots reviews from people who have already planted their own plots.
FAQ
What should I do if it rains right after I broadcast the seed?
After broadcasting, you mainly want the seed to stay in place long enough to germinate. If you get a heavy rain within a day or two, check for a crust or a washout of the seed bed. On small plots, gently rake or loosen only the surface crust (don’t dig deeper), then roll lightly again if the soil is still not firmed. If seeds look covered by thick mud or are floating in runoff areas, reseeding that section is usually better than waiting.
Can I throw and grow again if my stand looks thin?
Yes, but do it carefully. Rebroadcasting is most reliable when the seed is still visible or only lightly covered, because you can still firm it in. If you already see sprouts, avoid another pass unless you can do it very lightly and you will not bury the seedlings. A good approach is to wait 7 to 14 days, then spot-check germination and only replant the weak sections.
How do I decide how much to increase seeding rate beyond the “double drill rate” guideline?
The seeding-rate doubling is about replacing losses from surface seed, but you still need a realistic target for your crop. If your ground has extremely poor seed-to-soil contact (hard pan, lots of thatch, or sandy areas drying fast), go a bit higher than the “double drill rate” and plan on firming with a roller. If the surface is already loose and moist, doubling may be more than you need, so you can stick closer to the standard rate to avoid extra weeds and wasted seed.
Can I mix any seeds together in one throw-and-grow blend?
Broadleaf greens and legumes are not automatically interchangeable. For example, mustard greens and radishes can behave like quick, cool-season plants, but the same mix can fail if you hit the wrong temperature window or shade conditions. If your goal is fast harvest, choose 1 to 2 proven crops for that season first, then add small amounts of secondary crops once you know what establishes in your soil.
When should I fertilize for a throw and grow food plot, before or after germination?
Spreading fertilizer at the wrong time can harm germination. For small-seeded crops, it is safer to focus on soil-test-based amendments before planting, then keep additional top-dress fertilizer minimal until seedlings are established. If you must add nutrients, use rates and timing that match the crop label and soil test, and avoid applying concentrated fertilizer directly where seed is sitting loose.
What if I plant outside the recommended soil temperature range?
If you miss the ideal soil temperature window, you can still try, but adjust expectations. In general, use the crop’s germination temperature range as your guide, then avoid planting when the soil is far too cold or far too hot for that species. If temps are borderline, row cover can help buffer early temperature swings, but it will not fix a major mismatch between crop and soil heat.
Is throw and grow reliable on all soil types, like clay-heavy or sandy soil?
Not consistently. Broadcast seeding relies on firming and even moisture, so the key test is whether you can create seed-to-soil contact on your specific surface. If you cannot firm the surface (for example, very soft mud that won’t press), you often get poor germination. In very sandy ground, you may need extra moisture monitoring so the seed does not dry before roots establish.
Do I always need to thin after broadcast seeding?
Yes, if the seed is small-seeded and your goal is leafy harvest or quick forage. But if you want full-size root development (for example radish roots or turnip bulbs) you usually need enough spacing, which is harder with broadcast density. For food crops where size matters, consider using lighter broadcast density plus careful thinning later, or accept that you will harvest greens instead of large storage roots.
How long should I leave row cover on my throw and grow plot?
Row cover works best immediately after seeding, especially for bird pressure and to reduce moisture loss. Put it down so it contacts the ground or is snug enough that birds cannot access the seed, then secure the edges. Remove when seedlings are a few inches tall so they can access light and so humidity does not encourage damping-off in overly wet conditions.
If I’m not thinning, how do I prevent weeds from taking over?
Thinning is optional for forage-type crops, but weed management still matters. If you plan to harvest leaves, weeds can reduce yield even when the canopy closes. The practical edge is timing: weed or mow early, before weeds flower or set seed, and avoid letting a thick weed stand create competition during the first few weeks.
How do I set up succession planting if weather shifts my harvest date?
For continuous production, the safest plan is succession by crop speed, not by calendar date alone. Track actual harvest timing, then re-seed when you harvest and when temperatures still sit inside the crop’s germination range. If it gets too warm or too cold, switch to a crop that fits the new window (cool-season greens vs warm-season legumes).
What is the best way to protect a new broadcast stand from birds versus deer and rabbits?
For bird pressure, firming is the foundation, but temporary fencing adds a strong layer of protection. On small plots, lightweight row cover often solves early bird loss effectively, while chicken wire or hoops are better when deer, rabbits, or both are also active. If your main issue is birds and you already rolled the seedbed, focus on faster cover and quicker setup rather than adding more seed alone.
How can I tell if a poor stand is from seed loss or from uneven spreading?
If your broadcast spread looks uneven, change the method before you change the seed. Use a cross-pattern for hand broadcasting, and for spreaders calibrate by running a small test area, then adjust opening size. Also avoid broadcasting when wind is high, because drift can mimic “bad germination” later when seeds land outside the plot.
How do I know my watering plan is right until germination?
The most common “throw and grow fail” is not just drought, it is drying of the seedbed between rain events. Use the surface as your guide: if it crusts and cracks quickly, or if the top inch is dry while deeper soil is moist, you likely need short, consistent watering until germination is complete. After seedlings emerge, you can reduce frequency, but keep an eye on heat and crusting.
Next Article
Does Throw and Grow Food Plot Work? Test and Fix Guide
Find out if throw and grow food plots work at home, what fails, and step-by-step fixes for better germination and harves