You can run a productive home cricket farm with a few plastic storage bins, a heat source, some screen mesh, and a consistent routine. If you’re figuring out how to grow a farm at home, start by setting up breeding and grow-out bins with stable heat, humidity, and good biosecurity. Start with Acheta domesticus (the house cricket), keep your bins at 86–90°F, maintain humidity around 60–70%, gut-load your crickets for 24–72 hours before harvest, and pull egg cups every 2–4 days to control your breeding cycle. Done right, a small four-bin setup can produce a continuous supply of edible crickets within about 6–8 weeks of your first hatch.
How to Grow a Cricket Farm: A Step-by-Step Guide

Marcus Hendrick
6 Jun 2026
Pick a cricket species and decide your production goal
For beginners, Acheta domesticus is the right choice. It is the standard feeder and edible cricket used worldwide, it is easy to source, and there is more practical husbandry information available for it than for any other species. The tropical house cricket, Gryllodes sigillatus, is a legitimate alternative: it is quieter, slightly more heat-tolerant, and takes about 2 to 2.5 months to develop from egg to adult. But sourcing quality breeding stock is harder, and the learning curve is steeper. Stick with Acheta domesticus for your first farm.
Before you buy your first batch, decide what you are actually trying to produce. A small personal-use farm aimed at supplementing your diet or feeding livestock (chickens, fish, reptiles) needs a very different scale than a farm meant to supply 50+ grams of protein per week. A realistic beginner target: four tubs (two breeding, two grow-out), which can yield roughly 200–500 adult crickets per harvest cycle once the colony stabilizes. That is enough to experiment with flour, roasting, or whole dried crickets without overwhelming your space or budget.
Source your starter colony from a reputable supplier, not a bait shop or a pet store's feeder bin. You want a clean, disease-free population. Buy at least 250–500 mixed-age crickets to start, including a good proportion of adults. Never mix batches from different suppliers once your colony is established. This is the single most important biosecurity rule you will follow, and I will explain why in the troubleshooting section.
Starter setup: enclosures, heat, humidity, and ventilation
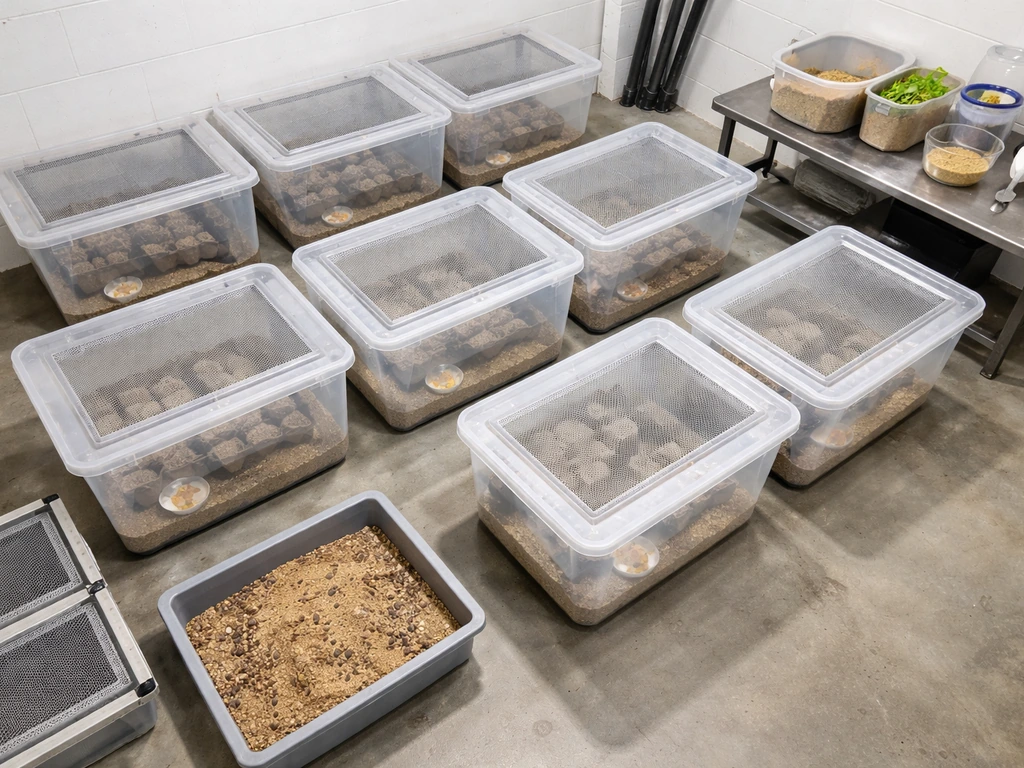
The bins themselves
Use 18- to 27-gallon plastic storage totes. Cut large panels out of the lids and replace them with fine hardware-cloth mesh or aluminum window screen. This mesh lid is non-negotiable: it provides ventilation while keeping crickets inside. Crickets are escape artists, and a single loose adult in your house will remind you of that at 2 a.m. Smooth-sided totes are better than textured ones because crickets cannot grip the walls and climb out as easily. For each bin, add egg-crate foam panels or cardboard toilet-paper tubes vertically inside to give crickets surface area to rest on: they do not do well in open-floor bins because they will pile up and cannibalize each other.
Temperature
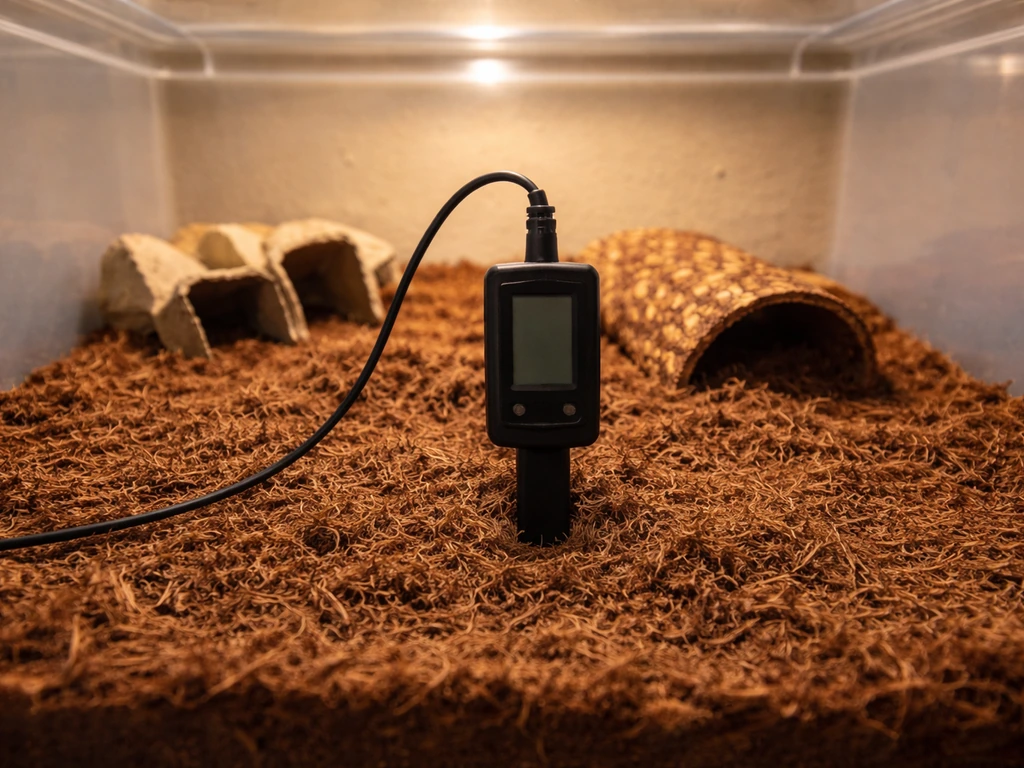
The sweet spot for Acheta domesticus is 86–90°F (30–32°C). At this range, females can lay roughly 15–30 eggs per day, nymphs develop at their fastest rate, and feed conversion is most efficient. Above 92°F, egg production drops significantly. Below about 75°F, growth slows noticeably and the colony becomes lethargic. Use a ceramic heat emitter, a reptile radiant heat panel, or a small space heater on a thermostat to keep your enclosure in range. If ambient temps drop at night, a heat mat placed under one side of the bin (not inside it) can prevent cold spots without overheating. Check temperature daily with a digital thermometer probe placed at cricket level, not at lid level.
Humidity and ventilation
Target 55–70% relative humidity for grow-out bins and 60–75% for breeding bins. Too dry and eggs desiccate; too wet and you get mold, bacterial growth, and ammonia buildup from frass and wet feed. The mesh lid panels are your primary humidity and ventilation tool. If your grow room is very dry, a light daily misting of one corner of the bin interior (not the food or frass area) can bring humidity up without soaking everything.
If your space is too humid, increase mesh panel size or add a small fan nearby to improve air exchange. Good ventilation alone can cut ammonia and odor by roughly 70%, which matters a lot if you are running this farm indoors or in a garage.
Light
Crickets do not need special lighting, but a consistent 12–14 hour light/dark cycle helps regulate activity and breeding behavior. A simple lamp on a timer is enough. Avoid exposing bins to direct sunlight, which can overheat plastic totes quickly.
Feeding, gut-loading, and safe watering
Day-to-day feeding
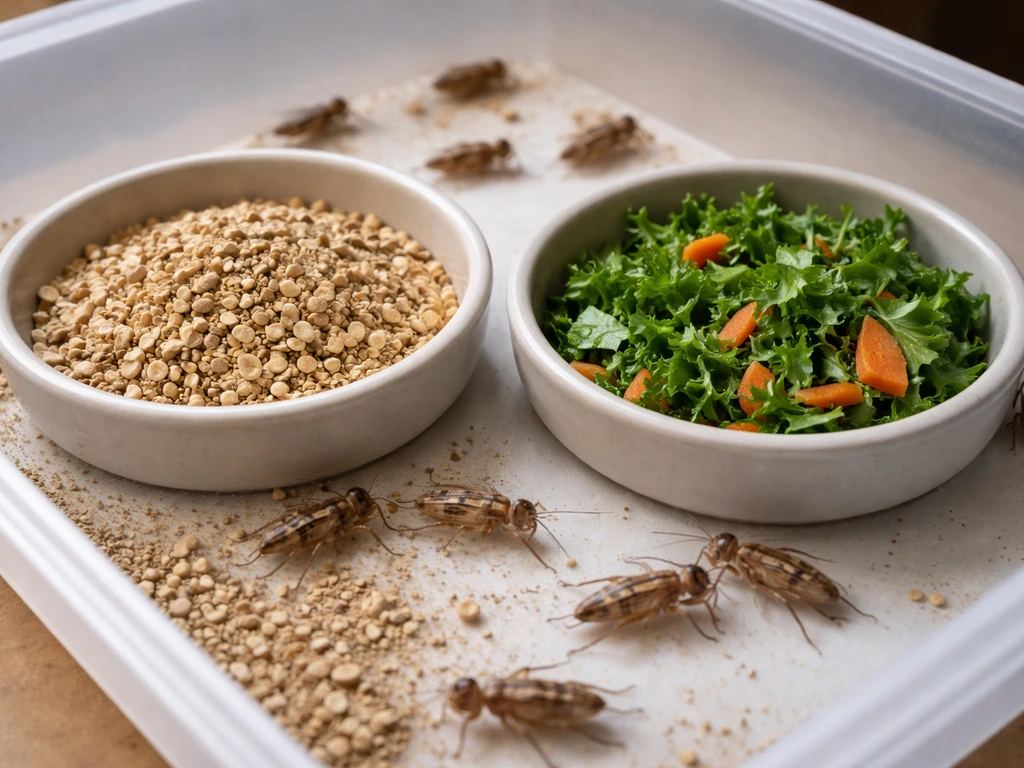
Crickets are omnivores and not picky. A base diet of dry poultry mash, oat bran, or commercial cricket food keeps them healthy for grow-out. Add vegetable scraps (leafy greens, squash, carrots) for variety and additional nutrients. Keep dry feed available at all times in a shallow dish. Remove uneaten wet food within 12–24 hours because it molds fast and is a primary driver of ammonia problems and bacterial infection in the bin.
Gut-loading before harvest
Gut-loading means feeding your crickets a nutrient-dense diet for 24–72 hours before you harvest them, so that the contents of their digestive tract pass those nutrients to whoever (or whatever) eats them. If you also want to dust your feeder insects with FoxFarm Grow Big, follow the label rates and only use it on the gut-loading schedule you already run.
For human consumption or for feeding to animals, load your crickets with a high-calcium diet: commercial gut-load formulas like Mazuri Hi Calcium Gut Loading Meal work well and are fed free-choice for 24–72 hours. For human consumption specifically, you want a gut-load with more than 8% calcium on a dry-matter basis. Add leafy greens, sweet potato, or carrot alongside the dry gut-load.
Effectiveness also depends on keeping the crickets warm and active during gut-loading so they actually eat, so do not cut the heat during this phase.
Watering safely
Open water dishes kill crickets: they climb in and drown. Use water gel crystals (sold as cricket water, available at most pet stores) in a shallow dish, or cut fresh vegetables like orange slices or cucumber as a water source. Replace water gel and fresh produce daily or every other day. This keeps hydration available without creating a drowning hazard or adding excessive moisture to the bin.
Breeding cycle: mating, egg care, hatch, and raising nymphs
Setting up the breeding bin
Your breeding bin holds adult males and females at a roughly 1:2 or 1:3 male-to-female ratio. Keep this bin at the top of your temperature range, 88–90°F, to maximize egg output. Provide plenty of egg-crate hide material so females are not stressed by overcrowding. Crowding and stress are leading causes of poor egg output and cannibalism.
The egg cup method
Place a shallow cup or dish (about 2–3 inches deep) filled with moist coconut fiber, peat-free soil, or vermiculite into the breeding bin. Females will use this as their oviposition (egg-laying) site. Cover the top of the cup with a piece of fine mesh: this lets females insert their ovipositors to lay eggs but prevents them from digging up or eating the eggs afterward. Leave the cup in the bin for 2–4 days, then remove it entirely and move it to a dedicated incubation tub. Replace it with a fresh moist cup immediately so laying continues uninterrupted. Do not leave egg cups in the breeding bin longer than 4 days or adults will find ways to damage the eggs.
Incubating eggs
In your incubation tub, maintain 86–90°F and around 70% relative humidity. The coconut fiber substrate in the egg cup should stay moist but not wet: if you squeeze a handful and more than a drop of water comes out, it is too wet. At these conditions, eggs begin hatching in roughly 12–15 days. A well-managed incubation can achieve 80% or better hatch rates. If humidity drops and the substrate dries out, hatch rates crash. Check the egg cup moisture daily and add a few drops of water if needed. Discard any egg cups that show mold or that have passed 20 days without hatching: do not let failed cups sit in the incubation tub.
Raising nymphs
Once eggs hatch, the tiny first-instar nymphs (called pinheads) need warmth and fine food they can eat. Move the hatched nymphs into a grow-out tub and feed them finely ground dry food: powdered oat flour or finely crushed commercial cricket food works. They need the same temperature range as adults. Provide pieces of egg crate or cardboard for hiding. Keep nymphs separated from adults because adults will eat them. From hatch to adult, Acheta domesticus takes roughly 5–8 weeks at 88°F, faster at the high end of temperature and slower if temps drop.
Harvesting, separating life stages, and scaling production
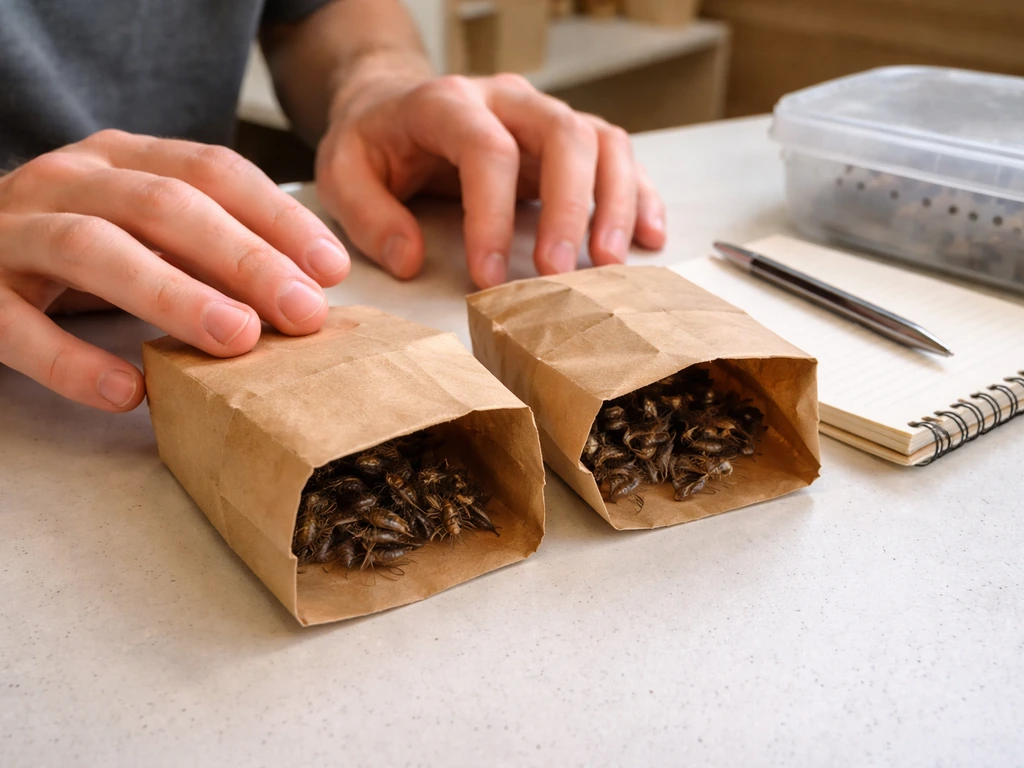
Harvesting without crashing your colony
Never harvest from your breeding bin. Keep those adults working. Harvest only from grow-out bins when crickets reach your target size, typically at adult or late-instar nymph stage. The simplest harvest method: refrigerate the grow-out bin for 15–20 minutes. The cold immobilizes crickets, making them easy to collect without a frantic chase. Pull what you need, then return the remaining crickets to a warm bin. Before eating, freeze harvested crickets for at least 24–48 hours (this kills them humanely and also acts as a safety step), then blanch or boil in water for about 15 minutes at 100°C. Dry or roast after that depending on your intended use.
Separating life stages
A sustainable farm runs at least three parallel bin types: one breeding bin, one or two grow-out bins with different-age nymph cohorts, and an incubation area. Keeping life stages separate prevents adults from eating nymphs, reduces stress in the breeding population, and lets you track where each cohort is in the development cycle. Label bins with the date egg cups were added so you always know how old each cohort is.
Scaling up
Once your system is stable, scaling is mostly a matter of adding bins and managing more egg cups. Each additional breeding bin you add multiplies your egg output proportionally, as long as your heat source can keep all bins in range. A useful way to think about yield: at 88°F, a healthy breeding bin of 200 females can produce 3,000–6,000 eggs over a two-week period.
Once you dial in warmth, breeding density, and gut-loading, you can estimate how much “grow big” output to expect from your setup over the next harvest cycles 200 females. At an 80% hatch rate, that is 2,400–4,800 nymphs per cycle. Not all will survive to harvest, but even at 60% survival to harvestable size you are looking at 1,400–2,900 crickets per cycle per breeding bin. That scales fast.
The main limiting factors are heat capacity, space, feed costs, and the time you spend on daily husbandry.
Troubleshooting and farm hygiene
The biggest threat: Acheta domesticus densovirus
This is the reason you only buy from one clean source and never mix batches. Acheta domesticus densovirus (AdDNV) can kill 95% or more of a colony within 10 days of the first visible die-off. By the time you see a lot of dead crickets, the virus is usually already through the whole bin. If you notice sudden mass die-offs, quarantine remaining crickets, disinfect everything with diluted bleach, and start a new colony from a fresh source. There is no treatment. Prevention, specifically not introducing infected insects, is everything.
Mites
Mites are a sign of too much moisture and too much organic buildup. You will see them as tiny white or tan dots moving around the bin floor or on the crickets themselves. Fix moisture first: reduce humidity, replace wet substrate, and increase ventilation. Do a full bin cleanout: move all crickets to a clean bin, discard all substrate, scrub the old bin with diluted bleach, rinse, and dry completely before reuse. Adding a clean layer of dry substrate and removing uneaten food daily prevents recurrence.
Mold
Mold shows up on uneaten wet food and sometimes on frass in humid bins. Remove any moldy feed immediately. Improve ventilation. Make sure you are not overfeeding wet vegetables: offer only what will be eaten within 12–24 hours. If mold appears on the egg cup substrate, that cup is compromised: discard it and do not try to salvage the eggs.
Escapes
Check your mesh lid seals every time you open a bin. A small gap is all it takes. Keep bins elevated on a smooth surface or place the legs in small containers of soapy water (a moat system) as a secondary barrier. Smooth-sided totes and a petrolatum (Vaseline) band around the top interior of the bin also stop climbing.
Slow growth and low hatch rates
Slow growth almost always comes back to temperature being too low. Verify your actual bin temperature at cricket level, not just the room temperature. Low hatch rates are usually caused by one or more of the following: temperature below 86°F during incubation, egg substrate drying out, a poor male-to-female ratio leading to unfertilized eggs, breeders that are too old or too stressed, or fungal contamination of the laying substrate. Work through that list systematically rather than guessing.
Cannibalism
Crickets will eat each other when they are overcrowded, underfed, or lacking protein and moisture. Make sure dry feed is always available, water gel is fresh, and bins are not overpopulated. Adding more egg-crate surface area is an underrated fix: crickets that have somewhere to perch and hide are much less likely to attack each other.
Daily and weekly hygiene routine
- Daily: remove dead crickets, replace or refresh water gel, remove uneaten wet food.
- Every 2–4 days: swap out egg cups in the breeding bin, check incubation tub moisture.
- Weekly: spot-clean frass buildup from bin floors and inspect all bins for mold, mites, or unusual die-offs.
- Every 4–6 weeks: full bin cleanout for grow-out bins between cohorts — scrub, rinse, dry.
Budget, yield planning, and a simple starter timeline
Rough startup costs
| Item | Estimated Cost | Notes |
|---|---|---|
| 2–4 plastic storage totes (18–27 gal) | $20–$50 | Look for smooth-sided bins |
| Hardware cloth or aluminum mesh | $10–$20 | For custom lids |
| Heat source (ceramic emitter or panel + thermostat) | $30–$60 | Thermostat is essential for consistency |
| Digital thermometer/hygrometer | $10–$20 | Need one per zone |
| Starter cricket colony (500 mixed-age) | $20–$40 | From reputable insect supplier |
| Initial feed (poultry mash, gut-load formula) | $15–$30 | Covers first 4–6 weeks |
| Egg crate foam panels | $10–$15 | For hiding and surface area |
| Coco coir or vermiculite (for egg cups) | $8–$15 | Small bag lasts months |
| Water gel crystals | $5–$10 | |
| Total estimated startup | $128–$260 |
Ongoing monthly costs
At small-farm scale (four bins), expect to spend roughly $15–$30 per month on feed, water gel, and electricity for the heat source. A well-run colony is largely self-sustaining on feed once established. The math works in your favor: 500 adult crickets provide roughly 50–75 grams of dry protein when processed, and commercial edible cricket powder runs $20–$40 per 100 grams. Even at the smallest scale, home production costs a fraction of buying processed cricket products.
Week-by-week starter timeline
- Week 1: Build and test your bins. Get temperature stable at 86–90°F for 48 hours before adding any crickets. Order your starter colony.
- Week 2: Receive crickets. Separate adults into the breeding bin. Place first egg cup. Set up grow-out bin for any nymphs included in your starter order.
- Weeks 2–4: Swap egg cups every 2–4 days. Move egg cups to incubation tub. Maintain temperature and humidity. Feed and water daily.
- Weeks 3–4: First eggs begin hatching (12–15 days after incubation). Transfer pinhead nymphs to grow-out bin.
- Weeks 5–8: Nymphs grow through instars toward adult size. Continue breeding-bin egg cup rotation. Begin gut-loading the oldest nymph cohort 2–3 days before your planned first harvest.
- Week 6–8: First harvest from grow-out bin. Refrigerate to immobilize, collect, freeze, then cook (boil 15 minutes at 100°C, then dry or roast).
- Ongoing: Maintain rolling cohorts. Retire breeder adults at 4–6 weeks of adult life and replace with grown-out crickets from your own stock.
If you are already exploring other aspects of home food production, the principles here overlap more than you might expect with growing insects for food more broadly: controlled environment, consistent nutrition, and disciplined hygiene drive results in every case. An Oxford Academic Journal of Economic Entomology study on mass-reared Gryllodes sigillatus reports growth and life-history parameters under controlled conditions, aligning with the idea that tailoring environmental and husbandry variables can optimize production for a grow-out plan.
If you are wondering how to grow insects for food beyond crickets, the same basics of temperature control, nutrition, and sanitation apply. If you are aiming for top grow agro outcomes, keep your environment consistent and treat husbandry details like a production system growing insects for food. A grow good farm approach also means planning your inputs and daily routine so your cricket colony stays healthy and productive.
Cricket farming fits naturally alongside a broader self-sufficiency setup, whether you are raising chickens, growing a kitchen garden, or looking at other alternative protein sources.
The most important thing to do right now is get your heat source running and stable before you order any crickets. Temperature control is the foundation everything else is built on, and it is far easier to troubleshoot an empty bin than one full of livestock. Get that dialed in first, then bring your colony home. If you are wondering what Kingman Farms grows, this type of indoor cricket setup is one common approach for producing edible crickets at home what do they grow at kingman farms.
FAQ
How do I confirm my bin temperature is correct, not just the room temperature?
If you are using multiple bins, keep a single thermometer probe and verify temperature at the same “cricket level” each time you check. A heater that warms the room but not the bin floor can still lead to cold incubation nights, slow nymph growth, and reduced hatch rates.
Should I set up grow-out bins before I start breeding egg cups?
Do not start breeding until your grow-out bins are ready to receive pinheads. The biggest mismatch at beginner scale is having a breeding setup that produces eggs faster than you can separate and feed nymph cohorts.
How long should I gut-load crickets, and does temperature affect results?
Gut-load for feeders is about timing, keep dry gut-load and fresh calcium sources available during the 24 to 72 hour window, and avoid skipping heat during this phase because crickets will eat less when they are cold.
What should I do if I notice pests near the cricket bins?
If you see ants, roaches, or other pests, treat them as a biosecurity breach rather than a nuisance. Clean the room, remove spills and standing water gel, and quarantine the cricket bin area before adding more bin material or feed.
What is the best way to quarantine a failing colony quickly?
For small bins, build a “break glass” plan: prepare a clean tote with fresh, dry substrate and a working heat source. If you have to disinfect after die-off, you want an immediate place for survivors so you do not keep stressing them through repeated moves.
Do I need special lighting for cricket farming?
A light mismatch can be fine, but consistency matters. Use a simple timer and avoid frequent on off changes, sudden nighttime brightness can increase activity but does not replace proper heat and humidity for breeding.
My egg cups are not hatching. What checks should I do first?
If eggs do not hatch, start by checking incubation moisture by the “squeeze test” (the substrate should be moist without dripping). Then confirm incubation temperature during the last 7 to 10 days, because both drying and cold swings commonly collapse hatch rate.
Can I reuse or salvage an egg cup if it gets moldy?
Remove mold immediately and avoid trying to salvage eggs from compromised egg cups. If mold appears on the cup substrate, discard that cup and prevent overwatering next time, reducing wet vegetable offerings is often enough to stop recurrence.
How can I improve egg output if my breeding bin seems stressed or low-yield?
Keep breeders warmer within the allowed range and avoid sudden drops. Too much heat can reduce laying, but the bigger practical issue is stress from overcrowding, so increase egg-laying surface material and keep the male to female ratio as planned.
If my nymphs are growing slowly, what husbandry change helps most besides raising the temperature?
For grow-out, the usual “slow” sign is often inadequate perch and hiding area, not only temperature. Add egg crate or cardboard vertical pieces, and make sure dry feed is always present so protein shortage does not trigger cannibalism.
What is the safest way to pause or reduce cricket production without crashing the colony?
If you need to pause production, freeze harvested crickets for food later as usual, but do not leave breeding eggs or nymph cohorts without heat. Cold slows development and can increase stress, plan short-term slowdowns by reducing egg cup frequency rather than letting incubation run cold.
Next Article
How Much Fox Farm Grow Big Per Gallon to Mix
Exact FoxFarm Grow Big mix per gallon, scaling tips, expected results, cost planning, and troubleshooting for healthy gr