The easiest way to start growing insects for food at home is to pick one beginner-friendly species, set up a simple plastic bin with the right temperature and moisture, feed them kitchen scraps or bran, and harvest on a rotating schedule every few weeks. Mealworms are the most forgiving starting point. Black soldier fly larvae (BSFL) are the best choice if you want to process food waste at scale. Crickets sit in the middle: productive, but a bit noisier and more demanding. You don't need a lot of space, special equipment, or much money to get started, but you do need a system.
How to Grow Insects for Food at Home Step by Step

Marcus Hendrick
13 May 2026
Best insects for beginners (and where they actually fit at home)
There are three species worth your time as a beginner, and they each suit a slightly different situation.
| Species | Difficulty | Space needed | Best for | Noise/smell |
|---|---|---|---|---|
| Mealworms (Tenebrio molitor) | Easiest | Small shelf, a few plastic bins | High-protein flour, first-time growers | Minimal |
| Black soldier fly larvae (Hermetia illucens) | Easy-medium | Outdoor bin or garage | Waste processing, high-fat larvae | Low to moderate |
| House crickets (Acheta domesticus) | Medium | Ventilated enclosure, warm room | Whole-insect protein, flour | Chirping can be loud |
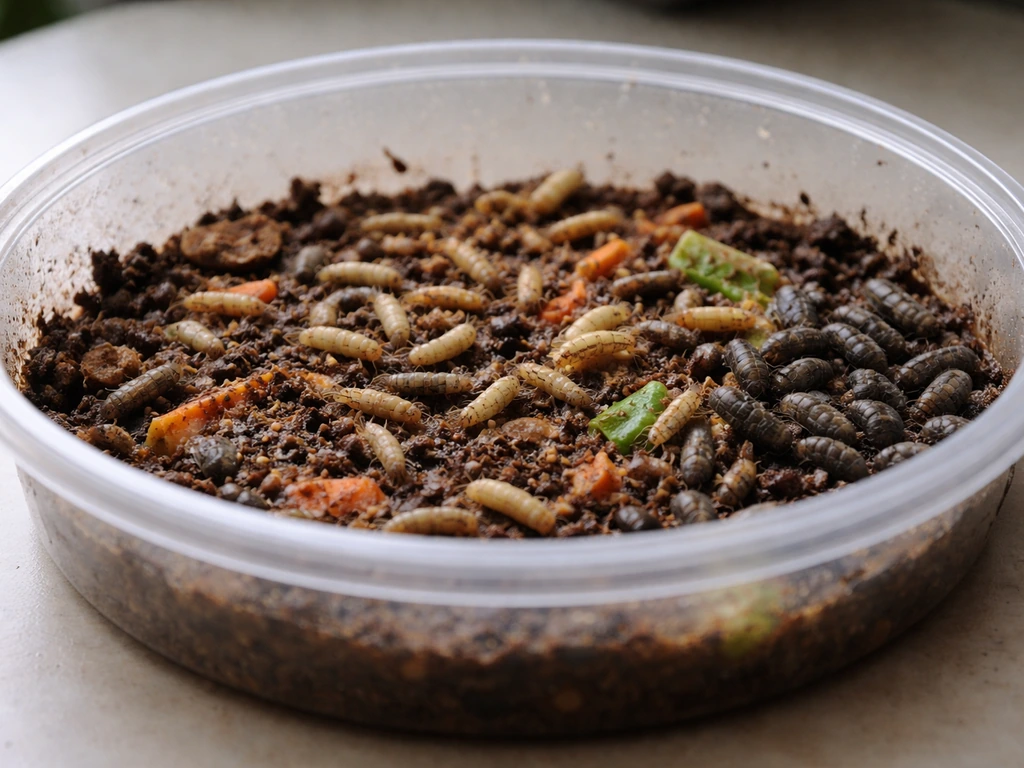
Mealworms are the yellow larvae of the darkling beetle. They live in dry grain substrate, tolerate some temperature variation, and are nearly odorless if you keep their bin clean. A single setup on a spare shelf can quietly produce hundreds of grams of larvae every month. If you're brand new to all of this, start here.
Crickets are more nutritious per gram in some measures and are the most widely consumed insect globally, but they need warmth, ventilation, and they will chirp all night. Black soldier fly larvae are incredible composters that convert food waste into rich, fatty larvae at impressive speed. They thrive outdoors in warm climates but can be maintained indoors with a bit more management.
If you're on a homestead and already thinking about how to grow a farm's worth of food, BSFL are worth learning.
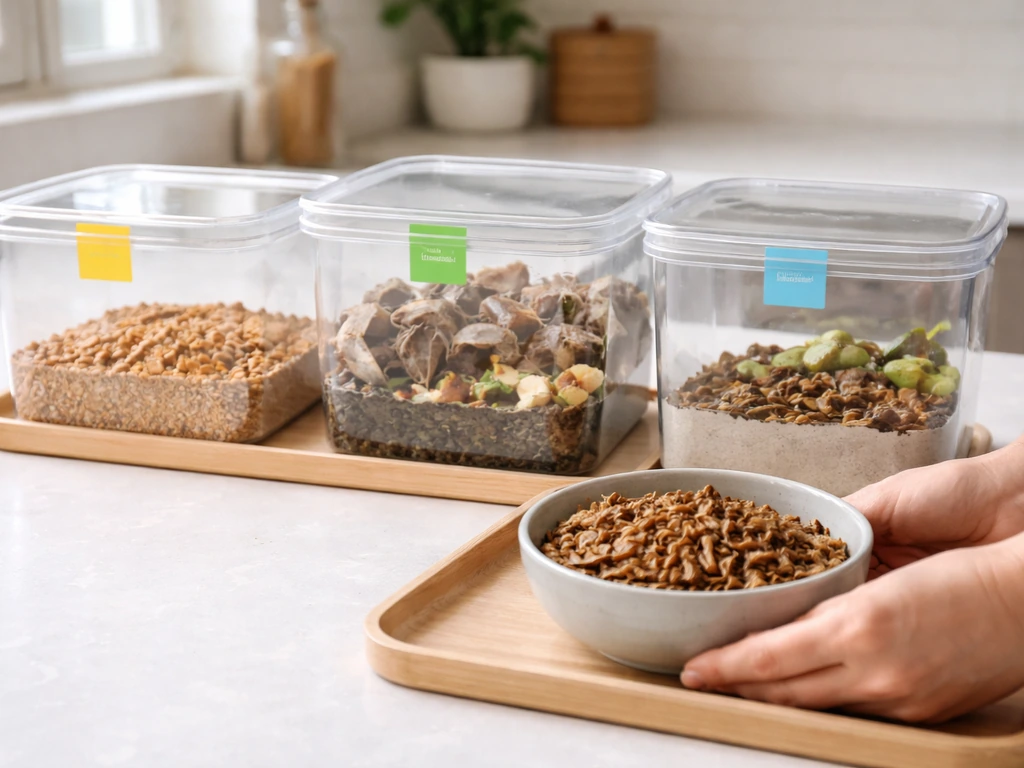
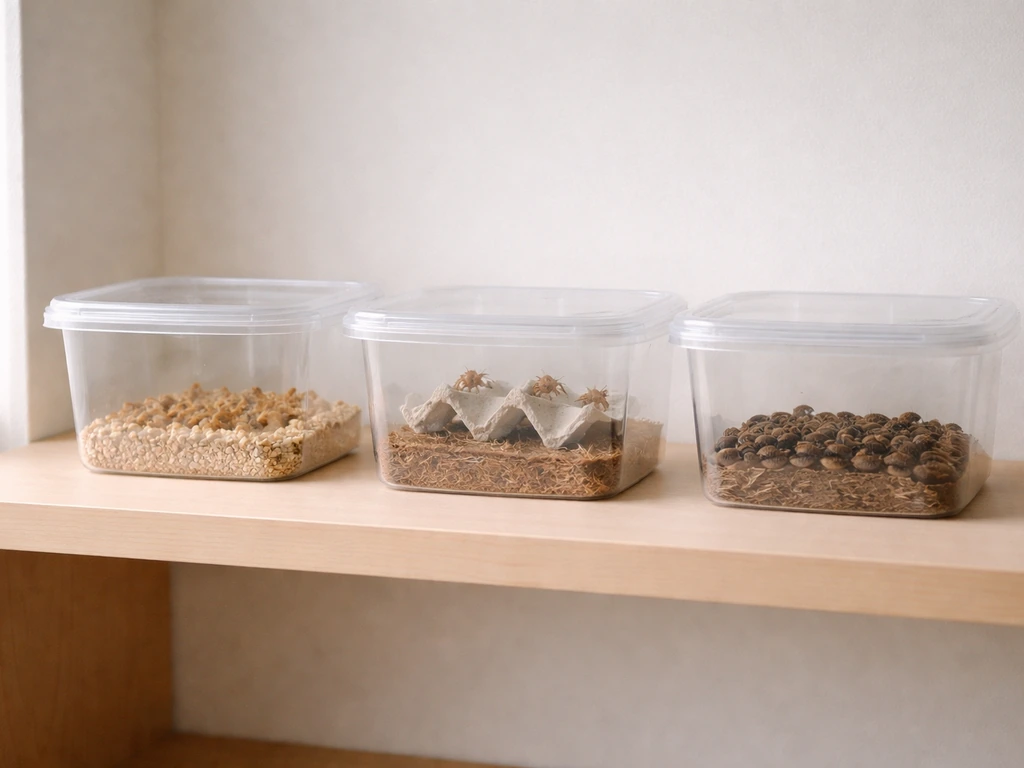
Housing and setup: bins, temperature, humidity, and airflow
Mealworm setup
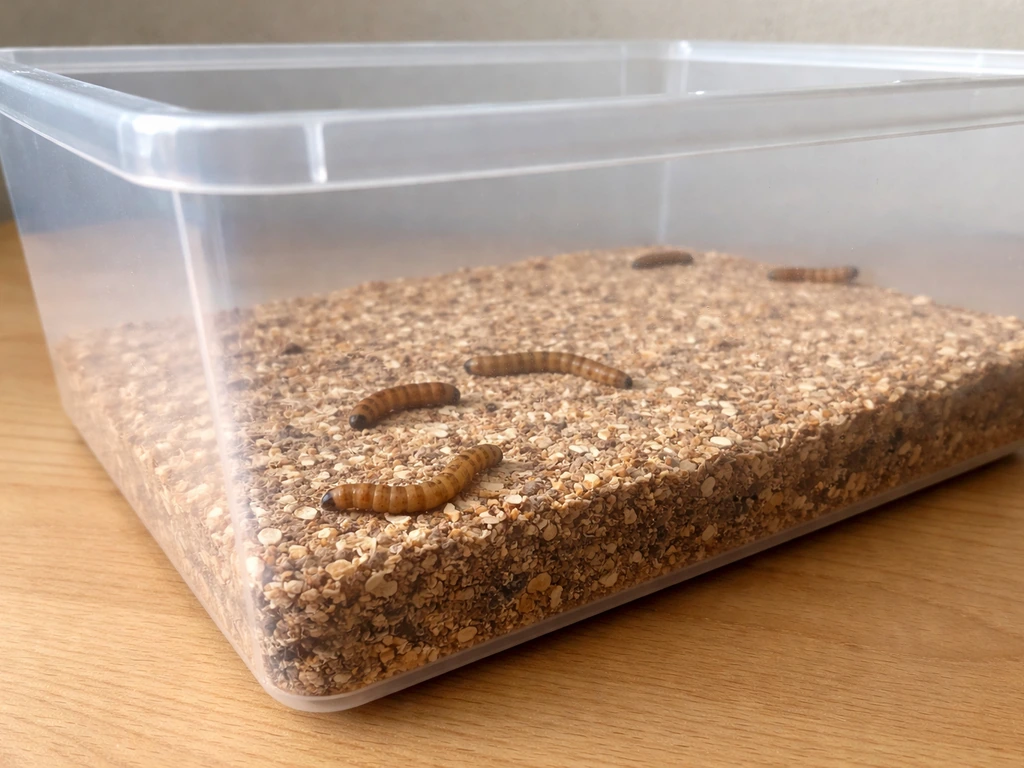
Mealworms do well in smooth-sided plastic storage bins (the kind with no texture on the interior walls, since they can't climb smooth surfaces). A standard 15- to 20-liter storage tote works perfectly for a starter colony. You'll want a mesh lid or a lid with ventilation cut-outs and covered in fine screen to keep humidity balanced and prevent other insects from getting in.
[Aim for a temperature of 25 to 28°C (77 to 82°F) and relative humidity around 60 to 70%. ](https://www. bioone. org/journalArticle/Download?
urlid=10. 18474%2FJES17-67. 1) At those conditions, larvae grow consistently and the colony cycles reliably. Cooler temperatures slow everything down, but mealworms won't die if your room dips to 20°C occasionally.
What they can't handle is high moisture without airflow, which causes mold in the substrate fast. Keep the bin in a warm corner, away from direct sunlight. If you're wondering what they grow at Kingman Farms, the first step is figuring out your local conditions and choosing a crop you can manage consistently grow a farm's worth of food.
Cricket setup
Crickets need a bit more infrastructure. If you’re wondering how to grow a cricket farm, focus first on a secure enclosure, steady warmth, and daily feeding so the colony can cycle reliably Crickets need a bit more infrastructure. Use a ventilated plastic or glass enclosure with egg cartons stacked inside for hiding and climbing surface. Temperature should stay around 28 to 32°C (82 to 90°F) for fastest growth, with around 60% relative humidity. They need a water source without drowning risk: a shallow dish with a wet sponge or cotton ball works well. Crickets are escape artists, so check every lid and seal carefully. A separate breeding container and a separate growing container makes management a lot easier.
Black soldier fly larva setup
BSFL are the most flexible in terms of housing. A circular plastic container 30 cm in diameter and 12 cm deep is enough for a test batch, and small-scale trials have been run in exactly that setup. For a proper home operation, use a larger bin (40 to 60 liters) with ventilation holes and a ramp built into one side.
Substrate depth should stay at no more than 5 cm to avoid unprocessed waste building up and creating anaerobic pockets that smell and attract pests. [Temperature between 25 and 35°C (77 to 95°F) gives the fastest larval growth. ](https://www. compostcheck.
com/academy/composting/the-ecology-of-black-soldier-flies-in-waste-management) In most of the US and temperate climates, an uninsulated outdoor bin works through summer; you'll need a heated shed or garage in winter.
Feeding your insects and keeping the bin clean
What to feed mealworms
Mealworms eat dry grain substrate and get their moisture from fresh vegetables. The standard and most cost-effective diet is wheat bran or oat bran as the bulk substrate, optionally supplemented with a bit of whole grain flour, cornmeal, or even dried bread crumbs. For protein to improve growth rate, add a small amount of skimmed milk powder, dried yeast flakes, or soybean meal mixed into the bran. For moisture, place a few slices of carrot, potato, or apple on top of the substrate two or three times per week, then remove the dried remnants before they mold. Don't mix wet scraps into the bulk substrate itself, as that invites mold and mites quickly. Keep the wet and dry portions separate.
What to feed crickets
Crickets are omnivores and eat a wide variety: leafy greens, vegetable trimmings, grain-based dry food (chicken layer crumble is a common cheap base), fruit scraps, and even a little dry dog food. Variety improves their nutritional profile. Remove uneaten fresh food within 24 to 48 hours so it doesn't rot and spike humidity or attract flies. Provide clean dry food constantly and refresh fresh scraps every day or two.
What to feed black soldier fly larvae
BSFL are waste converters. You can feed them almost any organic kitchen waste: vegetable peelings, fruit scraps, coffee grounds, cooked grain leftovers, and even small amounts of meat or dairy (though limiting those keeps smells manageable). Avoid highly acidic foods in large quantities and anything heavily salted. Add food in thin layers and let larvae process it before adding more. Because substrate depth matters, don't pile on more than 5 cm at a time. Thin, regular additions beat big infrequent dumps.
Hygiene: keeping mold, mites, and smells away
The single biggest cause of bin failure is excess moisture. For mealworms, sift out frass (the dark, fine waste material) once it accumulates to about 1 to 2 cm depth in the bin. Frass is actually a valuable garden fertilizer, so don't throw it away. Sift every 2 to 4 weeks depending on colony size.
For crickets, clean out dead insects and uneaten food every few days, since dead crickets decompose fast and introduce mold. For BSFL, the larvae themselves process waste very efficiently, but you still need to monitor for overflow and liquid pooling at the bottom of the bin. Add a thin layer of dry carbon material like shredded cardboard or dry leaves when the mix looks too wet.
Harvesting: timing, life stages, and doing it humanely
Harvesting mealworms
The larval stage is what you eat. Larvae take roughly 8 to 10 weeks to reach full size at 25 to 28°C, though this varies with diet and temperature. If you're wondering how long it takes a fox farm style grow set to reach bigger size, the timeline usually depends on temperature, feeding consistency, and container conditions larvae take roughly 8 to 10 weeks. Harvest before they pupate.
You can identify ready-to-harvest larvae by size (around 2. 5 cm) and their active, golden-yellow color. To harvest, sift the bin through a medium-mesh screen: larvae stay on top, frass falls through. Pull out any white pupae and set them aside in a separate container to become breeding adults.
For your harvest portion, place larvae in a container in the freezer for 10 to 15 minutes to chill them into torpor, then move them to the freezer for a humane kill. Plan to sift and harvest on a 2 to 4 week rotation once your colony is established.
Harvesting crickets
Harvest adult crickets or large nymphs at 5 to 6 weeks of age. Stop feeding for 24 hours before harvest to clear their gut, which improves flavor and food safety. Chill the entire enclosure (or a batch in a container) in the fridge or freezer for 20 to 30 minutes. Chilled crickets become torpid and are easy to handle. Then place them in the freezer to finish. Keep a portion of mature adults in the breeding enclosure at all times to maintain the next generation.
Harvesting black soldier fly larvae
BSFL self-harvest in a way no other insect does. When prepupae are ready (they darken in color and stop feeding, usually at 4 to 6 weeks), they instinctively migrate away from their feeding substrate looking for a dry place to pupate. You can exploit this behavior by building a simple ramp: an angled piece of plastic or wood that rises at about 40 to 45 degrees from the bin wall. Prepupae crawl up the ramp and fall into a collection bin or pouch on the other side. You collect them daily with almost no effort. No sifting required. This self-harvesting setup is genuinely one of the smartest low-labor features in any home insect operation.
Turning insects into food: drying, cooking, and storage
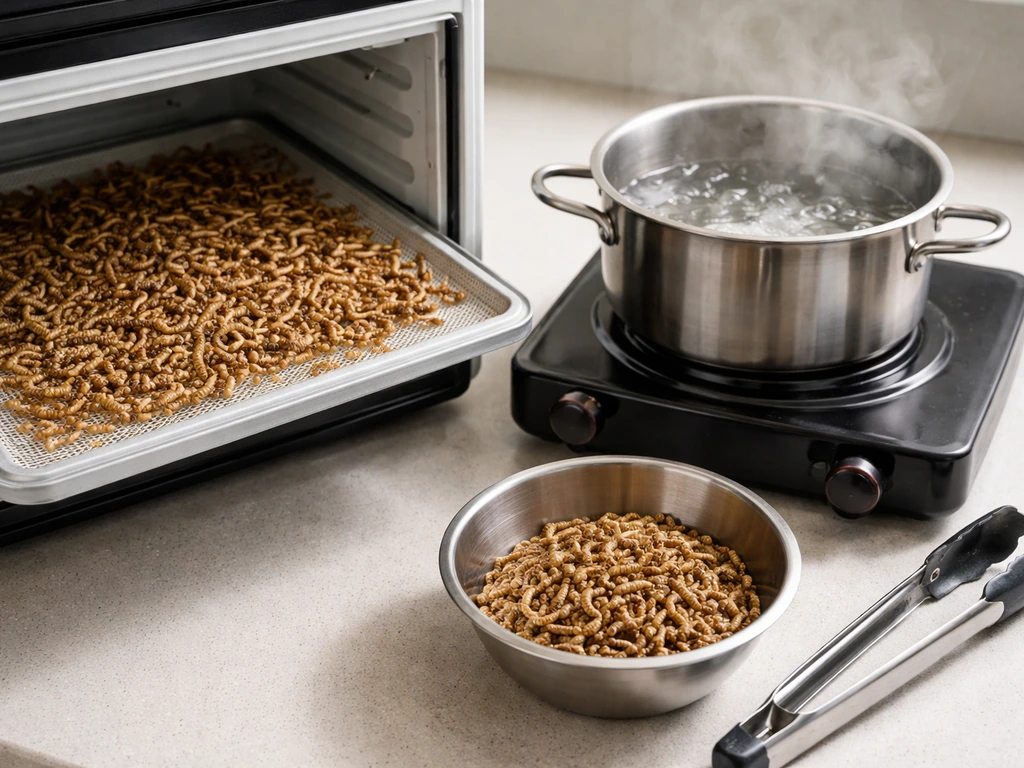
The most important step before eating home-grown insects is a heat treatment. This kills pathogens and makes the insects safe to process and eat. There are a few practical routes depending on what you want to do with them.
- Blanch and dry: drop chilled/frozen insects into boiling water for 2 to 3 minutes, drain thoroughly, then spread on a baking sheet and dry in an oven at 50°C (120°F) for around 24 hours until they reach a very low moisture level (roughly 10% moisture or less). This is the standard method for making shelf-stable insect material.
- Roast directly: spread chilled/frozen insects on a baking tray and roast at 175 to 200°C (350 to 400°F) for 10 to 20 minutes until crisp and golden. Season with salt, spice, or herbs after roasting. Great for snacking or adding to dishes whole.
- Dry at low heat: for BSFL especially, dry at around 60°C for extended periods (up to 72 hours in some protocols) to reach very low moisture content suitable for grinding into flour.
- Grind into flour: once fully dried and cooled, pulse in a blender or food processor until fine. Store insect flour separately from whole dried insects.
For storage, dried whole insects or insect flour should go into airtight containers or zip-seal bags with as little air as possible. Glass jars with tight lids work well. Store in a cool, dark place or in the freezer for longest shelf life. Properly dried insects stored airtight will keep for several months at room temperature. In the freezer, they'll keep for a year or more. Fresh harvested insects (not yet processed) can be held in the freezer for several weeks before you accumulate enough to batch-process.
Legality, safety, allergens, and biosecurity
Is it legal to grow and eat insects at home?
Growing insects for personal consumption at home sits in a legal grey area in many countries but is generally not restricted the way commercial production is. In the EU, insect species for commercial sale as food are governed by the Novel Foods Regulation (EU) 2015/2283, which requires authorization before insects or insect-derived products can be sold.
The UK's Food Standards Agency has its own parallel framework: from January 1, 2024, insect food products can only remain on the UK market if a novel food application for that species was received before December 31, 2023. In the US, the FDA does not specifically prohibit growing and eating insects at home, though commercial insect food producers must comply with food safety regulations including sanitation standards.
The practical takeaway: growing and eating your own insects at home for personal use is generally tolerated in most Western countries, but selling them without going through regulatory approval is a different matter entirely.
Allergy and cross-reactivity warnings
This is serious and worth reading carefully. People with shellfish (crustacean) allergies have a real risk of reacting to edible insects due to cross-reactive proteins, particularly tropomyosin, which is shared between insects, shrimp, crab, and lobster. Research has also found serological cross-reactivity between cricket proteins and house dust mite allergens, meaning people with house dust mite allergies may react to cricket consumption even without a history of food allergy. If you have shellfish allergies, mite allergies, or any known insect allergy, treat insect consumption with caution and consult a doctor before starting. When sharing insect-based food with others, always disclose the ingredient just as you would with any major allergen.
Biosecurity and food safety basics
Home insect farming introduces a few real food safety considerations. Keep your rearing bins away from areas where you prep or store other food. Wash hands thoroughly after handling live insects, substrate, or frass. Use dedicated tools (scoops, sifters, trays) for the insect operation and don't cross-use them in food prep areas without washing.
The main food safety tools are: hygienic substrate management, a proper heat-kill step before eating, and dry, sealed storage after processing. Mites are the most common pest in mealworm bins: they appear as tiny moving specks in substrate, usually triggered by too much moisture. If you see them, remove all insects to a clean bin with fresh dry substrate, and let the infested substrate dry completely before disposal.
Fruit flies can colonize BSFL bins if you're not careful about covering fresh food additions.
Cost, yield, and how to plan your scale
Here's what a realistic small home setup can produce, and what it costs to run. These are ballpark numbers based on typical home setups, not industrial operations.
| Species | Setup cost (starter) | Feed cost (monthly) | Yield (monthly, fresh weight) | Protein content (dry weight) | Time to first harvest |
|---|---|---|---|---|---|
| Mealworms | $20-40 (bins, bran, screen) | $3-8 (bran + veg scraps) | 200-500g larvae (1-2 bins) | ~50-55% | 8-10 weeks |
| Crickets | $30-60 (enclosure, egg crate) | $5-12 (grain feed + scraps) | 300-700g crickets (2-bin cycle) | ~60-65% | 5-6 weeks |
| BSFL | $15-35 (large bin, ramp) | Near zero (kitchen waste) | 500g-2kg prepupae | ~35-40% (fat: ~30%) | 4-6 weeks |
A single mealworm bin cycling on kitchen-shelf space will not replace your protein supply, but it will produce a meaningful supplement, enough dried larvae to add to smoothies, baked goods, or grain bowls several times a week. Two to four bins running in rotation is a realistic homestead operation that costs under $15 per month to maintain. BSFL are the best bang for your zero-cost-feed buck: you're essentially converting kitchen waste you'd otherwise compost into high-fat, high-protein larvae. If you already compost, BSFL are a direct upgrade. To produce 1 kg of dried insect flour, you need roughly 5 to 8 kg of fresh larvae (water loss during drying is significant), so plan for batch processing rather than daily harvesting.
Start with a single bin of one species for 6 to 8 weeks before scaling up. This gives you time to dial in temperature, moisture, and feeding cadence without overwhelming yourself. Once you're comfortable with the basics, adding a second bin doubles output with almost no additional management time. If you later expand to a more serious homestead-scale operation with multiple shelving racks and dedicated grow and breed sections, the same principles apply, just multiplied.
Many people expand this kind of insect operation into a grow good farm mindset, pairing multiple species with consistent feeding and waste recycling homestead-scale operation. The system that works in one bin scales cleanly. Many people find that growing crickets for food slots naturally into a larger self-sufficiency setup alongside a vegetable garden, where insect frass becomes a free soil amendment and the whole system feeds itself.
The best thing you can do right now is buy a bag of wheat bran, a smooth-sided plastic bin, and order a starter culture of mealworm larvae online. If you want to boost growth, a product like Fox Farm Grow Big can also be used, but follow the label rate and only apply it to plants after you’re sure it’s appropriate for your setup wheat bran.
Within two weeks you'll have an active colony and a much clearer picture of what you're working with. Most of what you learn in those first weeks, about moisture management, frass buildup, and larval timing, transfers directly to crickets or BSFL when you're ready to branch out. If you want a step-by-step on how to grow a farm with insects and keep it running, apply the same bin, feeding, and hygiene principles at a larger scale.
FAQ
Can I eat insects I grew at home without drying them? If so, how should I store them?
Yes, but it changes your storage plan. If you harvest and freeze larvae/crickets whole, thaw in the fridge, then cook or heat-treat before eating, because freezer burn and condensation can affect texture. If you dry them, use airtight containers and keep them away from humidity, since reabsorbed moisture is a common reason for spoilage.
What’s the safest way to add wet kitchen scraps so my bin doesn’t get moldy?
Typically, you should not start with freshly added kitchen scraps in the center of your dry substrate. A safer approach is to place scraps in small piles or a tray area at the top, let larvae process them, then remove any leftovers before they wet the bulk. This reduces mold and fruit fly issues without requiring more complex equipment.
If I see tiny specks or mites in a mealworm bin, what should I do immediately?
Mealworms are often managed by controlling frass buildup, but mites and mold are still tied to moisture plus airflow. If you notice mites, the quick decision aid is to move the entire colony to fresh dry substrate and let the old substrate dry completely before disposal, then start again with tighter moisture control.
Do I really need to do a heat treatment if I already freeze the insects?
Freezing kills, but it does not replace the heat step. The practical way to handle this is: chill first for humane handling, then cook or heat-treat using your chosen method (for example roasting or blanching) before eating. Freezing is mainly a convenience tool for processing, not a full food-safety substitute.
How should I handle allergen risk when serving insect-based foods to friends or family?
For personal use, labels and monitoring matter less than for commercial sales, but cross-contact is still a concern. If you share food with others, treat insect-based ingredients like allergens: keep them separate during prep, and disclose them clearly every time, especially for guests with shellfish or dust-mite allergies.
How do I choose between mealworms, crickets, and BSFL for my specific household waste and living conditions?
A simple decision rule is to choose the crop based on your waste type and your climate stability. If you generate mostly dry bran or have a dry, warm indoor shelf, mealworms fit. If you generate lots of fruit and vegetable scraps and can manage smells and ventilation, BSFL fit. If you have a warm space and can tolerate noise, crickets fit best.
Can I scale up by mixing species in the same bin to save space, or should I separate them?
Yes, but plan for a separate breeding and rearing workflow so your main grow container stays predictable. For crickets, keep a breeding colony with hiding spots and then move offspring into a growth container once eggs hatch. This reduces escape risk and makes feeding schedules easier.
What happens if my room temperature fluctuates a lot, and do I need a heater?
Temperature dips usually slow growth rather than instantly killing colonies, but persistent cold can cause uneven cycles and extended development. If your room regularly drops below your target range, you may need a small heat source or insulation, especially for crickets, since they also require warmth for consistent reproduction.
How can I tell excess moisture is building up, and what’s the quickest correction?
You can tell it’s time to reduce moisture when you see clumping in substrate, a musty smell, or frequent standing liquid. The fastest fix is usually to remove wet remnants, add a thin dry carbon layer (like shredded dry cardboard), and improve airflow by adjusting lid ventilation while keeping humidity in the target band.
What’s a realistic batch-processing schedule so I can keep my kitchen clean and still stay consistent?
For batch processing, aim to harvest in staggered windows and dry or heat-treat as soon as you can after a batch is collected. If you try to process every harvest immediately, it can lead to inconsistent heat treatment and messy kitchen contamination. A simple rhythm is one weekly or biweekly batch, then rotate your freezer space and containers.
Next Article
What Do They Grow at Kingman Farms? Crop List and Guide
Find which Kingman Farms you mean, then get the crop list plus a seasonal plan for growing the same at home.