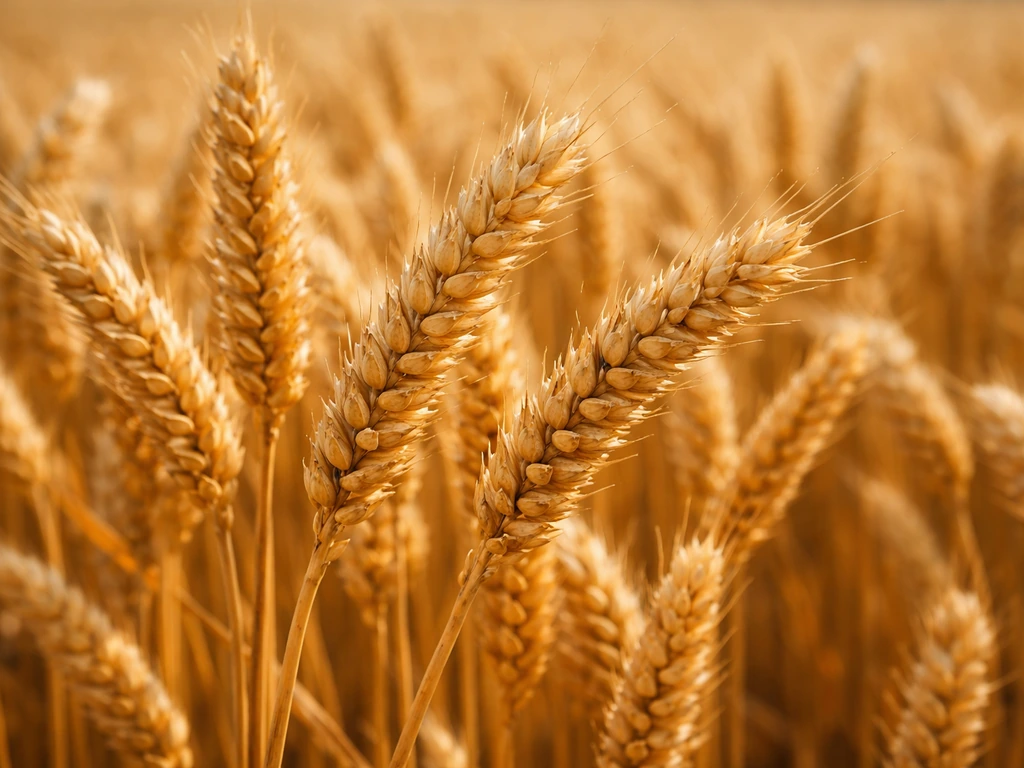
Bread doesn't grow on a plant, but wheat does, and wheat is what you're really after. Growing your own bread means growing wheat (or rye or barley), harvesting the seed heads, drying and threshing the grain, milling it into flour, and then baking. The whole chain from seed in the ground to a loaf on your counter is absolutely doable at home, even in a raised bed or a few containers, and this guide walks you through every step.
How Does Bread Grow: Wheat Seed to Flour Step by Step

Marcus Hendrick
5 May 2026
Bread isn't a plant: what actually grows for bread
When people ask how bread grows, they're usually picturing some plant that produces little loaves, which of course isn't how it works. Bread is made from flour, flour is milled from grain, and grain comes from cereal crops, primarily wheat. The wheat plant is a grass. You plant a seed, it sends up shoots, tillers out into multiple stems, forms a seed head full of kernels, and those kernels are the grain you mill into flour. Rye and barley follow essentially the same process and can also produce flour for bread, though with different flavor and gluten profiles.
The chain looks like this: seed in soil, plant grows and tillers, heads form and fill with grain, grain dries on the stalk, you harvest and thresh it, dry it further if needed, then mill it into flour, and finally bake. Every step matters. Skip proper drying and your grain molds in storage. Skip cleaning before milling and your flour tastes off. This guide covers the whole chain so you don't get caught out at any point.
Pick the right grain and varieties for your climate
The single most important decision you make before anything goes in the ground is whether you're planting winter or spring varieties, and which grain fits your region. Getting this wrong means crop failure before you ever see a seed head.
Winter vs. spring types
Winter wheat and winter rye are planted in fall, spend winter in the ground, and are harvested the following summer. They need a period of cold temperatures, a process called vernalization, to trigger flowering. One study found it took [40 days at 52°F or 70 days at 34°F](https://u. osu.
edu/henryag/2020/02/25/vernalization-requirements-for-winter-wheat/) to complete vernalization in winter wheat, and temperatures above 64°F were ineffective. That tells you something practical: if your winters are mild (think coastal California or deep South), winter varieties often won't work. Spring wheat and spring barley are planted as soon as the soil can be worked in early spring and harvested in late summer. They don't need vernalization, which makes them the better pick for mild-winter climates or if you missed the fall planting window.
Choosing your grain
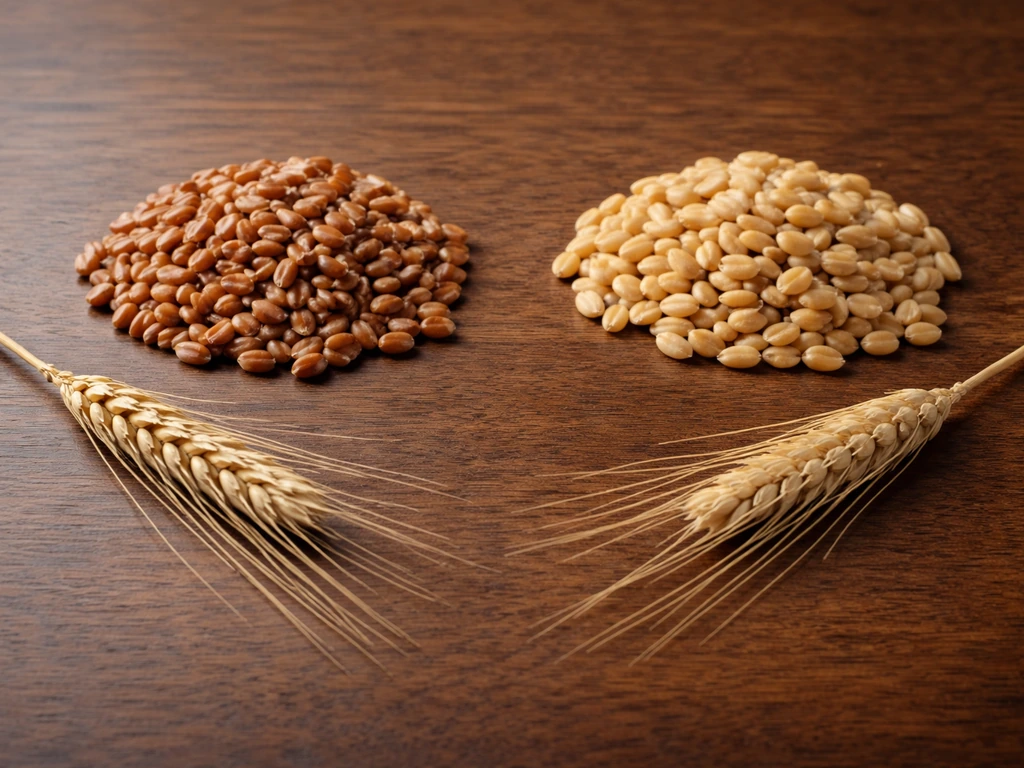
| Grain | Best for | Climate fit | Bread quality |
|---|---|---|---|
| Hard red winter wheat | Classic sandwich loaves, pizza dough | Cold-winter regions (zones 4–7) | High gluten, excellent rise |
| Hard red spring wheat | Artisan bread, mild-winter areas | Short-season or mild-winter climates | High gluten, strong flavor |
| Soft white wheat | Pastries, flatbreads, some loaves | Pacific Northwest, mild zones | Lower gluten, softer crumb |
| Rye | Sourdough, dense rye bread | Very cold-hardy, zones 3–8 | Low gluten, earthy flavor |
| Barley | Partial flour blends, malting | Wide range, short season | Very low gluten, dense bread alone |
For most home growers aiming at a usable bread flour, hard red wheat, either winter or spring depending on your climate, is the best starting point. Rye is the easiest crop to grow (it's extremely cold-hardy and tolerates poor soil) and makes fantastic sourdough, but it behaves differently at the mill and in the bowl. Barley is rarely baked into bread alone because its gluten is so low the loaf barely rises, but it can be blended with wheat flour or used for malting. If you want to go deeper on which wheat variety suits your specific setup, the best wheat to grow for bread is worth reading alongside this guide.
Soil prep, planting timing, and seeding basics
What your soil needs to look like
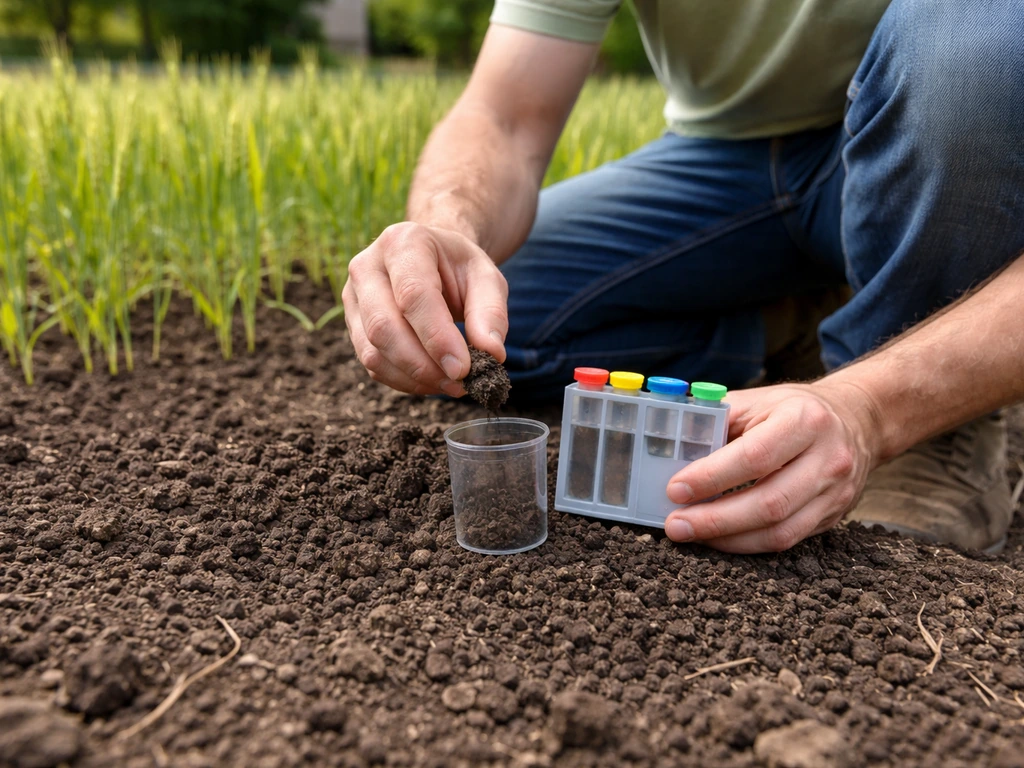
Wheat and barley want a soil pH of at least 6.3, though they'll tolerate above 6.0. Rye is more forgiving of acidic and sandy soils. The main thing to get right before you plant is pH because it controls how well your plants can use the nutrients already in the soil. If your pH is low, lime the bed a few weeks before planting. Drainage matters a lot too. For maximum wheat production you really want moderately well-drained to well-drained soil. Sitting water after rain is a red flag. Raised beds handle this well and are a great place to start.
One thing to watch in no-till setups is that soil pH often drops in the top 2 to 3 inches even when the deeper profile tests fine. If you're planting directly into an existing bed without turning it, take a stratified soil sample (one from the top 2 inches, one from 2 to 6 inches) before you plant rather than relying on a single blended test.
When to plant
For winter wheat, mid-September through early October is the optimum window in most northern U.S. regions. Plant too early and the plants get too large before winter, which makes them vulnerable to ice damage. Plant too late and they don't establish enough tillers before the cold arrives. For spring varieties, plant as early as the soil thaws and can be worked, usually late February through April depending on your latitude. Spring barley in particular benefits from early planting because it's a short-season crop and wants to finish before summer heat peaks.
How deep and how thick
Plant wheat and rye at 1 to 1.5 inches deep. Shallower than 1 inch and winter wheat crowns risk freezing out. Deeper than 1.5 inches and emergence gets slow and patchy. Barley is a little trickier here because barley coleoptiles (the sheath protecting the emerging shoot) are shorter than wheat's, meaning barley planted even slightly too deep struggles to push through. Keep barley at 1 inch, no deeper.
For home scale, broadcast seeding over a raised bed or small plot and then raking in to depth works fine. A target of roughly 21 to 30 plants per square foot after germination is ideal. In practical terms for a 4x8 raised bed, that's about 670 to 960 plants in the whole bed, so you'd broadcast roughly a handful of seed across the surface, rake to 1 to 1.5 inches, and firm the soil. Don't overthink the math at home scale, just aim for even coverage without seeds piling on top of each other.
Watering, nutrients, and growth stages of cereal grains

The growth stages you'll actually see
Wheat moves through several distinct phases that are worth recognizing because what the plant needs changes at each one. The Feekes scale is the standard way agronomists number these, but here's what they look like in plain terms: The Feekes scale describes wheat growth stages, with reproductive stages beginning when the heads (panicles or spikes) emerge (Feekes 10.1 to 10.5) and continuing through kernel ripening (Feekes 11.*).
- Germination and emergence: The seed sprouts and sends up a single green shoot, usually within 7 to 14 days of planting in warm soil.
- Tillering (Feekes 1–5): The plant branches at the base, sending up multiple stems called tillers. Each tiller can produce its own seed head, so more tillers generally means more grain. Winter varieties tiller mainly in fall and again in early spring. This is the stage where cold-hardening happens and where the growth point stays safely underground.
- Stem elongation (Feekes 6–10): Stems start stretching upward. The plant shoots up noticeably fast during this phase.
- Heading and flowering (Feekes 10.1–10.5): The seed head (the spike or ear) emerges from the top of the stem. Pollination happens here. Rye is wind-pollinated and cross-pollinating, so it needs a bit of room and more than one plant for good seed set.
- Grain fill: Kernels plump up with starch. About 70 to 90 percent of the final grain yield comes from photosynthesis during this window, so anything that stresses the plant now (drought, disease, aphids) directly cuts your flour supply.
- Maturity and ripening (Feekes 11): Kernels harden and the plant turns golden. This is harvest time.
Water and nutrients
Cereal grains are not heavy water users compared to vegetables, but they can't handle drought during grain fill. Keep soil consistently moist during stem elongation through grain fill. Once the plant is golden and drying down at maturity, stop watering and let it dry on the stalk.
For fertilizing, nitrogen is the key nutrient for grain crops. The recommendation for winter wheat and barley is to apply a small amount of nitrogen at planting, around 10 to 20 pounds of actual N per acre (scaled way down for a home bed, this is a light application of a balanced fertilizer at seeding), with the bulk of nitrogen applied in early spring at tillering. In a home raised bed, side-dressing with a nitrogen-rich fertilizer like blood meal or a balanced granular when you see active spring growth is the practical equivalent. Phosphorus and potassium should also be present, ideally worked in at planting based on your soil test.
The clearest sign of nitrogen deficiency is yellowing that starts on the oldest lower leaves and moves upward. Some early-season yellowing in wheat and barley is normal after heavy rain (nitrogen leaches), but if it persists into spring after a dry spell, your plants probably need a nitrogen boost.
Weeds, pests, and common failure points (and fixes)
Weeds
In a small home bed, weeds are your biggest competition, especially during the early tillering stage when the grain plants are still small. Hand pulling works well at home scale. The practical move is to weed thoroughly before planting, plant densely enough that the grain canopy shades out weeds once established, and hand pull anything that shows up in the first few weeks. Raised beds with good weed barriers underneath have a real advantage here.
Aphids

Aphids are the pest most home growers will encounter. They're most damaging when they colonize grain heads during heading, and large populations can cause shriveled, blasted kernels that ruin your yield. Mild winters followed by cool, dry springs are the conditions that favor outbreaks. Scout during heading by checking individual seed heads, and if you're seeing more than 15 to 25 aphids per head, intervene. At home scale, a strong spray of water knocks them back effectively, or use insecticidal soap.
Fusarium head blight (scab)
This fungal disease is one of the most damaging things that can happen to a wheat crop. Look for premature bleaching of parts of the seed head while the rest is still green. It's worse in warm, wet conditions during flowering. There's not much a home grower can do once it hits except remove and bin the affected heads. The prevention is choosing resistant varieties when you buy seed, and ensuring good airflow around your plants.
Winter kill
For winter varieties, the crown (the growing point just below the soil surface) can freeze if planted too shallow or if there's a hard freeze with no snow cover. Planting at 1 to 1.5 inches depth protects the crown. Snow is actually your friend, about 3 inches of snow provides meaningful insulation and 4 to 6 inches gives even better protection during cold snaps.
Harvest, drying, threshing, and safe storage
When to harvest
Harvest when the plant is fully golden and the kernels are hard. If you pinch a kernel and it dents easily, it's not ready. You want it to resist denting, almost like a small pebble. For home-scale harvest with a combine not in the picture, the target kernel moisture at cutting is around 13 to 14 percent. You can estimate this by feel (hard kernels, dry stalks) or buy an inexpensive grain moisture meter, which is worth it if you're growing more than a test batch.
Threshing at home
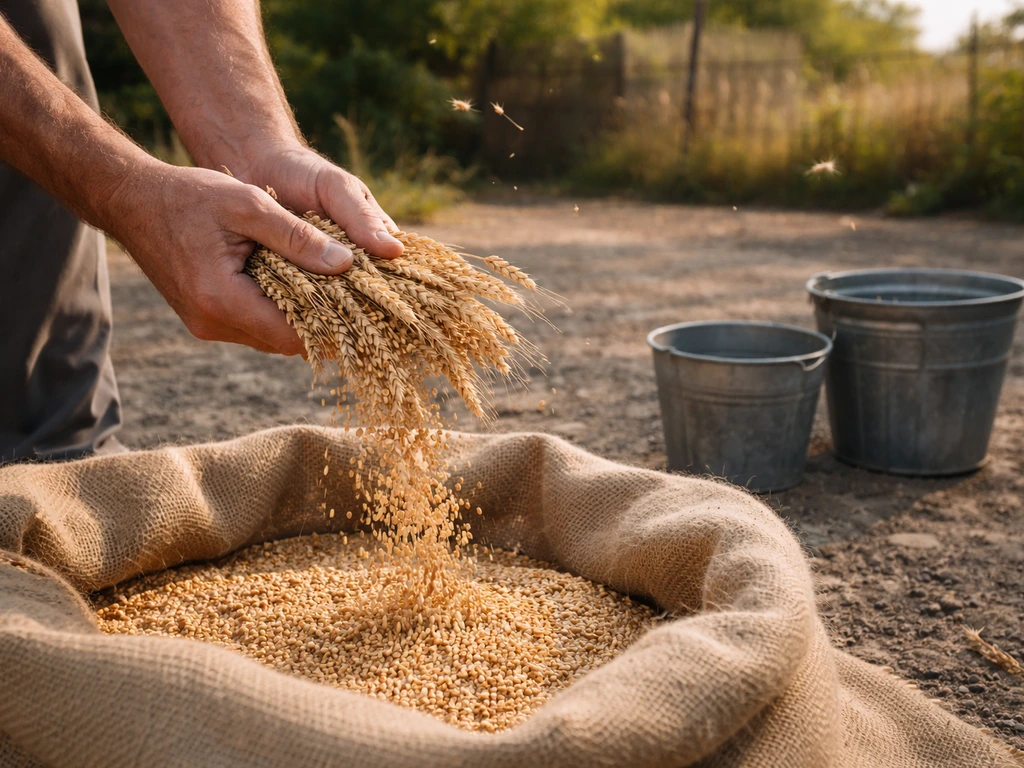
Threshing is separating the grain kernels from the seed head and stalks. At home, the simplest method is to cut or pull the seed heads, put them in a pillowcase or burlap sack, and beat the bag against a hard surface like a table or the inside of a trash can. The kernels shake free into the container below. You can also spread heads on a tarp and beat them with a flail (a stick with a rope-attached beater). Neither method is fancy, but both work.
After threshing, winnow the grain by pouring it slowly between two buckets outside on a breezy day, or use a fan. The lighter chaff blows away, the heavier grain falls. Run it through this process two or three times for cleaner grain.
Drying and safe storage
This step is critical and frequently underestimated. Grain stored above 14 percent moisture will develop mold within months. The NDSU guideline is clear: maximum moisture for wheat storage up to 9 months is 14 percent, and for longer storage it drops to 13 percent. Barley is even more sensitive at 13.5 percent for under 9 months and 12.5 percent for longer. Moisture above 13 percent allows slow invasion by storage molds that cause heat damage, and above 15 percent the grain heats noticeably without insects being present.
To dry your harvested grain, spread it in a thin layer in a warm, well-ventilated space out of direct sun and stir it daily for a week or two. If you have more grain, aeration with a fan during cool weather helps. Once dry, store in food-grade, moisture-proof containers: Mylar bags, polyethylene buckets with tight lids, or sealed #10 cans all work well. Clean your containers thoroughly before filling them, because grain insects most commonly arrive on dirty equipment or bins, not spontaneously. Cool the stored grain to below 60°F as soon as practical.
From grain to flour to bread: do-it-at-home processing options
Once your grain is clean and dry, you need to get it into flour. There are a few realistic options for home growers at different scales and budgets.
- Hand-cranked stone or burr mill: Inexpensive (often under $80), works for small batches, tiring for large amounts. Good starting point for testing your crop before committing to equipment.
- Electric countertop grain mill: The most practical home option for regular use. Models like the Nutrimill or Komo mills cost $200 to $500 and can handle several pounds of grain per session. Produces true whole-grain flour at close to 100 percent extraction (meaning nearly all of the bran, germ, and endosperm end up in your flour).
- High-powered blender: Works in a pinch for small quantities, but the flour is often inconsistent in grind size and the motor heats up fast.
- Local cooperative mill: Some areas have small community mills that will mill your grain for a fee per pound. Worth investigating if you grow a larger quantity.
Whole-grain flour milled at home is nutritionally richer than commercial white flour because it retains the bran and germ. The tradeoff is shelf life: the oils in the germ go rancid faster than the starch-only endosperm in white flour. Mill only what you plan to use within a week or two, or store surplus flour in an airtight container in the freezer.
For bread, whole wheat flour from hard red wheat will give you the best rise because of its higher gluten content. If you're baking with rye flour, plan on a denser loaf or blend it with wheat at a 30 to 50 percent ratio. Barley flour really needs to be blended with wheat (no more than 25 percent barley) to get any rise at all. Your first few loaves from home-milled flour will be a learning curve because whole-grain flour absorbs water differently than commercial flour. Expect to add 10 to 15 percent more water to your usual recipe and extend your rise times.
How to start small: container/raised-bed plan, yields, and cost-benefit
Here's the honest truth about yields: a 4x8 raised bed planted with wheat will give you somewhere between 1 and 3 pounds of grain, depending on your soil, weather, and how well the crop establishes. That's roughly enough flour for 1 to 3 loaves of bread. It's not going to feed your family, but it's a real, hands-on learning run that teaches you every step of the process before you scale up. If your goal is long-term bread-making, focus on how well the wheat you grow will feed your household over time, not just on a single harvest will feed wheat grow.
If self-sufficiency for bread is your actual goal, the numbers to understand are these: wheat yields roughly 20 to 60 bushels per acre at commercial scale (1 bushel of wheat equals about 60 pounds of grain), and a family of four baking regularly needs around 200 to 300 pounds of flour per year, which translates to roughly 220 to 330 pounds of grain before milling. That's a meaningful growing area, somewhere in the range of a quarter to a half acre of dedicated grain, which is a bigger commitment than most home gardens. Understanding how much wheat a family of four actually needs to grow is worth working through separately before you scale up. If you're wondering how much wheat to grow per person, the same method for a family of four will translate to a per-person target based on your bread needs how much wheat a family of four actually needs to grow.
A simple starter plan
- Year 1: Plant one 4x8 raised bed with hard red winter wheat (fall) or hard red spring wheat (spring). Spend this season learning the growth stages, scouting for pests, and getting comfortable with harvest and threshing.
- Buy a hand-cranked or small electric mill and mill your first batch by hand. Bake one loaf from your own grain. This is the moment the whole chain clicks.
- Year 2: Expand to a larger in-ground plot of 100 to 400 square feet if you have space. Start tracking your yield in pounds per square foot so you can estimate what area you'd need for your flour goals.
- Scale from there based on what the land, your time, and your climate will support.
The cost side is manageable at small scale. A pound of quality wheat seed costs $1 to $3 and covers more than enough for a raised bed. Add basic soil amendments, a moisture meter ($15 to $25), and storage containers, and your first-year investment is under $100 including a hand mill. The payoff isn't primarily financial at small scale; it's the knowledge and confidence that you can produce food from seed to table. That has real value for food security, and it compounds as you scale.
If you want to dig deeper into any part of this chain, related guides on what wheat needs to grow, how much wheat to grow per person, and whether feed wheat will germinate and grow all connect to specific decisions you'll face as you move from your first test bed toward a more serious grain garden.
FAQ
Can I grow bread at home without growing wheat seed heads first?
Not really. Bread dough needs flour, and flour comes from milled grain kernels. If you only want to bake, you can shortcut by buying flour, but if your goal is truly “from seed to loaf,” you will still need a cereal crop to produce grain you can dry, thresh, and mill.
What’s the quickest way to tell if my winter wheat will survive the cold?
The biggest practical risks are planting too shallow or letting plants get too large before winter. Use the 1 to 1.5 inch planting depth for the crown, and if you expect a hard freeze with little snow, prioritize a site that naturally holds snow (windbreak, slightly sheltered area) because snow cover provides real insulation.
How should I adjust planting depth if I’m using containers or raised beds with fluffy soil?
Fluffy media can settle after watering, so seeds may end up shallower than your target. Measure the depth after the soil is settled, not just when you sow, and if you’re aiming for 1 to 1.5 inches, consider placing seed a little deeper (then lightly firm) so it stays at the right depth through early irrigation.
Do I need to water on a strict schedule during the growing season?
Instead of a strict calendar, focus on the grain-fill window. Grain needs consistent moisture during stem elongation and filling, but once the crop is fully golden and drying down, stop watering and let it cure on the stalk so kernels reach the right hardness for harvest.
What if my wheat looks yellow, but it’s still early in the season?
Early yellowing can be normal after heavy rain because nitrogen can leach. The decision point is persistence: if yellowing continues into spring after a dry spell, it’s more likely nitrogen deficiency and you should side-dress with nitrogen when you see active growth resume.
Is it okay to rely on one soil test for pH when I’m doing no-till?
No-till often creates a pH gradient, the top layer can be more acidic even if deeper soil tests fine. If you plant directly into an existing bed, sample separately (top 2 inches, and 2 to 6 inches) and lime based on the depth where seed and roots will be.
How do I avoid mold during drying and storage if I don’t have a moisture meter?
Use time and airflow discipline: dry grain in a thin layer in a warm, well-ventilated space, stir daily for the first week, and only bag or jar when the kernels are truly hard and dry. The risk jump is real above 14 percent moisture, so if in doubt, keep drying longer or borrow/buy a moisture meter before committing to storage.
When threshing at home, should I aim for fully separated grain in one pass?
No, expect a multi-pass workflow. Do a first beat to release kernels, then winnow, then repeat winnowing (2 to 3 times) to remove stubborn chaff. Cleaner grain makes milling smoother and reduces “off” flavors that come from leftover hull debris.
How much water should I expect to add when baking with whole wheat flour I milled myself?
Plan for variability. Whole-grain flour usually absorbs more water than commercial white flour, and home-milled grain can be fresher and slightly different in grind size. A practical starting point is adding 10 to 15 percent more water than your usual recipe and extending rest or rise times as needed.
What’s the best way to store flour so it doesn’t go rancid?
Treat whole-grain flour differently than white flour. Because the germ contains oils, whole wheat flour can taste bitter or stale if left warm for too long. Store surplus in an airtight container in the freezer, and keep the container sealed to reduce moisture and pest exposure.
Will barley work for bread if I don’t want a blend?
Barley alone is usually a low-rise problem because its gluten strength is much weaker. If you want something that resembles a traditional loaf, blend it with wheat (keeping barley to around 25 percent or less) or expect a denser bake that behaves more like a hearty flatbread.
How can I estimate whether my yield is “enough” for baking before I commit space?
Use a reality check based on scale. A typical 4x8 raised bed often yields only about 1 to 3 pounds of grain, which becomes roughly 1 to 3 loaves worth of flour after milling. If you need daily bread for a household, you’ll likely need a much larger dedicated growing area than most gardens can provide.
Next Article
Will Feed Wheat Grow? How to Plant and Troubleshoot It
Find out if feed wheat will sprout and how to plant, test viability, and troubleshoot for a harvestable grain
