For bread baking, you want hard red winter wheat. It consistently produces flour with 10 to 13 percent protein, which gives you the gluten strength needed for a proper loaf. USDA AMS wheat protein determinations publish protein range data for wheat classes on a 12% moisture basis (including examples like Hard Red Spring and Hard Red Winter). Soft wheat, the kind used for cakes and pastries, simply doesn't have enough protein to build a strong dough structure, so no matter how carefully you mill it, your bread will be dense and flat. Hard red winter wheat is what most bread flour in the U.S. is made from, and it's also one of the easiest wheat classes to grow at home across a wide range of climates.
Best Wheat to Grow for Bread: Varieties and Steps

Marcus Hendrick
26 Apr 2026
Choosing wheat types for bread vs. all-purpose flour
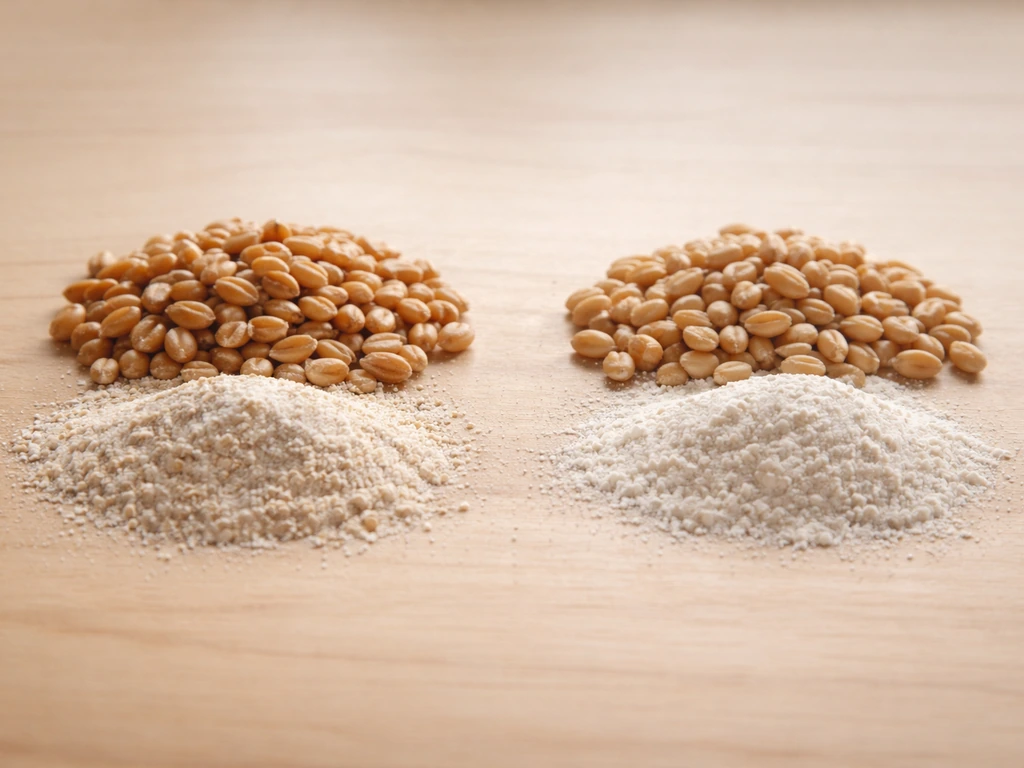
Wheat falls into two broad categories that matter a lot for baking: hard and soft. Hard wheat has more protein and stronger gluten-forming potential. Soft wheat has lower protein and produces a more tender, crumbly texture. If your goal is bread, you need hard wheat. Full stop.
Within hard wheat, there are three classes worth knowing as a home grower: Hard Red Winter (HRW), Hard Red Spring (HRS), and Hard White. Each one has different growing seasons and slightly different baking profiles.
| Wheat Class | Protein Range | Best Use | Growing Season |
|---|---|---|---|
| Hard Red Winter (HRW) | 10–13% | Bread flour, pan breads, rolls | Fall-planted, spring harvest |
| Hard Red Spring (HRS) | 13–16% | Artisan bread, high-gluten flour | Spring-planted, summer harvest |
| Hard White | 10–12% | Whole wheat bread, milder flavor | Fall or spring depending on variety |
| Soft Red Winter | 8–10% | Pastry, cakes, all-purpose | Fall-planted, not ideal for bread |
| Soft White | 8–10% | Pastry, crackers, flat breads | Fall or spring, not for bread |
Hard Red Winter is the most practical choice for most home growers. It's planted in fall, survives winter in the ground, and is harvested in early summer before the heat gets brutal. It's the backbone of commercial bread flour production in the U.S. for good reason. Hard Red Spring produces even higher protein flour, great for artisan sourdough, but it requires a cooler spring climate and a longer growing window. Hard White is worth considering if you want whole wheat bread with a milder, less bitter flavor than red wheat, since it lacks the tannins that give red wheat its characteristic bite.
Best wheat varieties to grow for home bread baking
General wheat classes tell you what to expect from your flour, but actual variety selection determines how well the wheat performs in your specific climate and soil. Here are the varieties I'd point most home bakers toward, depending on where they're growing.
Top Hard Red Winter varieties
- Turkey Red: One of the oldest and most reliable open-pollinated HRW varieties. It's drought-tolerant, widely adapted, and produces excellent bread flour. Great for seed-saving since it grows true to type. A solid first choice for any beginner.
- Wichita: A classic HRW variety developed in the Great Plains. High protein, good winter hardiness, and well-documented baking performance. Widely available from heritage seed suppliers.
- Red Fife: A heritage variety with a devoted following among artisan bakers. Good protein content and a rich, nutty flavor in the flour. It can lodge (fall over) in rich soil, so watch your nitrogen applications.
- Expedition: A newer, open-pollinated HRW variety bred for broader adaptability. Good disease resistance and reliable yields — a strong pick if you're in the eastern U.S. or mid-Atlantic region.
- Trigo Pinto (or similar regionally adapted HRW): If you're in the Southwest, look for locally adapted HRW varieties from your state's extension service. Regional fit matters more than any national recommendation.
Top Hard Red Spring varieties
- Glenn: An HRS variety with excellent protein levels and strong disease resistance. It's well-suited to northern climates (zones 3–5) and produces the kind of high-gluten flour that makes artisan sourdough really sing.
- Marquis: A heritage HRS variety, less common now but still available from specialty suppliers. Known for good flavor and reliable performance in short-season northern gardens.
- Sonora (Hard White Spring): Technically a hard white variety, but worth mentioning here for gardeners in the Southwest. It's drought-tolerant, historically significant, and produces a mild whole-wheat flour excellent for bread.
A quick note on sourcing: for home growers, open-pollinated (OP) or heritage varieties are almost always the better choice over hybrid commercial varieties. You can save your own seed year over year, which cuts your input costs dramatically. Most hybrid commercial varieties are bred for industrial farm conditions, heavy fertilizer, precise machinery, not for small-plot growing.
Matching variety to your climate and soil
Wheat is more climate-sensitive than most people expect. Getting the variety-to-location match right makes the difference between a good harvest and a failed one. Here's how to think through it. To grow wheat well, focus on the basics: the right variety for your climate, well-drained soil, proper planting timing, steady moisture, and good nutrition what does wheat need to grow.
Climate and hardiness zones
Hard Red Winter wheat is the go-to for most of the U.S., roughly zones 5 through 9 for winter planting. It needs a cold dormancy period (vernalization) to set grain properly, which means it won't work well in frost-free regions like southern Florida or coastal Southern California. If you're in zones 3 or 4, HRW may winterkill in severe cold snaps. That's where Hard Red Spring varieties like Glenn take over, plant them as soon as the soil can be worked in spring and harvest before summer heat. In the Pacific Northwest and similar mild-winter climates, both winter and spring types can work, so check with your local extension office for what's been trialed in your area.
Soil requirements
Wheat is not fussy, but it does have preferences. It grows best in well-drained loam or clay-loam soil with a pH between 6.0 and 7.0. Waterlogged soil is one of the fastest ways to kill a wheat stand, root rot sets in quickly. If your garden has heavy clay that holds water, raise your beds by even 4 to 6 inches or till in compost to improve drainage before planting. Sandy soil grows wheat just fine but will need more attention to fertilizing since nutrients leach quickly. Good soil organic matter (aim for 3 to 5 percent) gives you a buffer on both ends.
Soil preparation is straightforward: till or broadfork to about 6 inches, break up any large clods, and rake smooth. Wheat is a small seed and needs good soil-to-seed contact to germinate reliably. If you're planting into a heavily weedy area, do a shallow cultivation pass about a week before planting to knock back any weed seeds that have germinated near the surface.
Planting, spacing, and fertilizing for a strong stand
When and how to plant

For Hard Red Winter wheat, planting window timing is critical. You want to plant roughly 6 weeks before your average first hard frost, that's usually early to mid-October in zones 5 and 6, and late October to November in zones 7 and 8. This gives the wheat time to establish roots and a few leaves before going dormant. Planted too early, it gets too lush and becomes more susceptible to disease. Planted too late, it won't establish before hard cold and yield drops significantly.
For Hard Red Spring varieties, plant as early in spring as possible, ideally when soil temps reach 40°F. In zones 4 and 5, that's often March or early April. Spring wheat doesn't need vernalization, but it does need a cool growing period to fill grain properly. If it faces extreme heat during grain fill (the last 2 to 3 weeks before harvest), protein can drop and yields suffer.
Seeding rate and spacing
The standard broadcast seeding rate for home plots is about 2 to 3 pounds of seed per 1,000 square feet, or roughly 90 to 120 pounds per acre. For small plots, broadcast seeding (scattering seed evenly by hand) and then raking it in to about 1 to 1.5 inches deep is perfectly effective. If you're using a push seeder or drill, aim for 6-inch row spacing. The exact rate matters less than getting good, even coverage, thin spots invite weeds to fill in, and overly dense stands can lodge (fall over) when heads get heavy.
Fertilizing for protein and yield
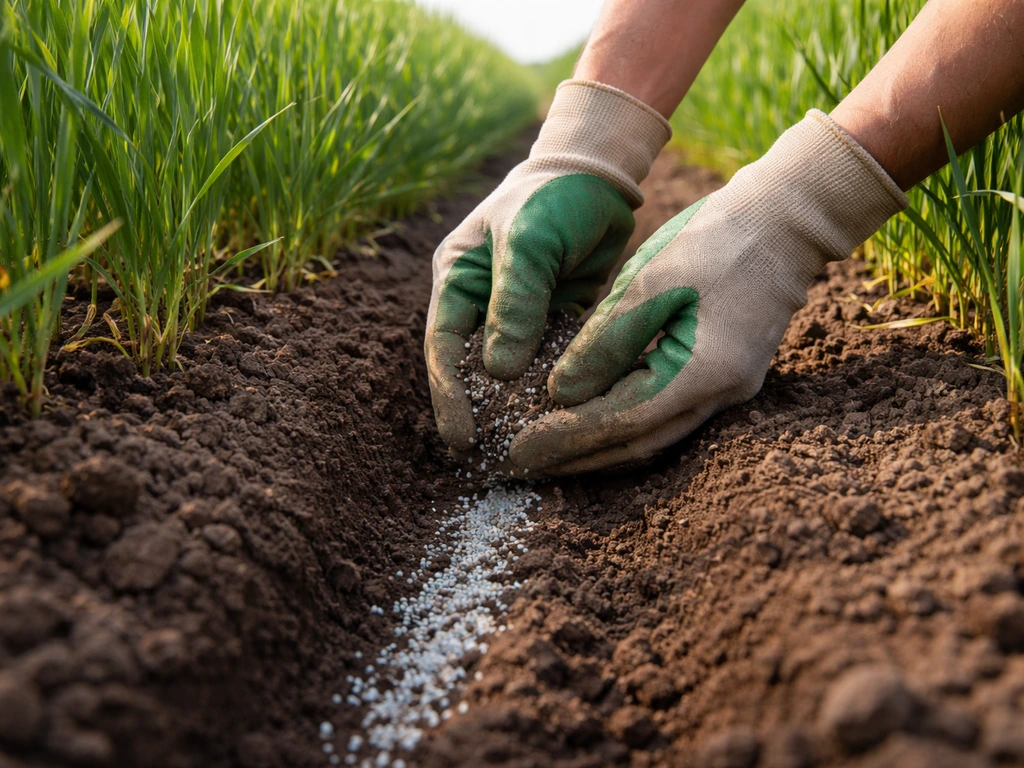
Nitrogen is the key nutrient for wheat, and it's especially important for bread bakers because nitrogen drives protein content in the grain. Low nitrogen equals low protein equals weak gluten equals flat bread. Here's a practical approach for home plots:
- At planting: Work in a balanced compost or a moderate phosphorus source (bone meal works well organically). Phosphorus supports early root development. Avoid heavy nitrogen at this stage — too much early growth going into winter creates disease risk.
- At green-up (for winter wheat, this is late February to early March when the crop breaks dormancy): Apply the bulk of your nitrogen. For organic growers, blood meal (12 to 15 percent nitrogen) at about 2 to 3 pounds per 100 square feet is effective. For conventional growers, a broadcast application of urea or ammonium nitrate works well. This is your most important fertilizer application.
- At jointing (when you can feel the first node forming on the stem, roughly 4 to 6 weeks after green-up): A second, smaller nitrogen application at this stage pushes grain protein higher. It's optional but makes a real difference if your goal is bread-quality flour. Use about half the rate of your green-up application.
For spring wheat, apply phosphorus and a moderate nitrogen charge at planting, then sidedress with nitrogen at jointing. The window is compressed since there's no winter dormancy period to break up the fertilizer timing.
Watering and weed management
Established wheat is surprisingly drought-tolerant, but it needs consistent moisture during two critical periods: germination and grain fill. After broadcast seeding, keep the soil surface moist for 7 to 14 days until you see even emergence. Then you can back off, winter wheat survives on rainfall through most of its life. During grain fill in late spring, a deep watering once a week if there's no rain will help grain size and weight. Overwatering, especially in the weeks before harvest, increases disease pressure and can cause grain to sprout in the head (pre-harvest sprouting), which destroys baking quality.
Weed competition is the other big management issue in small plots. Wheat is competitive once established and will shade out many weeds on its own, but early weed pressure before the canopy closes can really hurt yields. The pre-plant shallow cultivation mentioned earlier helps a lot. Hand weeding in rows is tedious but effective. Avoid hoeing too aggressively near the wheat base, the crown is fragile and damage there reduces tillering (the number of stems each plant sends up, which directly determines yield).
Knowing when to harvest, and how to thresh and mill at home
Harvest timing
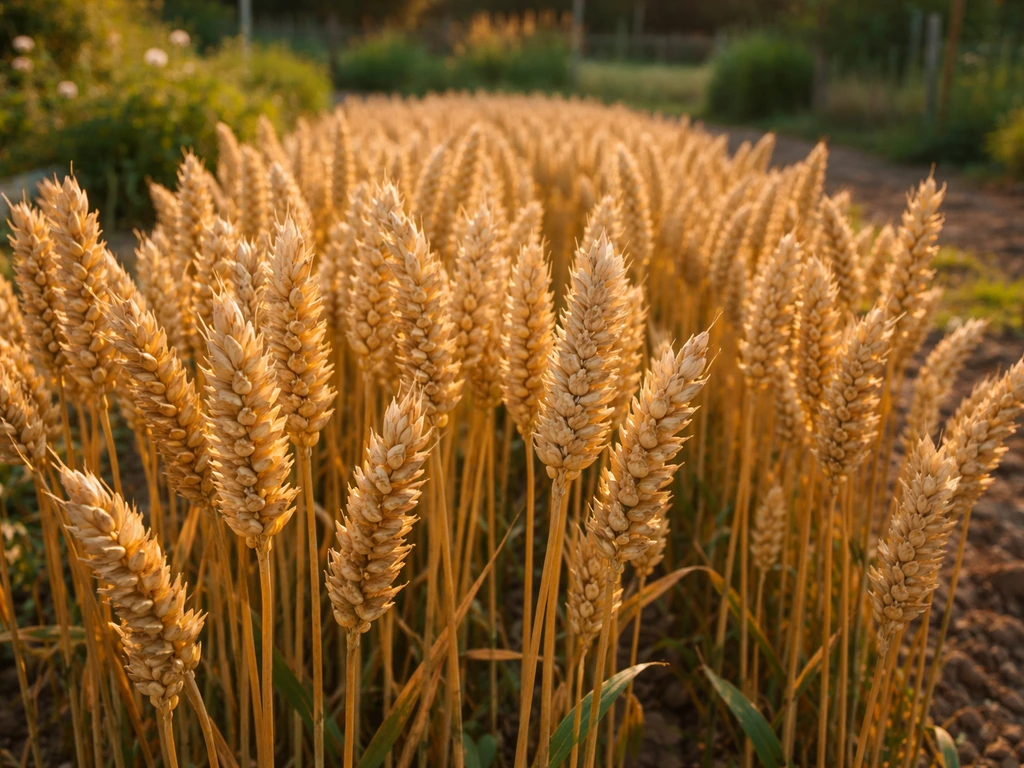
Harvest timing is one area where getting it wrong costs you a lot of flour quality. Too early and the grain is soft and doughy, it won't mill well and won't store properly. Too late and you risk the heads shattering (seeds falling to the ground before you cut them), or rain causing pre-harvest sprouting. The right window is when the grain is at physiological maturity: the heads have turned golden, the stems are dry and straw-colored, and the grain is firm and chalky when you bite it. Squeeze a grain between your thumbnail and fingernail, it should dent rather than squish. Grain moisture at harvest should be around 13 to 14 percent or lower for safe storage.
For most HRW varieties in the central U.S., that window falls in mid to late June. Spring wheat varieties typically ripen in late July to early August depending on location. You'll have about a 1 to 2 week window when conditions are ideal, so be ready to move quickly.
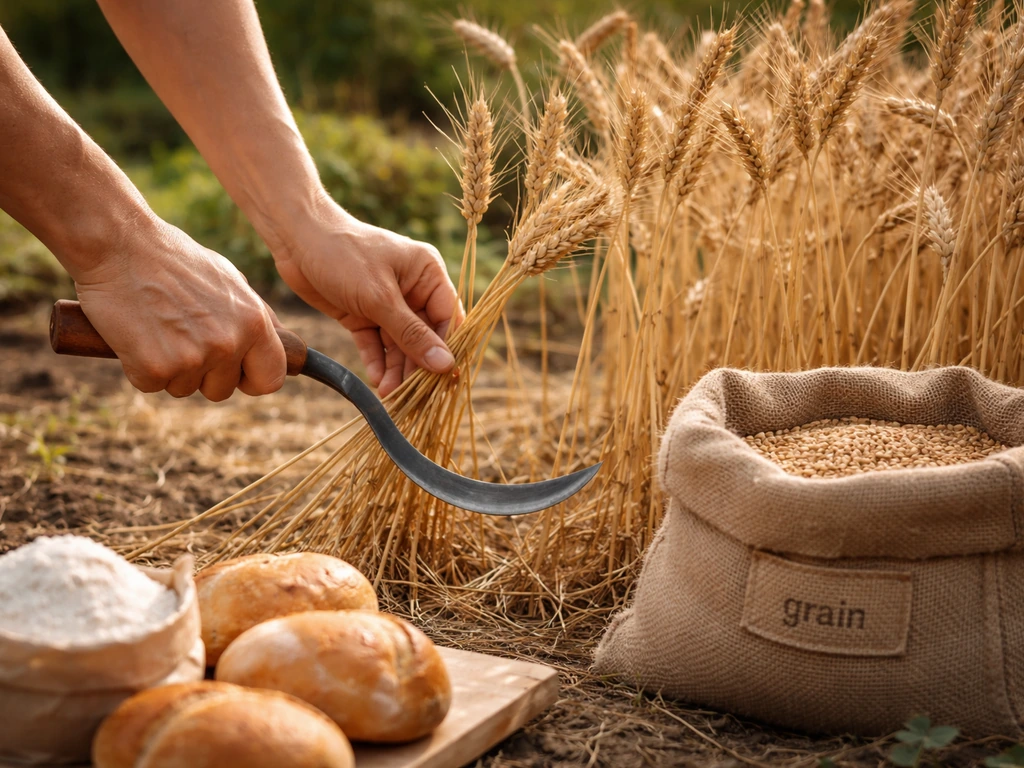
Threshing at home
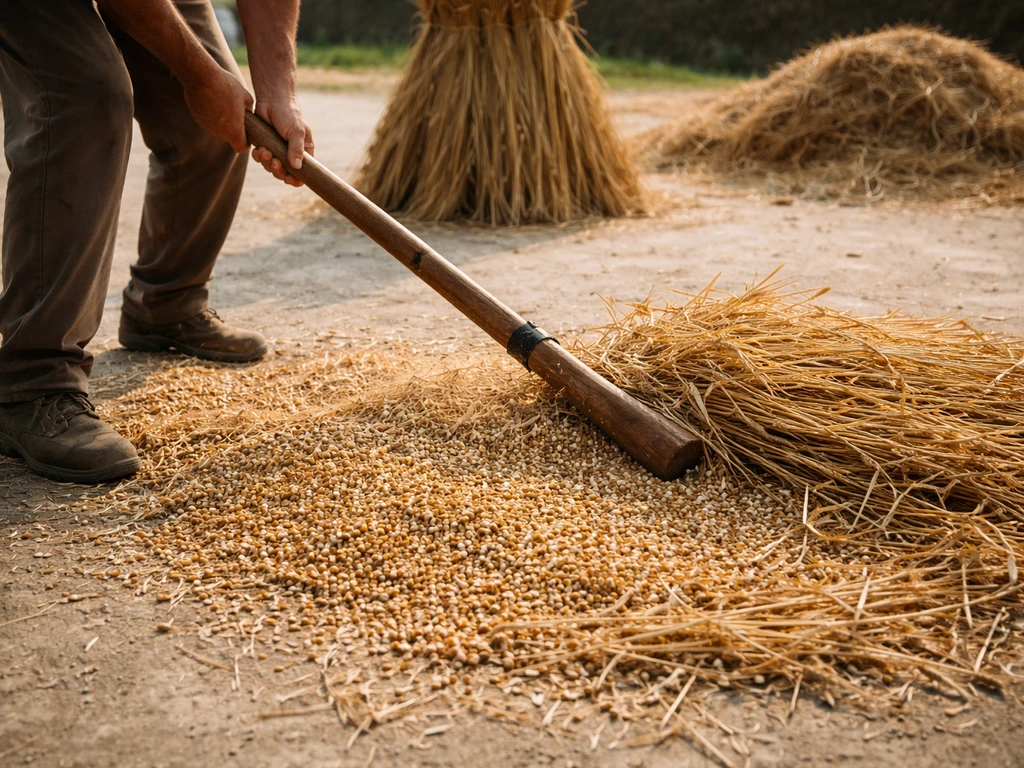
For small plots, cut the wheat stalks with a scythe, sickle, or even a sharp swing with hedge shears, then bundle the cut stalks into sheaves and let them dry in an upright shock (a teepee of sheaves) in the field for 1 to 2 weeks. Once fully dry, thresh by beating the heads against the inside of a clean trash can or barrel, the grain knocks off into the barrel. An old-school approach that actually works well for small quantities.
After threshing, you'll have a mix of grain and chaff (dry plant debris). Winnow it by pouring the grain from one container to another in a light breeze, or in front of a box fan on low. The chaff blows away; the grain falls straight down. Repeat two or three times until the grain is mostly clean. Store cleaned grain in sealed, airtight containers, food-grade buckets with gamma seal lids are ideal. Properly dried grain stored this way keeps for 5 or more years.
Milling your grain at home
A hand-cranked grain mill works for small quantities but takes real effort, plan on 15 to 20 minutes of grinding per pound of flour. Electric stone mills like the Mockmill or NutriMill are the practical choice for anyone milling more than a few pounds at a time. They produce consistent flour at home-baker scales in a fraction of the time. Stone burr mills preserve more of the grain's oil and nutrients than steel burr mills, but any good electric mill will give you usable bread flour. Mill fresh and mill only what you'll use in the next week or two, freshly milled whole wheat flour goes rancid faster than commercial flour because the bran and germ oils are still present and active.
Realistic yields, common problems, and budgeting it out
What to expect for yield
Home garden wheat yields are almost always lower than commercial farm yields, and that's normal. A realistic expectation for a well-managed home plot is 20 to 40 pounds of clean grain per 1,000 square feet. A 10-by-100-foot strip (1,000 sq ft) planted to HRW wheat will produce enough flour for roughly 15 to 30 loaves of bread, depending on how much you sift out the bran. To keep a family of four in bread for a full year using home-grown flour, you'd typically need somewhere in the range of 1,000 to 2,000 square feet of dedicated wheat plot, more information on planning those quantities for a family is covered in related guides on this site. If you want the same kind of planning but for a household, see how much wheat to grow for a family of 4 next. To translate those harvest numbers into a planning figure, use a per-person wheat budget like “how much wheat to grow per person.”.
Troubleshooting common problems
- Winterkill: If your HRW stand dies back heavily in winter, the most common causes are planting too late (shallow roots can't anchor against freeze-thaw heaving), planting too early in warm climates (too much lush growth before cold), or variety mismatch (using a variety without adequate cold hardiness for your zone). Choose regionally adapted varieties and nail your planting window.
- Poor germination: Usually caused by planting too deep (over 2 inches), dry soil at seeding, or old/low-viability seed. Test germination before planting by wrapping 10 seeds in a damp paper towel for 5 days — you want at least 8 out of 10 to sprout.
- Lodging (plants falling over): Almost always a nitrogen issue. Too much nitrogen early drives lush, tall stems that can't support heavy grain heads. Reduce your at-planting nitrogen and split the application as described above. Variety choice helps too — some heritage varieties like Red Fife are more prone to lodging than modern shorter-straw varieties.
- Stripe rust or leaf rust: The classic wheat diseases. Look for orange or yellow pustules on leaves. Rust spreads fast in cool, wet conditions. Best prevention is choosing rust-resistant varieties. If you see rust late in the season (after heading), it may not impact yield much. Early rust requires removing affected plants and improving airflow.
- Aphids or Hessian fly: Aphids show up in spring, especially during warm spells. A strong jet of water knocks them back on small plots. Hessian fly is more of a problem when wheat is planted too early in the fall — planting after your region's 'fly-free date' (available from your state extension service) is the main prevention.
- Pre-harvest sprouting: If rain comes right before harvest and grain starts germinating in the head, baking quality drops sharply. Harvest as early as you safely can (14% moisture or less) and dry grain under cover if rain is forecast.
The cost-benefit picture
Growing your own bread wheat is not a money-making proposition, it's a food security and quality proposition. Heritage seed runs about $3 to $6 per pound, and you need 2 to 3 pounds per 1,000 square feet. A basic grain mill costs $150 to $400 depending on the model. Other inputs (compost, fertilizer) are modest. In the first year, your cost per pound of flour will likely be higher than store-bought bread flour. But once you're saving your own seed (possible with all the open-pollinated varieties listed here), your seed cost drops to essentially zero. The value is in knowing exactly where your flour came from, having a harvest you can store for years, and producing a fresher, more nutritious product than anything on a grocery store shelf.
Start small, even 200 to 400 square feet your first year, so you can learn the crop, dial in your timing, and troubleshoot mistakes without a huge investment at stake. Wheat is forgiving and teaches you a lot in that first season. By year two, you'll have seed adapted to your specific plot, a clear sense of what your soil needs, and the confidence to scale up if bread self-sufficiency is the real goal. And once your wheat starts growing, bread begins with how does bread grow from seed to loaf. When you match the right wheat variety to your climate, you will feed wheat grow.
FAQ
What if I can only grow wheat in a frost-free climate, what should I plant for bread?
Choose spring types rather than winter wheat. Spring wheat does not need cold dormancy (vernalization), so it can still set grain if you plant as soon as soil is workable in spring. If summers are very hot, also pick a variety known for earlier maturity in your area, because extreme heat during grain fill can lower protein even when the wheat survives.
How do I know whether my flour will have enough protein for bread before I commit to baking lots?
If you do not have a protein reading, use your variety and your nitrogen plan as proxies, then do a small test bake. Bread dough should feel elastic and stretch without tearing easily; dough that stays slack or sticky usually indicates lower protein. If your dough is weak, reduce water slightly for the first trial and prioritize higher-protein grain from your next sowing rather than relying on technique alone.
Can I mix hard and soft wheat to make bread flour at home?
Yes, mixing works, but it is easy to under-shoot protein. A practical approach is to blend small batches and measure results by baking test loaves, since flavor and gluten strength change as the hard wheat percentage drops. For a true bread-baking goal, keep the blend hard wheat heavy, then adjust hydration because soft wheat absorbs and behaves differently in the dough.
What is the best way to handle weeds if my wheat stand is already past the early growth stage?
Once wheat is established and shading the soil, hand weeding becomes your safest option. Avoid aggressive hoeing near the crown because injury can reduce tillering and therefore yield. If weeds are a major issue before emergence, focus on pre-plant knockdown and good seed coverage, since post-emergence control in small gardens is much harder and riskier.
Should I water wheat more often with lighter watering, or less often with deeper watering?
For most small plots, deeper watering less frequently is better during grain fill. The goal is to wet deeper soil so the plant can sustain grain development, especially when natural rainfall is inconsistent. Frequent shallow watering can encourage surface roots, increase disease pressure in humid conditions, and still fail to support weight gain in the kernels.
How can I reduce pre-harvest sprouting if rain hits before harvest?
Prioritize timely harvest at physiological maturity and consider harvesting at the first sign of grains turning firm and chalky rather than waiting for “perfect” dryness. Wet weather increases sprouting risk, so do not let the crop overstay. After cutting, drying and storage discipline matters, because any remaining moisture accelerates spoilage even if sprouting does not visibly start.
What does lodging (falling over) do to bread wheat quality, and how do I prevent it?
Lodging mainly reduces yield and can create uneven grain drying, which can increase issues like sprouting or mixed kernel moisture at harvest. Prevention starts with avoiding overly dense seeding, keeping nitrogen at the right level (not excessive), and planting on well-drained soil to reduce stress. Even spacing and good drainage are often as important as fertilizer.
Is the seeding rate guidance different if I am planting in rows with a drill versus broadcasting by hand?
The depth and uniformity matter most, but yes, row planting changes your outcome. With rows, you can maintain better spacing between plants and more consistent stand density, which reduces thick spots that lodge and thin spots that invite weeds. For broadcasting, aim for even coverage, then rake for good soil contact, because clumps or skips cause the uneven stand that leads to variable protein and yield.
How do I adjust nitrogen for bread quality if my soil already has a lot of organic matter?
High organic matter helps nutrient buffering, but it does not automatically guarantee high protein. If you over-apply nitrogen, you can increase lodging and disease risk, while under-apply leads to weaker gluten. A practical plan is to keep to the recommended nitrogen timing (including sidedress for spring wheat) and then use your first-year test loaves to fine-tune future rates rather than guessing wildly in the same season.
What storage should I use for the grain, and how do I tell if it dried enough?
Use airtight, sealed containers and keep grain cool and dry. The article gives moisture targets for safe storage, so if you do not have a moisture meter, reliability drops, and you should error on drying longer before sealing. Any lingering moisture can cause quality loss or spoilage over time, even if the grain looks dry on the outside.
Do I need to mill immediately, or can I store flour for later bread baking?
Whole wheat flour goes stale faster than store-bought refined bread flour because bran and germ oils remain active. A better workflow is to mill only what you will use within about a week or two, and keep flour sealed to limit oxygen exposure. If you must store longer, cooler storage helps, but expect flavor and performance to drift.
Is stone milling the whole answer for making great bread flour?
Milling method matters, but particle consistency and bake timing matter too. If your flour feels gritty or the dough is unexpectedly tight, it can be due to coarse grind or bran particle size variation. Consider sifting and remixing (especially for whole wheat blends) to match your preferred dough behavior, and keep notes on grind settings across batches.
How much wheat plot space do I really need if I want bread every week year-round?
The article provides a square-foot range, but your actual need depends on loaf size, how much flour you sift out, and whether you bake other bread types. Use a simple check: estimate flour pounds per week from your recipe, then convert flour to grain using your expected yield and milling losses. If you are not sure, start with a smaller plot, measure your real grain output, then scale the area based on your recorded numbers.
Next Article
How Much Wheat to Grow Per Person: Simple Yield Math
Learn how much wheat to grow per person using yield math for flour and bread, with buffers and step-by-step calculations