Anyone can grow crops. Seriously. Home gardeners, backyard growers, homesteaders, retirees with a patio, and apartment dwellers with a sunny windowsill all grow food every day. The question "who grows crops" is really two questions rolled into one: who are the people actually doing it, and how do you become one of them? This guide answers both. You'll learn who's growing food at home (and what makes them successful), then get a clear, step-by-step path for choosing crops, setting up beds or containers, planting, caring for your plants, harvesting, and budgeting so you can start today.
Who Grow Crops: Home Gardening Guide to Growing Food

Marcus Hendrick
8 Jun 2026

Who actually grows crops at home
The people growing crops at home are not all farmers in the traditional sense. A place where farmers grow crops is usually chosen for its climate, soil, and access to water so plants can thrive. They're a pretty wide group. Home gardeners grow food in backyard plots, raised beds, and containers. Homesteaders (defined by Merriam-Webster as people who live frugally and self-sufficiently by growing and preserving food) go further, often raising multiple crop types alongside animals and preservation systems. Small-scale urban farmers run community plots or sell at local markets. And then there are Master Gardeners: trained volunteers who are part of one of the largest volunteer networks in the country, sharing research-based horticultural knowledge with their communities through university extension programs.
What all these growers have in common is not land or money. It's a willingness to learn through doing. The skills that matter most are basic: reading your climate, preparing soil correctly, watering consistently, and paying attention to what your plants are telling you. None of that requires a farming background. If you're interested in grain crops specifically, there's a whole discussion around who grows grain for us and whether home growers can replicate that, which is worth exploring separately.
Pick the right crops for your climate and space
Before you buy a single seed, figure out two things: your USDA hardiness zone and how much space you actually have. These two factors will determine almost everything else. Growing in zone 5 (cold winters, short summers) is a completely different game than zone 9 (mild winters, long hot summers). What works brilliantly in one will fail in the other.
Space matters just as much as climate. West Virginia University Extension is clear that vegetables need at least 8 hours of direct sunlight per day and enough root space for the mature plant, even in compact setups. That means a north-facing balcony with 4 hours of shade is going to limit you to herbs and some leafy greens, no matter how good your soil is.
Matching crops to what you've got

| Setup | Best crop choices | Key consideration |
|---|---|---|
| Windowsill or countertop | Herbs (basil, cilantro, chives), microgreens | Light is the main limiting factor |
| Patio containers (5–15 gal) | Tomatoes, peppers, lettuce, kale, radishes, dwarf beans | Drainage and consistent watering are critical |
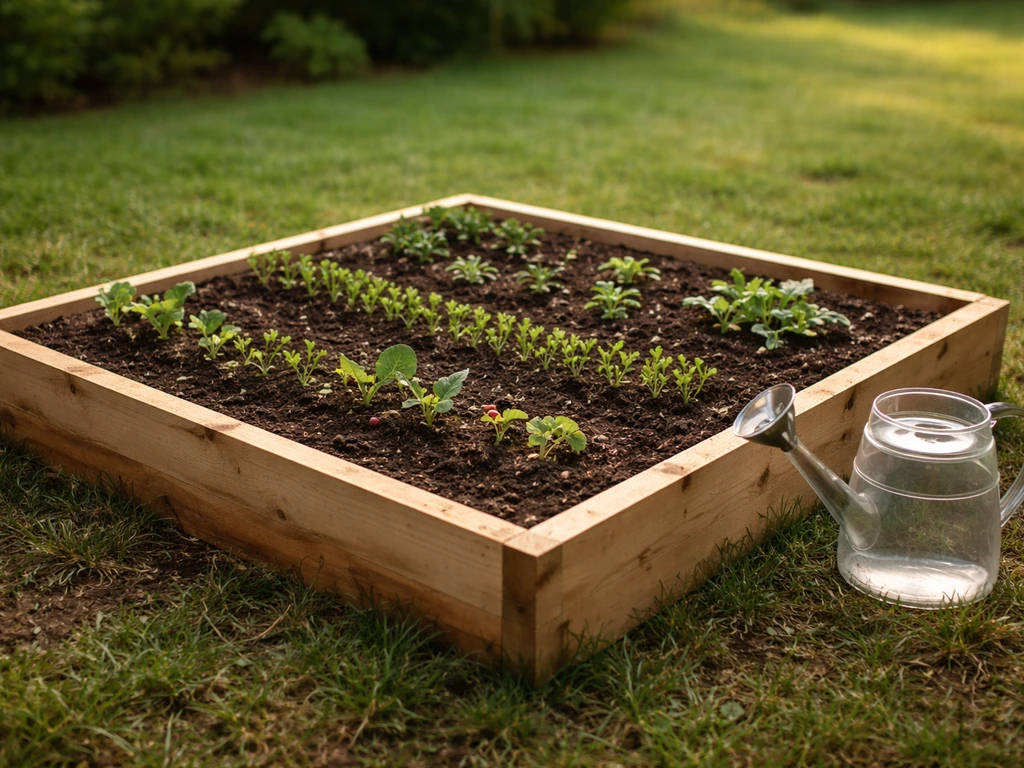
| Raised bed (4x8 ft) | Carrots, beets, spinach, zucchini, bush beans, kale | Soil quality pays off fast here |
| Ground plot (100+ sq ft) | Any vegetable, corn, melons, potatoes, winter squash | Rotation and weed management matter most |
| Shaded yard | Lettuce, spinach, arugula, chard, most herbs | Avoid fruiting crops—they need full sun |
OSU Extension confirms you can grow vegetables in barrels, flower pots, window boxes, baskets, tile pipes, and even cinder blocks, as long as conditions are right. The container itself is rarely the problem. Light, water, and soil quality are almost always the real variables. Don't overthink your starting setup. Start with three to five crops you actually want to eat, in the sunniest spot you have, and build from there. The best crops to grow together is another topic worth digging into once you have your basics sorted, especially for small spaces where companion planting can stretch your yield.
Prepare your soil and beds before anything goes in the ground
Soil is where most beginner gardeners underinvest. If you skip good soil prep, you'll fight the garden all season. Good soil drains well, holds moisture, provides nutrients, and lets roots move freely. Poor soil does none of those things, and no amount of watering or fertilizing will compensate.
Raised bed soil mix
For raised beds, the research consensus is a mix of topsoil and compost. UMN Extension recommends roughly two-thirds to one-half topsoil with one-third to one-half plant-based compost. Penn State Extension lands on about 70% soil to 30% compost. USU Extension adds drainage-improving materials like coarse sand, vermiculite, pumice, or perlite if your mix tends to compact or sit wet. Any of these ratios will work well in practice. The key is that compost feeds the soil biology, and that biology feeds your plants. Don't skip it.
Soil pH and testing
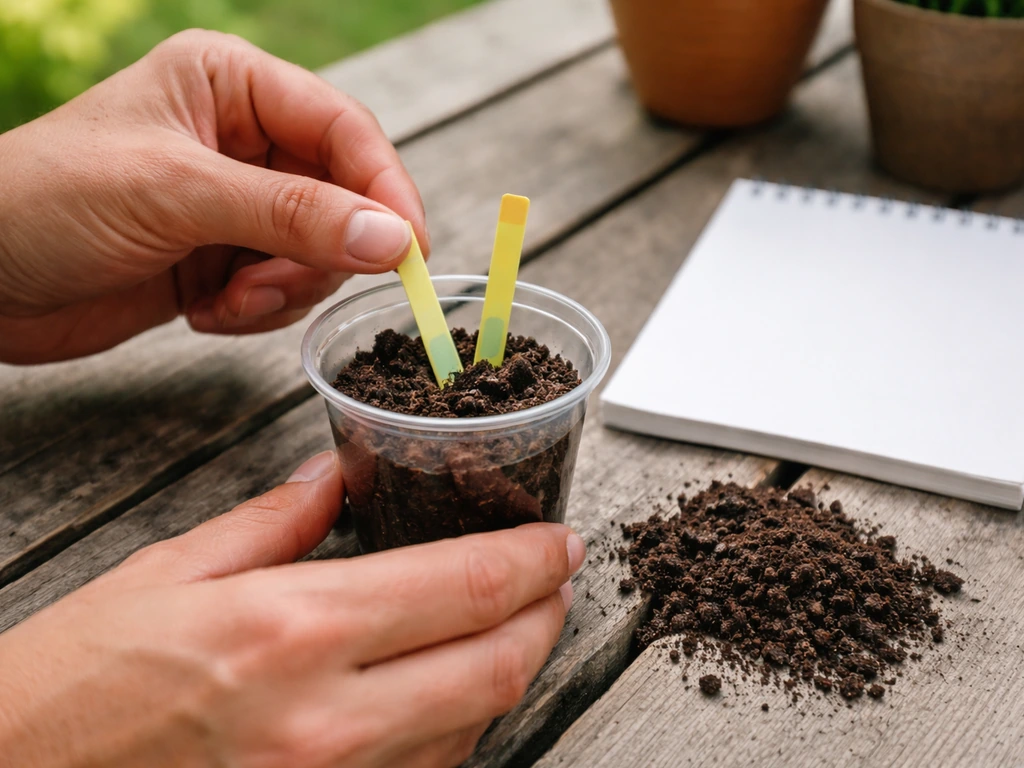
Most vegetables thrive in a soil pH of 6.0 to 6.5, with the sweet spot for nutrient availability being around 6.5 to 6.8. Mississippi State Extension and UVM both point to this range as optimal. Outside that range, nutrients lock up in the soil and plants can't absorb them even if you're fertilizing. A basic soil test from your local extension office costs very little (often under $20) and tells you exactly where you stand on pH, nitrogen, phosphorus, and potassium. UMN Extension frames soil testing as a "snapshot" of nutrient levels that helps you decide what to add and how much, which is far better than guessing and wasting money on amendments you don't need.
Container setup
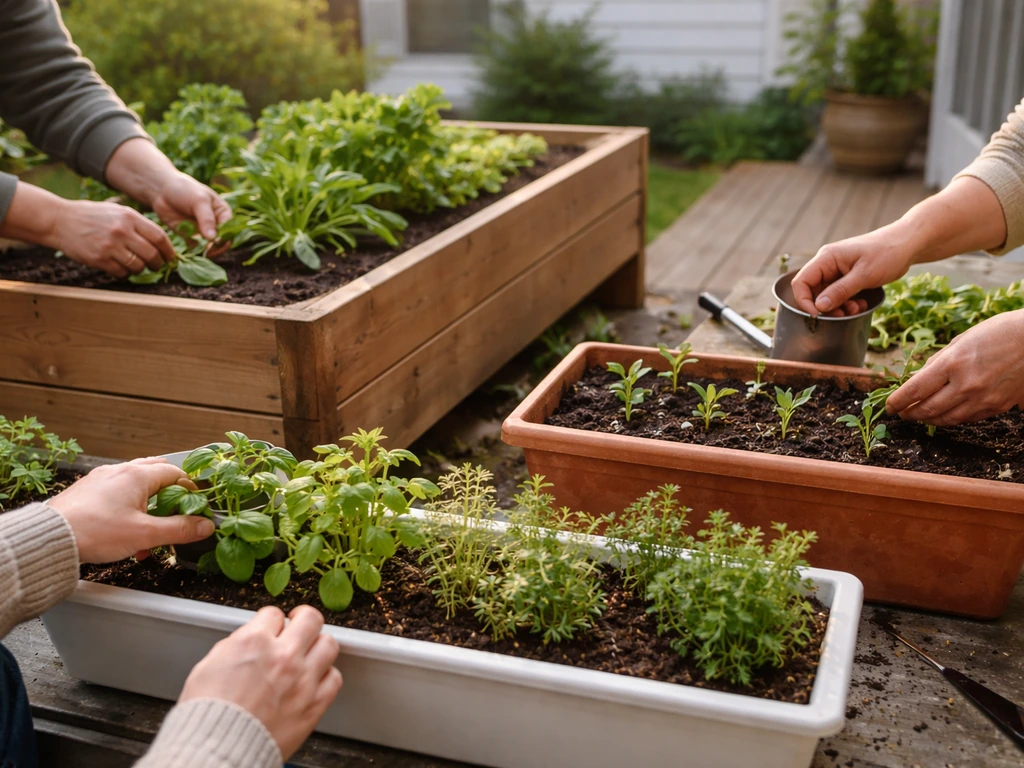
For containers, skip garden soil entirely. It compacts badly in pots and suffocates roots. Use a quality potting mix or a soilless blend, and make sure every container has drainage holes. Size matters: most vegetables need at least a 5-gallon container, and tomatoes or peppers do better in 10 to 15 gallons. Bigger containers hold moisture more consistently and give roots room to establish.
Planting: timing, depth, and getting good germination
Timing is everything with planting. Most crops have a last frost date window that determines when you can safely put seeds or transplants outside. In zone 5, that's typically late May. In zone 9, you may be planting fall and winter crops that zone 5 growers can't. Your local extension office or seed packet will list the correct window for your area. Start seeds indoors 6 to 8 weeks before your last frost date for crops like tomatoes, peppers, and eggplant. Direct sow cold-tolerant crops like lettuce, spinach, carrots, and peas directly in the bed as soon as soil can be worked.
Seed depth and spacing
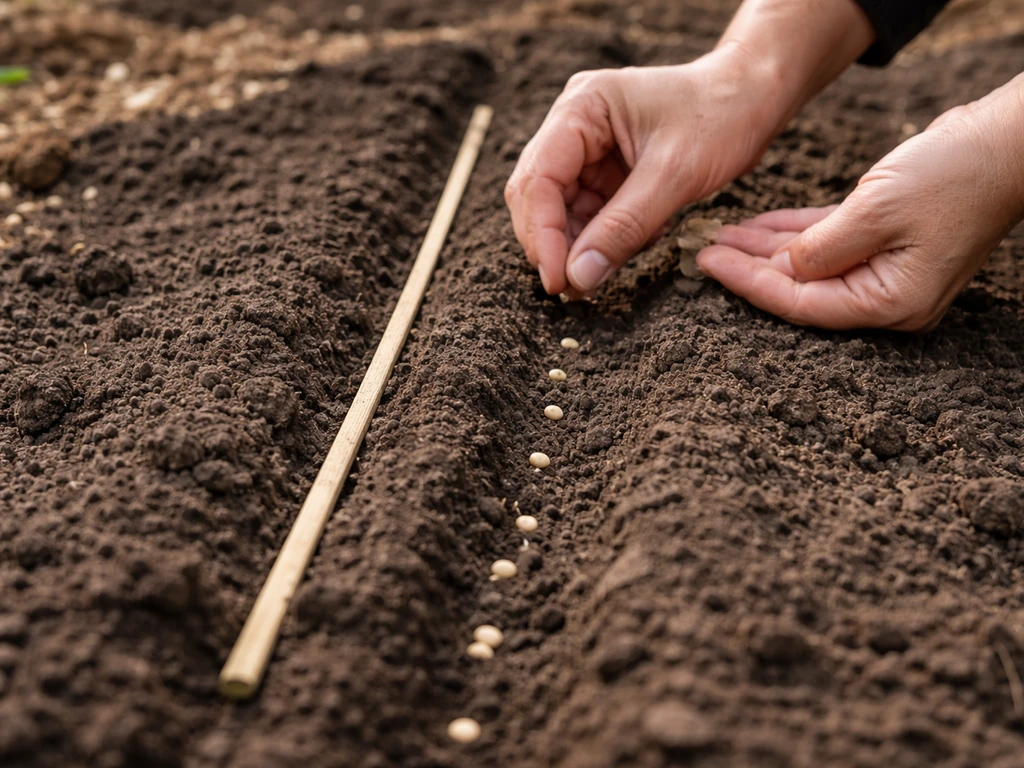
Both UMN Extension and UGA offer the same rule of thumb: plant seeds about twice as deep as their width. A tiny lettuce seed goes in barely covered. A large bean seed goes in about an inch deep. If you're unsure, that 2x-depth rule rarely fails you. For spacing, follow the seed packet as a starting point. USU Extension notes that leafy greens can be spaced under an inch apart in wide-bed systems, with row spacing around 2 to 3 inches. Crowding increases disease risk and reduces yields, so resist the urge to jam in extra plants.
Transplanting seedlings
When moving seedlings from trays to containers or beds, UMN Extension recommends transplanting into a container 1 to 2 inches wider in diameter than the cell pack. Harden off indoor seedlings by setting them outside in a sheltered spot for a few hours each day, increasing exposure over 7 to 10 days before transplanting. Skipping hardening off is one of the most common rookie mistakes, and it often kills otherwise healthy starts.
Ongoing care: watering, feeding, weeds, and pests
Watering
Water early in the day and direct it at the soil at the base of the plant, not the leaves. OSU Extension emphasizes this approach for reducing disease and ensuring the moisture gets to the roots. The most critical watering periods are during seed germination, the first 2 to 3 weeks after transplanting, and during flower and fruit development. Both underwatering and overwatering cause damage. blank" rel="noopener noreferrer">USU Extension explains that overwatering fills soil pores with water and starves roots of oxygen, which is a surprisingly common reason plants fail even in attentive gardens. That kind of stress can quickly turn into failed plants, so it helps to learn how to grow crops to stay consistent and not starve together starved roots of oxygen. Check soil moisture with your finger an inch below the surface before watering rather than following a rigid schedule.
Feeding your plants
If your soil test showed deficiencies, address them with targeted amendments. For general feeding, compost is your best tool. EPA research confirms that home composting improves plant growth by building healthier soil and reduces the need for synthetic fertilizers and pesticides. Add a layer of compost as a top dressing mid-season for most vegetable beds. For container plants, which flush nutrients out with regular watering, supplement with a balanced liquid fertilizer every 2 to 3 weeks through the growing season.
Weed management
Weeds compete for water, nutrients, and light. The most effective approach is to prevent them rather than fight them after the fact. A 2 to 3 inch layer of organic mulch (straw, wood chips, or shredded leaves) suppresses most weeds and retains soil moisture at the same time. OSU Extension also points to sheet mulching with cardboard as an effective method for new beds, suppressing weeds while adding organic matter over time. Pull any weeds that do emerge while they're small, before they set seed.
Pest and disease control
Integrated Pest Management (IPM) is the practical approach used by most experienced growers. NC State Extension describes it as a sequence: identify the problem correctly, monitor it, then use cultural and physical controls first, with chemical options as a last resort. UNR Extension emphasizes correct identification as the starting point, because treating the wrong problem wastes time and money. USU Extension recommends monitoring by counting pest insects per plant or tracking the percentage of plant affected, which sounds technical but really just means checking your plants regularly and keeping a rough mental tally. A few aphids are not an emergency. A plant covered in them needs action.
Harvesting, storing, and improving next season's yields
When and how to harvest
Harvest timing matters more than most beginners expect. Picking too early reduces flavor and yield. Picking too late can signal the plant to stop producing. For most fruiting crops like tomatoes, peppers, and beans, regular harvesting actually encourages more production. For root vegetables and leafy greens, harvest in the morning when plants are hydrated and temperatures are cool for the best flavor and longest shelf life.
Storing your harvest
Different crops need different conditions. UMN Extension notes that ideal "cold and dry" storage for many root crops is around 32 to 40 degrees Fahrenheit at 65% relative humidity, and that quality shortens when you deviate from those targets. Leafy greens like lettuce need 32 to 35 degrees Fahrenheit at near-100% humidity and will keep about two weeks under those conditions, according to USU Extension. Garlic and onions need to be cured (dried at room temperature for 2 to 4 weeks) before long-term storage. Tomatoes are a notable exception: store them dry at room temperature and rinse only right before eating, since moisture shortens their shelf life significantly. UMN Extension also recommends removing field heat from freshly harvested crops quickly by moving them to a cool area immediately after picking.
Boosting yields next season
Two practices reliably improve results year over year. First, crop rotation: WVU Extension recommends rotating crops within plant families across beds each year to break pest and disease cycles. This is especially important in small spaces where you can't move crops far. Second, succession planting: staggering plantings of the same crop 7 to 14 days apart, as WVU Extension suggests, spreads your harvest over weeks instead of getting a glut all at once. Both practices cost nothing and make a noticeable difference in both yield and quality.
Budget, tools, and planning your way to self-sufficiency
Getting started doesn't require a big investment, but having a clear sense of costs helps you make smart choices. WVU Extension breaks gardening costs into setup (building raised beds, purchasing soil) and recurring inputs (seeds, amendments). The setup costs are front-loaded. Once your beds are built and your soil is established, annual costs drop significantly.
A realistic starter budget
| Item | Approximate cost | Notes |
|---|---|---|
| Seeds (5–8 varieties) | $15–$30 | Buy open-pollinated/heirloom to save seeds later |
| Potting mix or raised bed soil (per 4x4 bed) | $30–$60 | One-time cost; top up with compost annually |
| Basic tool set (trowel, hoe, watering can) | $30–$50 | Quality tools last 10+ years |
| Compost (if not making your own) | $15–$25 per bag | Making your own costs almost nothing |
| Soil test | $15–$25 | Do this before adding any amendments |
| Containers (if not building beds) | $10–$40 each | Check thrift stores and Facebook Marketplace |
A soil test is genuinely the highest-value purchase on that list. Knowing your soil's pH and nutrient levels before you buy amendments means you spend money on what you actually need instead of what a generic bag suggests. This is exactly what UMN Extension recommends for keeping inputs efficient and costs under control.
For self-sufficiency planning, think in seasons, not just one harvest. Map out what you want to eat, then work backward to figure out how many plants you need. A single zucchini plant can produce 6 to 10 pounds per season. A 4-foot row of beans may yield 2 to 3 pounds. A 4x8 raised bed, managed well, can grow a meaningful portion of your vegetable intake through a growing season. Start with one bed or a cluster of containers, track what worked, and scale from there. The goal isn't perfection in year one. It's building a system you understand well enough to improve every season.
Every experienced grower you'll meet, whether a Master Gardener, a homesteader, or a backyard hobbyist, started somewhere small and learned mostly by doing. Give yourself permission to experiment, make mistakes, and treat each season as data for the next one. That mindset is what separates people who grow crops consistently from people who try once and give up. If your goal is to grow crops once you are human, keep learning the basics, watch your conditions, and adjust as you go.
FAQ
Do I need to own land to grow crops?
Yes. Many people grow crops without owning land by using containers, grow bags, or even window or balcony setups. The main constraint is usually light and container size, so prioritize the sunniest location and pick crops that match it (for example, leafy greens and herbs for partial shade).
What’s a smart number of crops to start with as a beginner?
Start with a short list you will eat and can realistically care for. A practical rule is 3 to 5 crops, then add one more batch each season once watering, pests, and harvest timing feel manageable.
Is my USDA hardiness zone enough to plan planting, or should I consider anything else?
Use the USDA hardiness zone for timing, but also consider your microclimate (near a wall, balcony wind exposure, heat trapped by pavement, or a shaded north corner). If your zone timing says a crop should be okay, but your spot is colder or windier than average, you may still need row covers or later planting.
What are the most common reasons new growers end up with weak or failed plants?
Most failures come from planting too early or watering at the wrong moments. For outdoor beds, confirm soil is workable for direct sowing, watch temperatures near the germination window, and water based on soil moisture (check an inch down) instead of a fixed calendar schedule.
Can I use garden soil in containers?
No, and it often causes problems. Garden soil compacts in pots, drains poorly, and can spread pests or diseases. Containers generally do best with a quality potting mix (or soilless blend) plus drainage holes, and tomatoes or peppers usually need larger volumes like 10 to 15 gallons.
How do I know if I’m planting too densely in a small space?
Overcrowding is a hidden driver of disease and low yields. Follow seed packet spacing for starts, and if you are using dense planting for small space, compensate with better airflow, regular inspection, and prompt removal of diseased leaves.
What does hardening off actually involve, and why do seedlings sometimes die after transplanting?
If you start indoors, harden off means gradually exposing seedlings to outdoor conditions (sun, wind, temperature swings) over 7 to 10 days. Skipping it can shock plants, causing leaf burn, slowed growth, or sudden transplant failure even when watering and soil are correct.
How can I tell if my watering method is increasing disease risk?
Yes, especially for beginners. If leaves stay wet, water is usually being splashed from overhead or irrigation is directed toward foliage. Aim water at the soil base, water earlier in the day, and remove or avoid watering practices that keep leaves constantly damp.
What should I do if my plants look like they’re deficient, but I’m not sure why?
Use a soil test to avoid guessing, then make only targeted changes. Also check whether your issue is nutrient-related or environmental (pH, overwatering, poor drainage, root oxygen shortage, or insufficient light), because “yellow leaves” can come from multiple causes.
Is it okay to fertilize first and test soil later?
Before adding fertilizer, confirm soil pH and look for patterns: yellowing of older leaves can suggest different nutrient issues than yellowing of new growth. Then apply compost or a balanced liquid option only if the soil test or plant symptoms align with a likely deficiency.
What’s the easiest weed-control strategy that doesn’t require constant weeding?
You can, but start small. Use mulch to suppress weeds, then combine it with quick removal while weeds are young (before they flower or set seed). For new bed conversion, sheet mulching (cardboard plus organic layers) can reduce weed pressure over time.
What’s the best way to handle pests without accidentally making the problem worse?
Treat pests as a monitoring problem first. If the infestation is localized, hand removal or a strong water spray may be enough. If you see consistent counts per plant or increasing plant damage, then escalate within an IPM approach rather than applying chemicals automatically.
Are there preventive steps I should take early, before pests explode?
Yes. Some pests are easier to prevent than fix, like using physical barriers (row covers) during vulnerable growth stages. Also inspect undersides of leaves regularly, because many common pests start there before damage becomes obvious.
How do I know when to harvest so I get more yield instead of slowing production?
Harvest schedules matter by crop type. For fruiting plants, frequent picking encourages more flowers and fruit. For greens and roots, harvesting in the morning helps because plants are more hydrated and temperatures are cooler, improving shelf life and flavor.
Can you store harvested vegetables at home, and what mistakes reduce shelf life?
Yes, and it starts with storage conditions. Root crops and many greens keep best at cool temperatures with high relative humidity, while tomatoes are the exception where moisture management is different (store dry at room temperature and only rinse before eating).
What should I track after each season so I improve quickly?
Track totals you care about: what you planted, how long it took, pests or failures you saw, and how much you harvested. Then adjust one variable at a time (one crop variety, spacing, watering practice, or planting date) so next season is an improvement, not guesswork.
Next Article
How to Grow Crops Once Human: Beginner Home Garden Guide
Step-by-step guide to grow food at home, choosing crops for your climate, prepping soil, watering, and harvesting.