Yes, you can grow potatoes on Mars, but only inside a sealed, fully controlled environment, not in open Martian soil under the raw atmosphere. The Martian gets the spirit right: potatoes are one of the most calorie-dense, adaptable crops humans could bring to space. But the film glosses over just how much engineering stands between a seed potato and a harvest on another planet. The good news for home gardeners is that the same controlled-environment principles that would make Mars farming possible are entirely replicable in a spare room, a garage, or even a large closet, and running your own 'Mars-style' potato experiment is genuinely achievable on a hobbyist budget.
Can You Grow Potatoes on Mars The Martian Guide

Marcus Hendrick
8 Jun 2026
Can you actually grow potatoes on Mars?
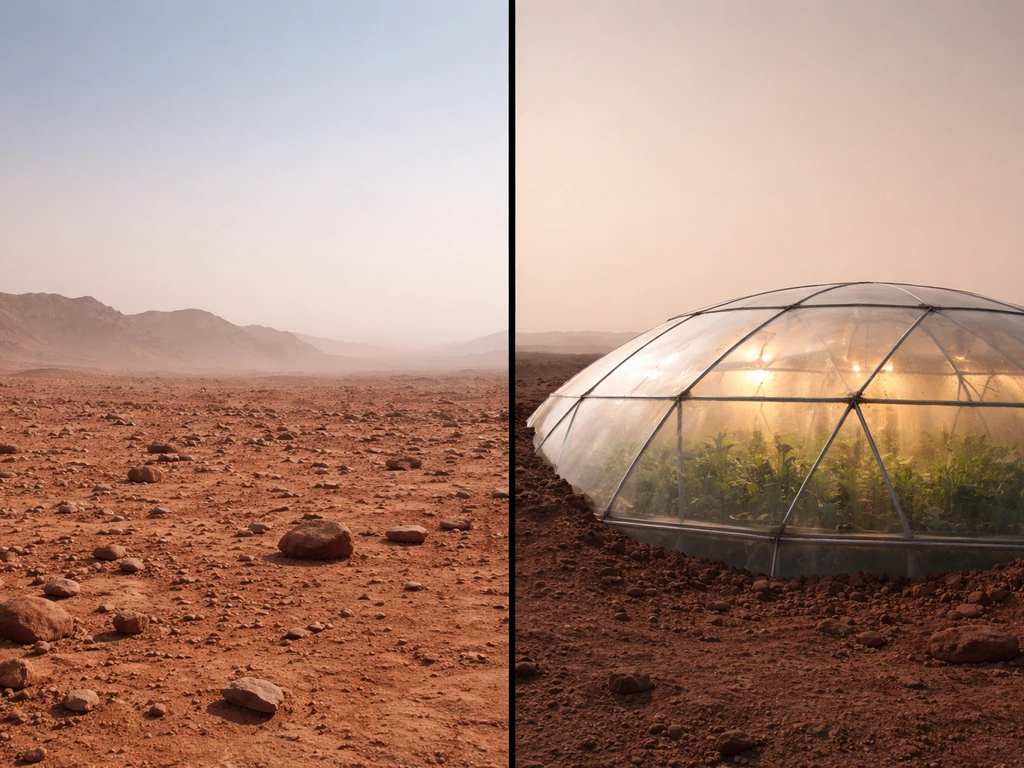
The realistic answer is: not outside, not easily, and not without serious life-support infrastructure. Mars presents four immediate show-stoppers for open-air potato growing. First, the atmosphere is about 95% CO₂ but at a pressure roughly 1% of Earth's, so there is nowhere near enough of anything for a plant to work with. Second, surface temperatures swing from around -80°C at night to about 20°C on a warm afternoon near the equator, which would kill potato foliage within hours.
Third, Mars receives roughly 43% of the solar irradiance Earth does, and potato tuber formation needs a specific light and temperature regime to trigger properly. Fourth, Martian regolith (the loose surface material) is broken rock with essentially no organic matter and lacks the nitrogen, phosphorus, potassium, and micronutrients potatoes need. NASA researchers have confirmed that Mars soil is broken rock material that is missing most plant-growth nutrients outright.
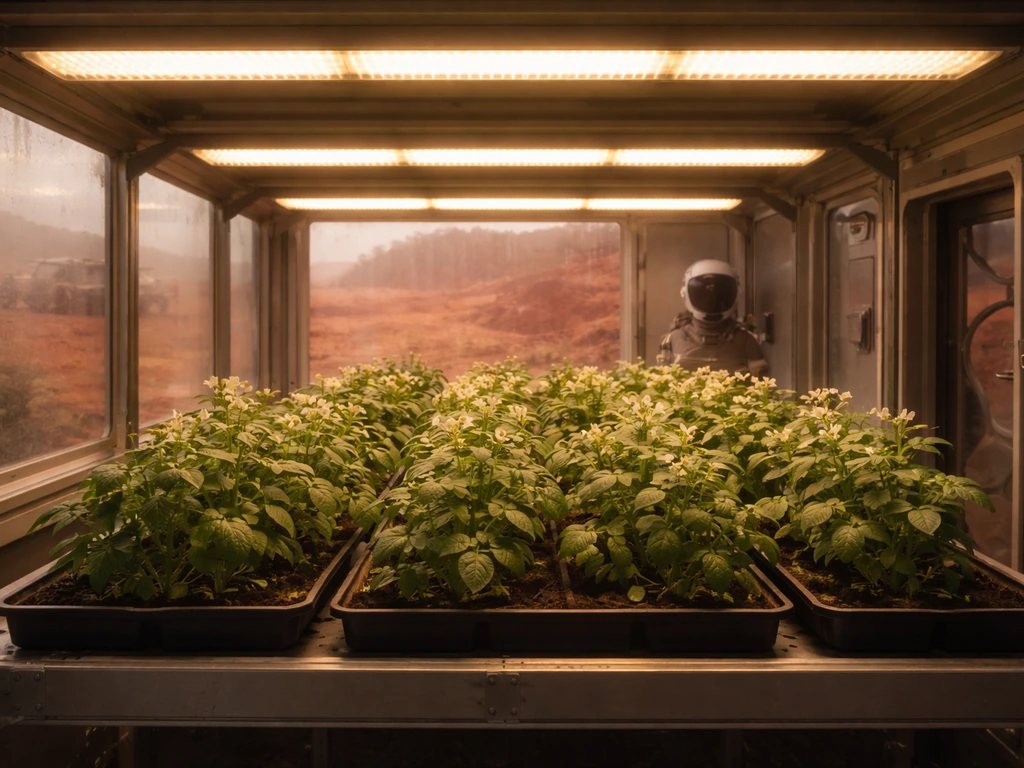
That said, NASA and the International Potato Center have already demonstrated that potatoes can survive Mars-analog conditions inside a sealed CubeSat chamber that controlled nutrient-rich water, temperature, air pressure, oxygen, and CO₂. Potato grow roots can also be managed carefully so they can produce healthy, edible tubers potatoes can survive. The plant lived. The takeaway is not that it's impossible, but that every life-support variable has to be supplied artificially. Nothing about Mars helps you; everything has to come from your sealed system. That framing is useful whether you're thinking about a future Mars habitat or a grow tent in your basement.
In The Martian, Mark Watney uses blank" rel="noopener noreferrer">human waste as fertilizer and manages to coax a crop out of Martian soil mixed with Earth compost. It's a compelling survival story, but the film skips the part where a single breach of the habitat destroys everything, which actually does happen. It's a compelling survival story, but if you want a reality check on what limits his potato output, see why couldn't mark grow more potatoes. That plot point is more scientifically honest than the farming scenes: the real challenge is maintaining the seal.
What potatoes actually need to produce a harvest
Potatoes are not a simple crop. They have specific environmental triggers for tuberization (the process where the plant stops putting energy into leaves and starts forming tubers underground), and if you miss those triggers, you get a beautiful leafy plant with nothing edible beneath it. Here is what the research and hands-on experience both confirm you need to get right.
Light
Potatoes need a short photoperiod (10 to 12 hours of light per day) to initiate tuber formation. Longer photoperiods of 14 to 18 hours keep the plant in a vegetative state and suppress tuberization. Light intensity matters too: research using NASA's controlled-environment protocols found that a photosynthetic photon flux (PPF) of around 34 mol per square meter per day, combined with elevated CO₂ and cooler temperatures, produced the best tuber yields. In practical terms, that means a photosynthetic photon flux density (PPFD) in the range of 400 to 800 µmol per square meter per second during the light period. A single 600W or 800W full-spectrum LED panel in a 4x4 foot space gets you into that range.
Temperature
Tuberization is strongly inhibited by high temperatures. You want air temperatures around 20°C (68°F) during the day and slightly cooler at night, ideally 15 to 18°C (59 to 64°F). Root zone temperature matters even more: keep your growing medium between 15 and 20°C for the best results. Above 25°C the plant prioritizes foliage over tubers, and above 30°C tuberization basically shuts down. This is one reason a climate-controlled indoor environment has a real advantage over outdoor growing in hot climates.
Water
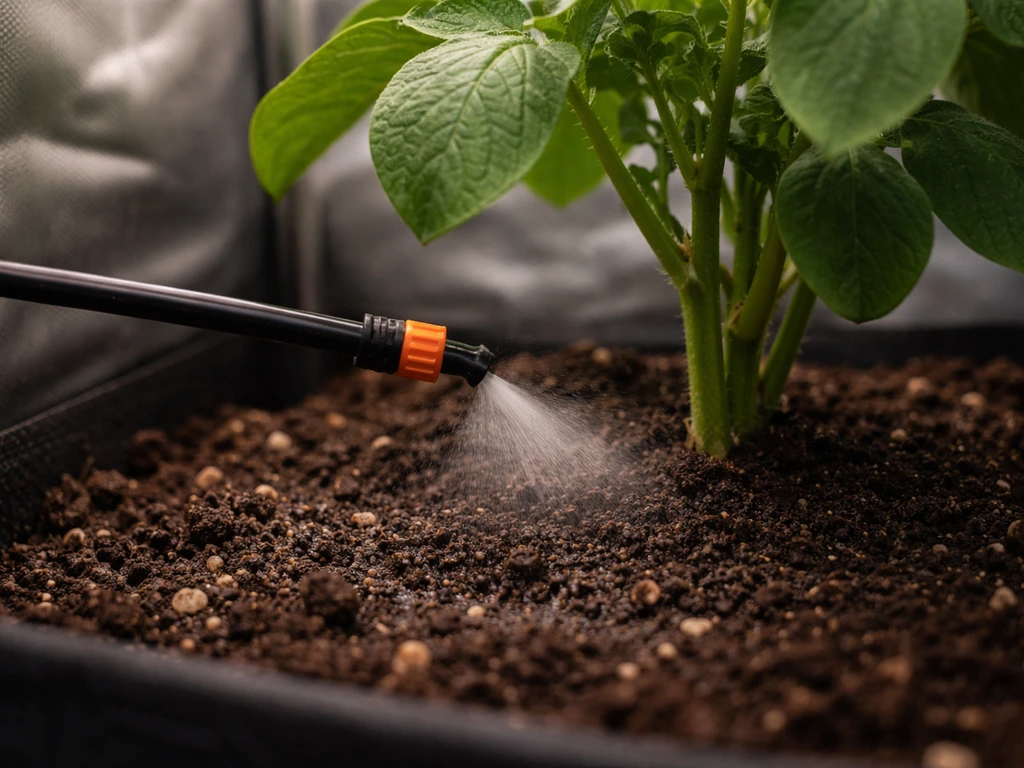
Potatoes are sensitive to water stress, especially during tuber bulking. The goal is consistent moisture without waterlogging. Fluctuations in soil or medium moisture cause uneven tuber bulking, growth cracks, and misshapen potatoes. In a container or soilless system, this means watering on a schedule rather than waiting for visible wilt. Overhead watering (like a sprinkler) also creates humid canopy conditions that favor late blight and other fungal diseases, so drip irrigation or bottom watering is strongly preferred in any enclosed setup.
CO₂ and air
One of the most interesting findings from NASA's research is that elevated CO₂ significantly boosts potato tuber yield. Ambient CO₂ is around 420 µmol/mol today. Raising the enclosure to 1,000 to 2,000 µmol/mol increased tuber production in controlled studies. This is one of the few areas where a sealed environment actually outperforms a field: in a closed grow tent or chamber, CO₂ from a small supplemental tank builds up naturally, and adding a CO₂ controller is a standard practice among serious indoor growers.
Soil and nutrients
Potatoes are heavy feeders. They need nitrogen (N), phosphorus (P), and potassium (K) in substantial amounts, plus micronutrients like calcium, magnesium, sulfur, boron, and zinc. In a field, soil organic matter and microbes supply a lot of this. In a controlled system with inert media (like perlite or a soilless mix), every nutrient has to come from you.
Research on optimizing electrical conductivity (EC) and pH for hydroponic seed potatoes showed that EC and pH can be tuned specifically to favor tuberization over vegetative growth. A good baseline for a nutrient solution is EC around 2. 0 to 2. 5 mS/cm and pH between 5.
5 and 6. 0. During tuber initiation, NASA's studies found that lowering nitrogen concentration (relative to the vegetative stage) helped trigger tuber formation.
Growing setups that could actually work
There are three realistic approaches for a controlled-environment potato system, whether you're thinking about Mars or just want to grow potatoes indoors year-round. Each has real trade-offs.
| Setup | Best for | Key advantage | Key challenge | Rough cost to start |
|---|---|---|---|---|
| Sealed greenhouse (on Mars or off-grid) | Long-term production, multiple plants | Solar light supplement, natural CO₂ management | Temperature control, humidity, disease pressure | $500+ for insulated build |
| Indoor grow tent with containers | Home experiment, year-round growing | Full environmental control, easy to dial in | Electricity cost, manual nutrient management | $150 to $400 all-in |
| Hydroponics or aeroponics | Maximum yield efficiency, minimal medium | Precise nutrient delivery, fast growth cycles | System complexity, pump failures are costly | $200 to $600 depending on scale |
For most home gardeners doing a Mars-inspired experiment, the grow tent with containers is the sweet spot. It gives you real environmental control (you can manage light hours, temperature, and CO₂) without requiring the plumbing complexity of a full hydroponic system. That said, if you already grow hydroponically, potatoes work well in deep water culture or nutrient film technique setups, and aeroponics (misting roots with nutrient solution) is actually how the International Potato Center produces certified disease-free seed potatoes commercially.
Whatever setup you choose, the engineering priorities are the same: eliminate overhead watering to control disease, maintain stable root zone temperature, use a timer for photoperiod control, and monitor CO₂ if you can. A cheap CO₂ monitor (around $30 to $50) is one of the most useful investments for indoor growing.
Choosing seed potatoes and getting them ready to plant
In a controlled environment, disease pressure from your starting material is magnified because you don't have the natural microbial buffering of a healthy field soil. Start with certified seed potatoes, not grocery store potatoes (which are often treated with sprout inhibitors and may carry disease). For a small-scale Mars-style experiment, varieties like Yukon Gold, Red Norland, or any short-season variety bred for cooler climates will perform best indoors.
Chitting (green sprouting) your seed potatoes
Chitting is the process of pre-sprouting your seed potatoes before planting. You place them eye-side up in a bright, cool location (around 10 to 15°C) for 2 to 4 weeks until the eyes develop short, stubby green sprouts about 1 to 2 cm long. After sprouting, make sure you only eat the potato tubers and not the green sprouts potato grow sprouts. Research from USU Extension confirms that chitted seed potatoes emerge 7 to 14 days earlier than unchitted ones and produce earlier harvests overall. In a time-constrained controlled environment (or if you're simulating a 90-day Mars growing window), those two weeks matter.
Cutting and curing seed pieces
If your seed potatoes are large (over 60g), cut them into pieces with at least one or two eyes per piece. This is where disease prevention starts. Cut surfaces are entry points for fusarium dry rot and bacterial decay, especially in a warm, humid enclosed space. After cutting, cure the pieces before planting: hold them at 12 to 15°C with 85 to 95% relative humidity and good air circulation for at least 3 days, ideally up to 2 weeks.
The curing process causes suberization, a natural wound-healing response where the cut surface forms a protective layer. UC IPM research confirms that fusarium cannot penetrate suberized tissue, so this step is genuinely worth the wait. Skipping it in a sealed environment is one of the most common reasons a batch fails.
Planting, spacing, and keeping the crop healthy
Once your seed pieces are cured and sprouted, plant them about 10 to 15 cm (4 to 6 inches) deep in your chosen medium with the cut side down and eyes facing up. In containers, space plants about 30 cm (12 inches) apart. In a trash can or large container grow (a popular method for maximizing small spaces), one to two seed pieces per container is standard.
Hilling
Hilling is the process of mounding growing medium up around the base of the plant as it grows. You do this because potato tubers form on underground stems (stolons) above the original seed piece, not below it. If those stems are exposed to light, the tubers turn green (and mildly toxic). In containers, you achieve this by progressively adding medium to the container as the plant grows, keeping the lower stems buried. Hilling also helps maintain even moisture around the developing tubers, which reduces growth cracking and uneven bulking.
Irrigation in an enclosed space
Water consistently but avoid wetting the foliage. In a grow tent or enclosed chamber, wet leaves stay wet longer than outdoors, and that creates ideal conditions for late blight and white mold. Use drip emitters or bottom-water your containers by sitting them in a tray with a few inches of water. The medium should stay evenly moist but never waterlogged. A simple finger test (stick a finger 2 inches into the medium, water if it feels dry) works fine for a small home experiment.
Nutrients through the growth stages
During early vegetative growth, feed heavier on nitrogen to build canopy. Once plants are about 20 to 25 cm tall, shift to a lower-nitrogen, higher-phosphorus and potassium formula to trigger tuberization. This shift in nutrient ratio, combined with dropping to a 12-hour photoperiod at the same time, sends the plant two signals at once to start making tubers. If you're using a commercial balanced fertilizer, this is when you'd switch from a 'grow' formula to a 'bloom' or 'tuber' formula.
What to expect at harvest: yields, timing, and storage
Harvest timing
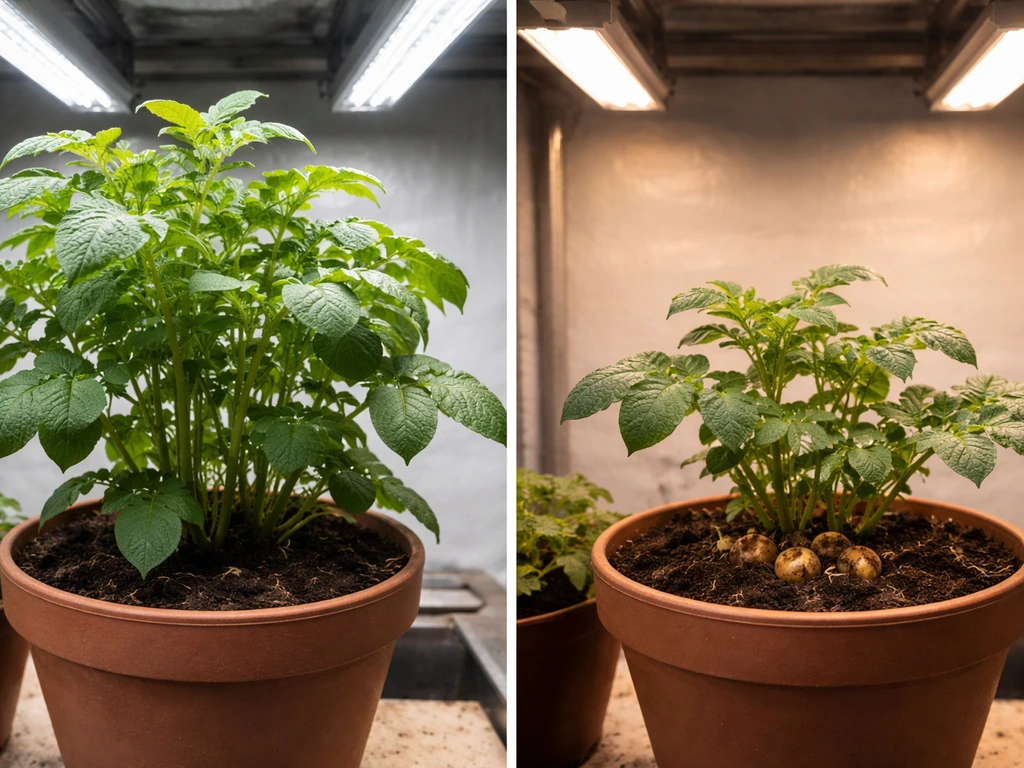
Most potato varieties reach harvest maturity in 70 to 120 days from planting, depending on the variety and conditions. In a controlled environment with elevated CO₂ and optimized light, NASA's 90-day growth window studies produced measurable tuber yields, so targeting 90 days is reasonable for a first experiment. Watch for the tops (foliage) to yellow and die back: that's the classic signal that the plant has moved its energy into the tubers. In a sealed environment with artificial light, you can also just cut off the light and wait one to two weeks (a 'curing in the dark' period) to let the skins set before harvest, which improves storage quality.
Realistic yield expectations
A healthy potato plant grown in a container or controlled environment should produce 0.5 to 1.5 kg (about 1 to 3 lbs) of tubers per plant under good conditions. Field-grown potatoes yield around 2 to 4 kg per plant under ideal conditions, but containers and controlled systems restrict root run. If you plant 4 seed pieces in a large container setup, you're looking at roughly 2 to 6 kg total harvest per grow cycle. That's not going to feed a Mars crew for a year, but it demonstrates the system works and gives you a real baseline to improve from.
Storage after harvest
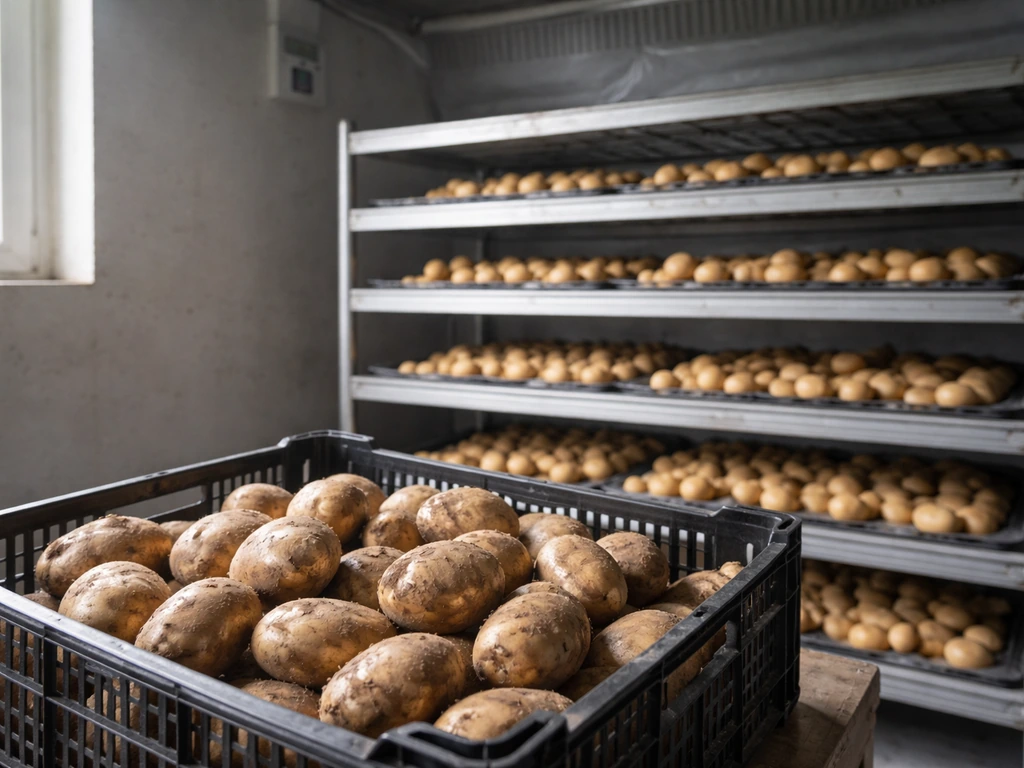
After harvest, potatoes need to be cured before long-term storage. Cure at 15 to 20°C with 90 to 95% relative humidity for 5 to 14 days. This heals any skin damage from harvesting and dramatically extends shelf life. After curing, move them to a cool (4 to 10°C), dark, slightly humid location for long-term storage. Do not refrigerate below 4°C: the starches convert to sugars and the texture degrades. In a Mars-analog scenario, a separate sealed cool chamber would handle this. At home, a basement or cool garage does the job.
Run your own Mars-style potato experiment at home
This is the part I'd actually encourage you to try. A home Mars-style potato grow is a genuinely useful self-sufficiency experiment, not just a novelty. Here is a practical path from zero to harvest.
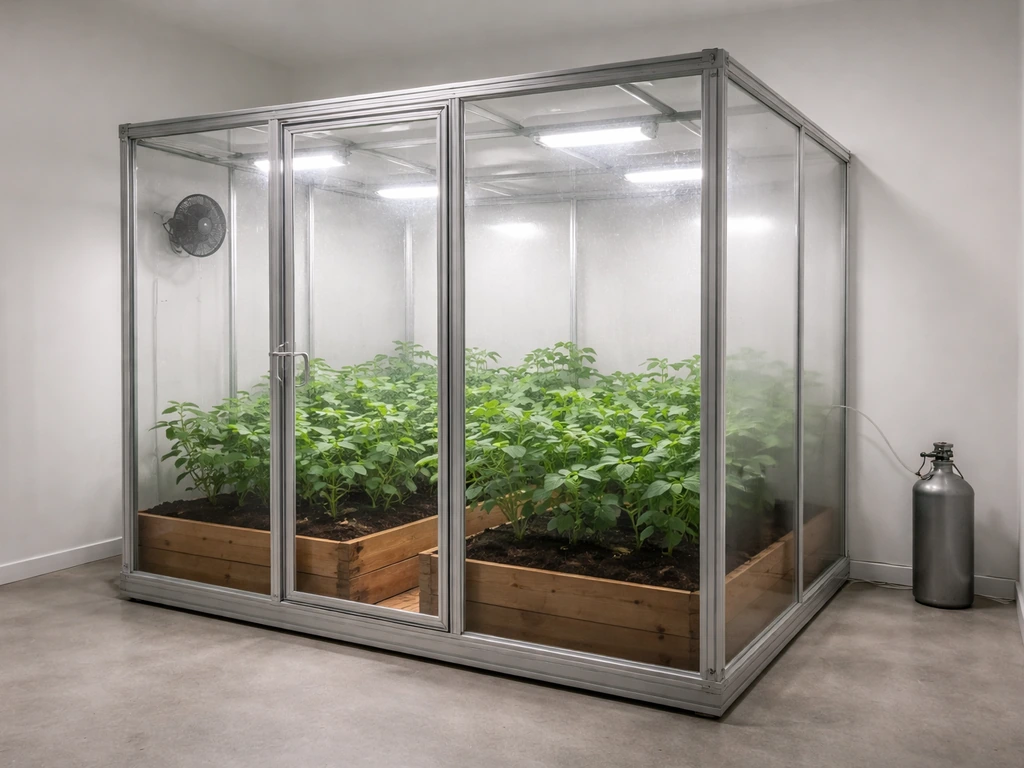
- Set up your enclosure: A 4x4 foot grow tent (around $80 to $120) is ideal. It's lightproof, reflective inside, and has ports for ventilation and cables. If you want to go minimal, a large dark-colored trash can or grow bag system in a spare room works too.
- Get your lighting right: A 400W to 600W full-spectrum LED panel placed 30 to 45 cm above the canopy will hit your PPFD target. Set a timer: 16 to 18 hours of light per day for the first 4 to 5 weeks (vegetative stage), then drop to 12 hours to trigger tuberization.
- Choose a growing medium: A 50/50 mix of perlite and a good potting mix works well for containers. Pure perlite or coco coir are excellent if you're doing hand-watering with a nutrient solution. Avoid regular garden soil: it compacts badly in containers and introduces disease.
- Start with certified seed potatoes: Order from a reputable seed supplier. Chit them for 2 to 3 weeks before planting (bright windowsill at room temperature works fine). Cut and cure any pieces larger than 60g before planting.
- Set your nutrient schedule: Use a water-soluble balanced fertilizer (something like 20-10-20) at half strength for the vegetative phase, then switch to a low-nitrogen, high-K formula (like 5-15-30) once you drop to the 12-hour photoperiod.
- Water with drip emitters or bottom trays, not overhead. Check the medium moisture every 2 days and keep it consistently moist but not wet.
- If you want to go full Mars-mode, add a CO₂ monitor and a small CO₂ tank with a regulator to bring enclosure CO₂ up to 1,000 to 1,200 µmol/mol. This step alone can meaningfully improve yield and is a fascinating variable to track.
- Measure and document everything: plant height weekly, any visible disease, medium moisture, and temperature. At harvest, weigh your total yield. This data tells you what to change in the next cycle.
- Harvest when foliage dies back (around day 80 to 100), cure the tubers at room temperature with high humidity for one week, then store cool and dark.
The total cost for a first run, including the tent, LED, containers, seed potatoes, and nutrients, is around $200 to $350. Electricity for a 600W LED running 16 hours a day for 90 days is roughly $25 to $40 depending on your local rates. That's a reasonable investment for a system you can run year-round, independent of season or climate.
If you've been curious about growing potatoes in a trash can or large containers already, a Mars-style controlled setup is just the next step up in precision, and it's well within reach for a motivated home gardener. If you are wondering whether garbage can potatoes grow well, the same controlled-environment basics apply: manage light hours, temperature, moisture, and nutrients carefully.
The film got one thing absolutely right: in a crisis, potatoes are the crop you want. They produce more calories per square foot than almost anything else, they store well, and now we know they can be grown in a sealed controlled environment almost anywhere, including, eventually, Mars.
Purdue’s Controlled Environment Agriculture extension hub also maintains resources for controlled-environment topics such as water management, nutrient deficiencies, and integrating those needs into a functioning system grown in a sealed controlled environment almost anywhere. If you're wondering why Mark couldn't grow potatoes on Mars in The Martian, it's because open-air conditions and insufficient nutrients and pressure make tuber formation unrealistic without a fully controlled, sealed system why couldn't he grow potatoes.
Start your experiment, keep notes, and learn from what the plants tell you. That's exactly how every successful grower gets better.
FAQ
Can I grow potatoes outdoors in a greenhouse or cold frame on Mars, or does it really need a sealed chamber?
On Mars, a greenhouse still leaves you exposed to the core show-stoppers the article lists, especially pressure and CO2 availability, plus the extreme day-night temperature swings. A Mars-style result requires a sealed system where pressure, gases, and temperature are controlled together, otherwise tuberization will likely fail even if the plant survives briefly.
If sealed is required, how much CO2 enrichment do I actually need for tubers at home?
You do not need Mars-level concentrations, but you do need enough enrichment and stability to avoid veg growth. For a typical grow tent, a CO2 controller that maintains around 1,000 to 2,000 µmol/mol during the light period is a practical target, and you should still manage temperature and photoperiod because CO2 alone cannot fix heat-stalled tuberization.
What should I do if my plants look healthy and very leafy, but I get tiny or no tubers?
That pattern usually means tuberization triggers were missed, most commonly photoperiod too long, nitrogen still too high, or temperatures staying above the tuber threshold. Use a timer to drop to a shorter light cycle when plants reach the 20 to 25 cm stage, then shift to a lower-nitrogen nutrient blend while keeping daytime air and root-zone temps near the target range.
How do I prevent blight or mold in an enclosed grow tent during high humidity?
Avoid wetting the canopy (use drip or bottom watering) and increase air exchange enough to prevent persistently wet leaf surfaces. Also keep watering consistent, because water fluctuations plus high humidity is a recipe for fungal outbreaks. If you see fast-spreading leaf spots, remove affected leaves early to slow escalation.
Does it matter whether I start with certified seed potatoes or can I use store-bought ones?
Store-bought potatoes can work occasionally, but they are higher risk because they may be treated to suppress sprouting and can carry diseases that spread in sealed environments. If you want a reliable first experiment, certified seed potatoes reduce the chance of failure and allow clearer interpretation of results, especially when you are adjusting triggers like photoperiod and nutrient ratio.
Can I cut seed potatoes and skip curing if I am short on time?
Skipping curing is one of the fastest ways to lose a container crop in an enclosed setup. The cut surface needs time to suberize, which blocks pathogens. If you must speed things up, at least keep the pieces cool and humid with strong airflow long enough for the cut surface to dry and seal, rather than planting immediately.
How deep should I plant seed pieces in containers to maximize tuber yield?
For containers, the practical target from the article is about 10 to 15 cm (4 to 6 inches), planted cut side down with eyes up. If you plant shallower, tubers can be exposed to light, turning green and reducing quality, if deeper than needed you can slow growth and complicate drainage and root-zone temperature control.
What is the best way to water so I avoid growth cracks and misshapen potatoes?
Aim for consistent moisture rather than “wait until wilt.” Bottom watering via a tray helps keep foliage dry, and the medium should feel evenly moist without waterlogging. Use the finger test a couple of times per week early in the grow, then adjust based on temperature and airflow inside the tent.
Do I need to hill in a small container, or can I just let tubers form where they start?
Hilling helps bury stolons as they develop, which keeps tubers from turning green and it supports more even moisture around developing tubers. In small containers, you typically mound medium gradually as the plant grows, adding enough volume that the lower stems stay covered.
When exactly should I harvest, and should I dark-cure my potatoes?
Use foliage dieback as your main signal, tops yellowing and drying usually means tubers have matured. In an artificial-light environment, you can also cut the light and wait about 1 to 2 weeks for skins to set, which improves storage quality, then cure after harvest for best shelf life.
How do I cure and store potatoes from a tent grow, and can I refrigerate them?
Cure at about 15 to 20°C with high humidity for roughly 5 to 14 days to heal harvest damage, then store cool, dark, and slightly humid. Do not refrigerate below 4°C, because cold can convert starch to sugars and worsen texture. If your home is too warm, use a separate cool storage area rather than a regular refrigerator crisper.
My first grow only produced a small amount per plant, is that expected?
Yes, 0.5 to 1.5 kg per plant is a strong outcome in containers under good conditions, but many first runs land lower due to inconsistent temperatures, variable moisture, or less reliable CO2 and light intensity. Keep a log of photoperiod, day and root-zone temperatures, watering schedule, and nutrient stage, so you know which lever to adjust next.
Next Article
Potato Grow Sprouts: Can You Eat Them Safely?
Learn if sprouted potatoes and potato shoots are safe to eat, what to discard, and how to prevent solanine risk.
