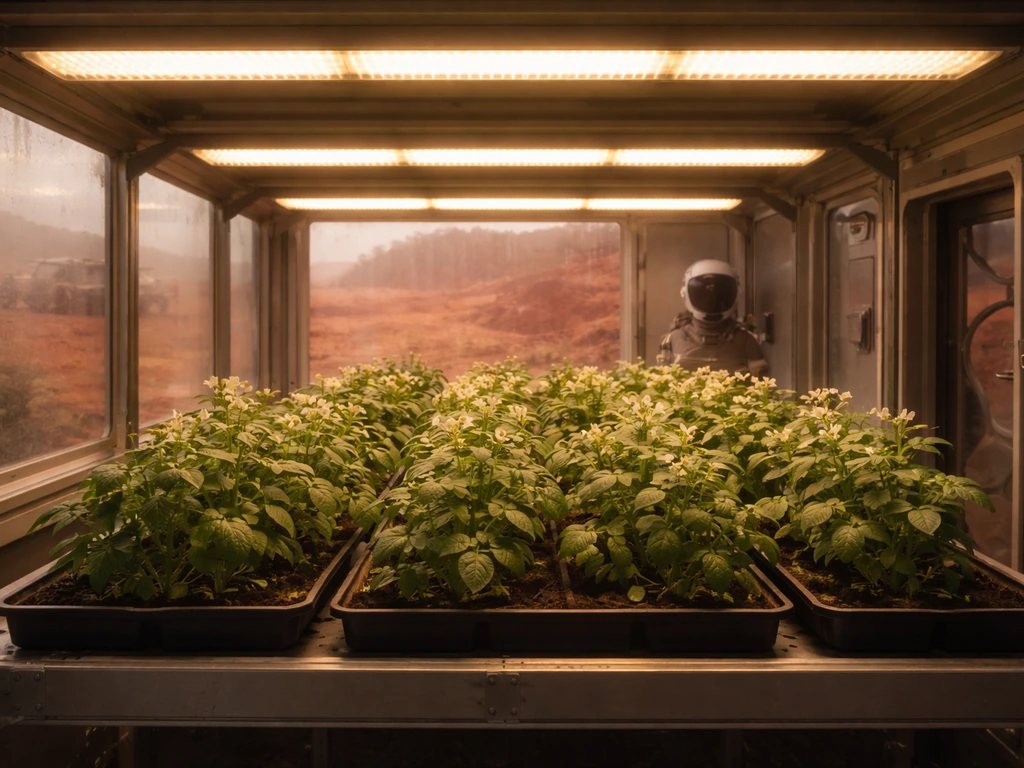
Yes, potatoes grow really well in a garbage can, and this is one of the most practical container gardening methods out there. If you are also wondering whether you can grow potatoes in space like on Mars, the same basics of tubers, soil, and light still apply in different ways the martian can you grow potatoes. A standard 32-gallon trash can gives you enough depth and volume to produce a genuinely useful harvest, even if you're working with a tiny patio, a concrete driveway, or a balcony. I've grown potatoes this way for years and it consistently outperforms smaller pots and buckets for total yield per square foot of ground space. A quick related story is about the Martian, where the main challenge wasn’t just growing potatoes but keeping the plants alive long enough to produce a harvest. If you want, you can also learn how to troubleshoot common issues so your trash-can potatoes get a better harvest grow potatoes in a trash can. The key is getting the drainage right, using the correct soil mix, and doing the 'mounding' step every time the plants push new growth. Skip those three things and you'll end up with rot, stunted plants, or a disappointing handful of tiny tubers. Get them right and you can pull 10 to 15 pounds of potatoes from a single can.
Garbage Can Potatoes: How to Grow, Care, and Harvest

Do potatoes actually grow in a garbage can (and is this method for you)?
Potatoes form tubers along buried stems, not just on the roots. That means the more vertical growing space you give them, the more tubers you can generate. A garbage can, with its depth and width, is genuinely one of the better container shapes for this. University extension programs confirm that any opaque container with drainage holes works, and barrels, garbage bins, and trash cans are explicitly mentioned as good candidates.
This method works especially well if you're renting and can't dig up a lawn, if your native soil is heavy clay or compacted, if you want to avoid the soil-borne diseases that accumulate when you grow potatoes in the same ground year after year, or if you just want to grow a meaningful amount of food in a small footprint. It's also a great option for anyone who wants to experiment with growing potatoes in a trash can before committing to a larger in-ground patch. The trade-offs are real though: containers dry out faster than in-ground beds, they can overheat in hot summers, and you'll need to water more frequently than you would in the ground. If you're in a climate with very hot summers (sustained highs above 85°F), you'll want to position the can strategically and monitor moisture carefully.
Choosing the right garbage can setup
Size and container type
Bigger is better here. OSU Extension recommends containers that are at least 18 inches wide and 3 feet deep for potatoes. A standard 32-gallon plastic trash can hits roughly those dimensions, which makes it a solid choice. A 20-gallon can will work but expect fewer tubers. Metal garbage cans look great but absorb and radiate heat, which can cook the soil around your tubers on hot days. If you use metal, paint it white or wrap it with burlap to reflect heat, or stick to plastic. The can does not need a lid during the growing season, lid or no lid doesn't affect the potatoes, but keeping a lid nearby to cover the can after harvest can protect stored tubers if you plan to leave them in the can briefly.
Drainage: the non-negotiable step
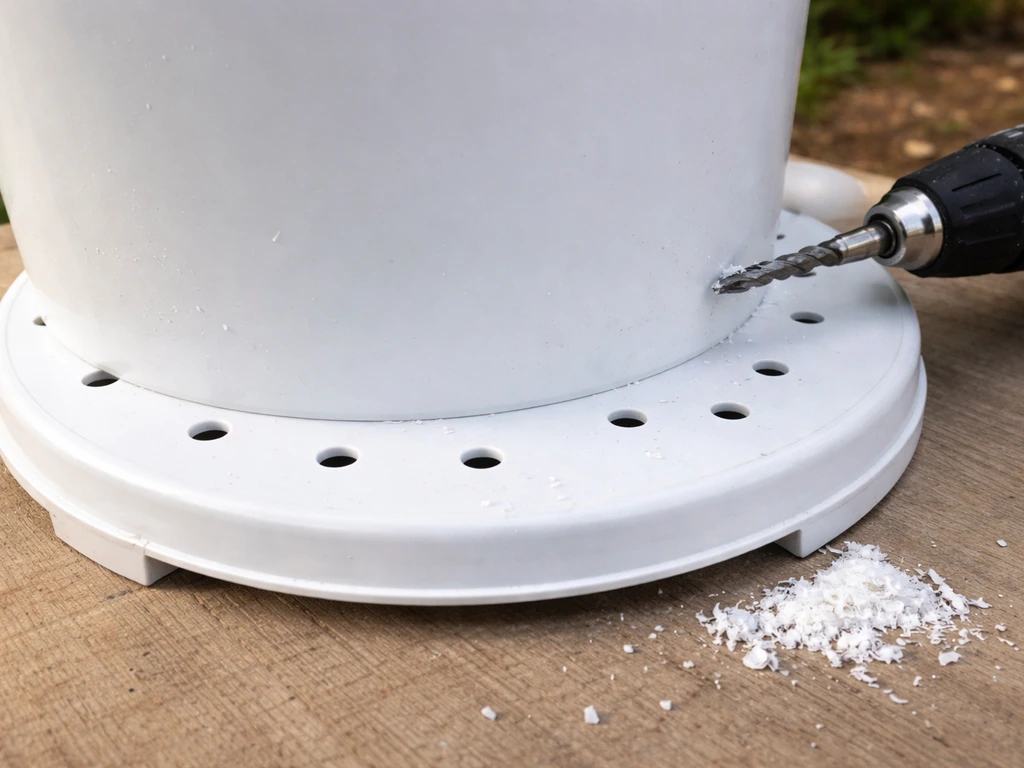
This is where most garbage can potato projects fail. You need drainage holes, full stop. Drill at least 6 to 10 holes in the bottom of the can, each about 1/2 inch in diameter. Also drill a row of holes around the lower sides, a few inches up from the bottom, as a backup if the bottom holes get blocked. UNH Extension suggests a thin layer of coarse gravel (about 1/2 inch) in the very bottom as an additional precaution. One thing to be clear about: do not fill the bottom 6 inches with rocks or gravel thinking it will improve drainage. University of Maryland research shows this actually makes drainage worse because it reduces root space and disrupts how water moves through the soil column. Use the gravel layer very sparingly, just enough to prevent soil from plugging your holes.
Location and sunlight
Potatoes need full sun: at least 6 to 8 hours of direct sunlight daily. The advantage of a garbage can is that you can move it, so take time to scout your space before you fill it with 50 pounds of soil mix. Once it's full, it's not going anywhere easily. Put it on a plant dolly or wheeled platform if you think you'll need to reposition it during the season. Keep the can off hot concrete or asphalt if possible, or at least elevate it on wooden blocks to allow airflow under the bottom and reduce heat transfer.
Planting potatoes in your garbage can
Choosing seed potatoes
Use certified seed potatoes rather than grocery store potatoes. Certified seed potatoes are disease-free and bred to perform reliably. For garbage can growing, early and mid-season varieties like Yukon Gold, Red Norland, or Adirondack Blue work well because they produce tubers faster and the plants stay a manageable size. Late-season varieties like Russet Burbank will also grow, but they need more time and tend to want more space. If you're in a hot climate, early varieties are especially smart since they'll have finished producing before the worst summer heat arrives.
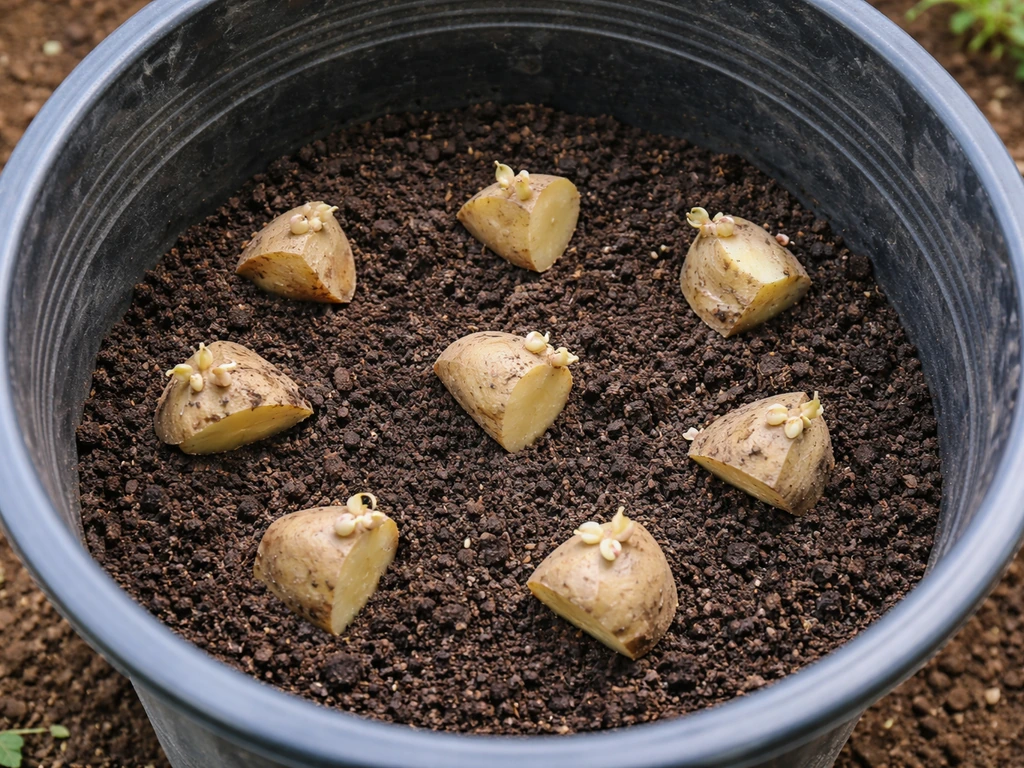
If your seed potatoes are large (bigger than a golf ball), cut them into pieces, each with at least two or three 'eyes' (the small buds you can see on the surface). Let cut pieces sit at room temperature for 24 to 48 hours before planting so the cut surfaces dry and form a protective skin. This dramatically reduces the risk of the seed piece rotting in the soil.
Soil mix
The best mix for a garbage can potato setup is roughly half soilless potting mix and half quality compost. UNH Extension specifically recommends this ratio. The potting mix keeps things light and well-drained, which prevents waterlogging, while the compost provides the nutrients potatoes need without relying entirely on synthetic fertilizer. Aim for a slightly acidic soil: a pH of 6.0 to 6.5 is ideal (UMN Extension guidance), though potatoes will tolerate as low as 5.0. Do not use straight garden soil from your yard in a container. It compacts badly, drains poorly, and introduces soil-borne disease. Bag it up and use the 50/50 potting mix and compost blend.
Planting depth and timing
Don't fill the can all the way to the top at planting. Start with 6 to 8 inches of your soil mix in the bottom of the can. Place your seed potato pieces on top of that layer, about 3 to 4 inches deep when covered, which means you'll add another 3 to 4 inches of mix over them after placing them in the can. Space seed pieces 6 to 12 inches apart from each other. In a 32-gallon can, you can fit 2 to 3 seed pieces comfortably. Plant outdoors after your last frost date, when soil temperatures are reliably above 45°F. In most of the US, this falls somewhere between late March and late May depending on your zone.
Mounding soil as they grow (plus watering and feeding)
The mounding process

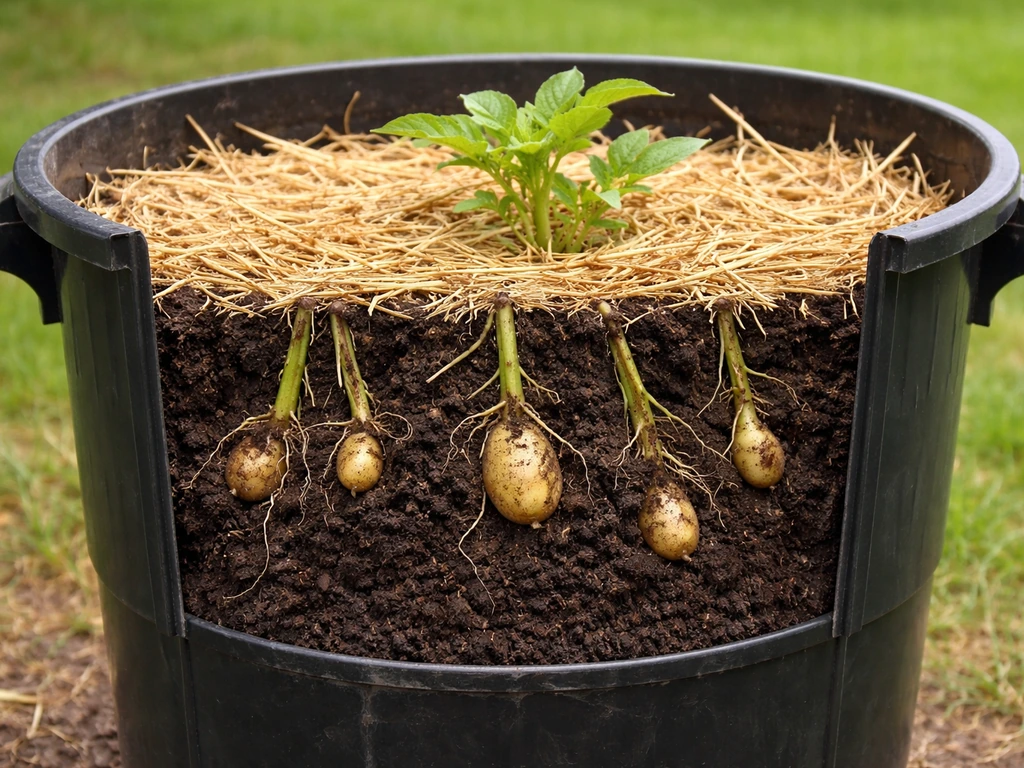
Once green shoots emerge from the soil surface, you start adding more soil mix. This is the most important thing you'll do all season. Potato tubers form along the buried portion of the stem, so the more stem you bury (up to a point), the more tubers you get. As the buried stem grows into the roots, potato plants can develop tubers you can eat after harvest, not while they are still rooting potato grow roots can eat. The rule is to add soil mix until only about 6 inches of foliage remains above the surface. Let that exposed foliage grow a bit more, then add soil again. Repeat this process every week or two through the growing season, gradually working your way toward the top of the can. This is sometimes called 'hilling' in in-ground growing. In the can, it's the same idea: you're building up the soil layer continuously so the plant keeps making new tubers on the newly buried stem sections.
Keep mounding until you reach about 2 to 3 inches from the top of the can. At that point, the plant will continue growing upward but you stop adding soil. Just let it flower and focus on watering and feeding from here.
Watering
Containers dry out much faster than in-ground beds, especially in warm weather. Check moisture by pushing your finger about 1/4 inch into the soil surface. If it feels dry at that depth, water thoroughly until it drains freely from the bottom holes. The goal is consistent moisture, not wet soil. Avoid letting the can dry out completely between waterings and then flooding it. That drought-then-flood cycle is a major cause of hollow heart (a physiological defect inside the tuber) and cracked skins. In hot weather you may need to water every day or every other day. In cooler spring weather, every 2 to 3 days is more typical. Once the vines start dying back near the end of the season, cut back on watering significantly to allow the tuber skins to set and harden before harvest.
Fertilizing
Because you're using a good compost-based mix, you won't need to fertilize heavily at the start. After 3 to 4 weeks of growth, begin applying a diluted liquid or water-soluble fertilizer about once a week. A balanced fertilizer works well early in the season. Once the plants are flowering, shift to a lower-nitrogen formula (or just stop nitrogen feeding) so the plant puts energy into tuber production rather than leafy top growth. Potassium is particularly important for tuber development, so a fertilizer labeled for tomatoes or vegetables (which tend to be higher in potassium) is a good choice at the mid-season point.
What good growth looks like and the timeline to expect
Here's a rough timeline for garbage can potatoes from planting to harvest:
| Timeframe | What you should see | What to do |
|---|---|---|
| Weeks 1–2 | No visible growth above soil (seed piece is establishing) | Keep soil moist, don't overwater |
| Weeks 2–4 | First green shoots emerge | Begin mounding soil to cover all but 6 inches of stem |
| Weeks 4–8 | Vigorous leafy growth, stems thickening, regular mounding needed | Add soil every 1–2 weeks, start weekly liquid fertilizer around week 4 |
| Weeks 8–10 | Plants may begin flowering (yellow, white, or purple blooms depending on variety) | Stop adding soil when you're near the top of the can |
| Weeks 10–16 | Foliage begins yellowing and dying back from the bottom up | Reduce watering, do not add more soil or fertilizer |
| Weeks 14–20+ | Vines fully yellow and collapsed (timing varies by variety) | Wait for vines to fully die before harvesting |
Early varieties like Red Norland can be ready in as few as 70 days. Late varieties may take 100 to 120 days. You can do a 'test dig' by carefully reaching into the side of the soil mix with your hand around week 10 or 12 to feel for tubers without disturbing the plant. Small 'new potatoes' can actually be harvested early (after flowering) if you want some fresh eating while leaving the main crop to mature. Good progress means steady upward growth, dark green leaves, and no yellowing before the expected maturity window.
Harvesting and storing your potatoes
When and how to harvest
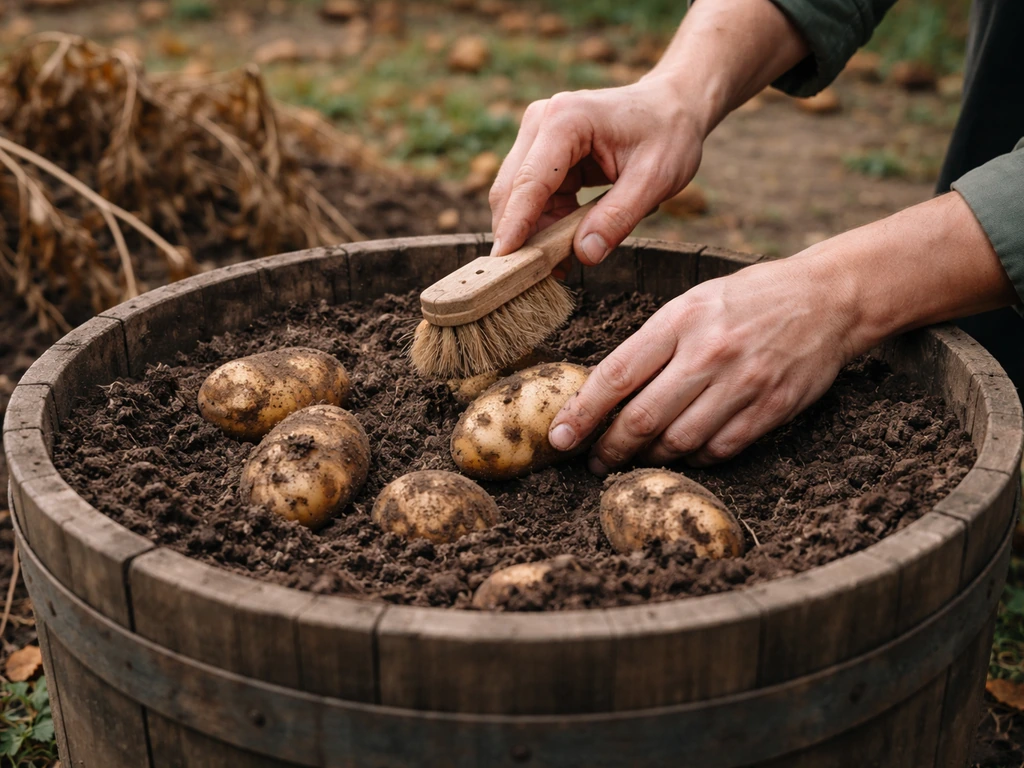
The cleanest harvest signal is fully dead and dried vines. Wait until the foliage has completely collapsed and browned before you dig. If late blight is present in your area, Oregon State University recommends waiting 2 to 3 weeks after vine death to harvest, which gives the tuber skins time to toughen. To harvest from a garbage can, simply tip the can onto a tarp or into a wheelbarrow and sift through the soil mix by hand. This is actually the big advantage of container growing: no digging with a fork, no accidentally stabbing tubers. Pull every tuber you find, including any tiny ones, since small cut pieces left in the mix can rot and cause problems if you reuse the soil.
Brush off loose soil gently. Don't wash the potatoes if you're planning to store them. Washing removes the protective skin layer and invites rot. Let them air dry in a shaded spot for an hour or two before moving them indoors.
Curing and storage
Curing is a step most beginners skip, and it's why their potatoes go soft or moldy within a few weeks. After harvest, place potatoes in a single layer (or loosely stacked) in a dark, well-ventilated space at 60 to 65°F with high humidity (around 95% relative humidity if you can manage it) for 7 to 14 days. This lets the skin thicken and minor cuts or bruises heal over. After curing, move them to a cooler, dark storage space: around 40 to 45°F is ideal for long-term storage, which keeps them dormant without freezing. A basement, root cellar, or cool closet works well. Properly cured and stored potatoes from a garbage can harvest can last 3 to 6 months.
Expected yield from a well-managed 32-gallon can is roughly 10 to 15 pounds of potatoes, sometimes more if conditions are ideal. Don't be discouraged if your first year produces less. The mounding timing and watering consistency take a season or two to dial in.
Common problems and how to fix them
Rotting tubers or seed pieces
Rot is almost always a drainage or moisture problem. If your seed pieces rot before sprouting, the soil is staying too wet. Check that your drainage holes aren't plugged and that you're not overwatering early in the season when the plant isn't yet pulling much moisture. Make sure you cured your cut seed pieces for 24 to 48 hours before planting. If tubers are rotting later in the season, the same culprits apply, usually blocked drainage or overwatering during cool, wet stretches.
Poor sprouting or no growth
If nothing emerges after 3 to 4 weeks, the soil is probably too cold or too wet. Potatoes won't sprout if soil temperatures are consistently below 45°F. If you planted early and hit a cold snap, be patient and make sure the can is in the warmest available spot. Also check that your seed potatoes weren't already rotted when you planted them, which can happen with improperly stored seed stock. If you notice potato sprouts, you can usually eat the potatoes as long as they are green-free and the sprouts are removed.
Overheating
Containers sitting on hot pavement in full summer sun can get dangerously hot at the soil surface. Potato tubers stop forming when soil temperature rises above about 80°F, and quality degrades significantly above that. If you're in a hot summer climate, move the can to afternoon shade, elevate it off heat-absorbing surfaces, or wrap the outside of the can with reflective material. A light-colored can is significantly better than a dark one for heat management.
Low yield
The most common reason for disappointing yields is skipping or rushing the mounding step. Sometimes Mark Grow couldn't keep his potato plants productive because key steps like drainage, sunlight, or consistent watering were off why couldn't mark grow more potatoes. If you let the plant grow tall without adding soil, you're missing all the tuber-producing stem length that would have been buried. The second most common reason is insufficient sun: potatoes really do need 6 to 8 hours of direct sun. Insufficient water during the flowering and tuber-filling stages is the third major cause. If you're consistently hitting all three of these right and still getting poor yields, try a different variety next season.
Pests: Colorado potato beetle
The Colorado potato beetle is the most significant insect pest for potatoes, even in containers. These beetles and their orange larvae can strip a plant of its leaves surprisingly fast if you don't catch them early. Penn State Extension also notes that Colorado potato beetles can defoliate potato vines rapidly if left unchecked, so timely monitoring and management matters even when growing in containers strip a plant of its leaves surprisingly fast if you don't catch them early. Check the undersides of leaves for orange egg clusters. If you see adults (yellow with black stripes) or larvae, pick them off by hand and drop them in a bucket of soapy water. In containers this is very manageable since the plant is at eye level and you can inspect it easily. Don't ignore it: a fully defoliated plant won't produce a good harvest.
Late blight and foliar disease
Late blight is the most serious potato disease and it spreads through wet foliage. Avoid watering overhead, especially in the evening. Water at the base of the plant so the leaves stay dry. If you see dark, water-soaked lesions on the leaves with a white mold border underneath, that's late blight. Remove affected foliage immediately and do not compost it. If the plant is severely affected, cut the vines down entirely and wait 2 to 3 weeks before harvesting so the tubers aren't contaminated during the harvest process.
Your shopping list and simple planting schedule
Here's everything you need to get started:
- One 32-gallon plastic trash can (light-colored if possible)
- Drill with 1/2-inch bit for drainage holes
- 1 to 2 cubic feet of soilless potting mix
- 1 to 2 cubic feet of quality compost
- 2 to 3 certified seed potato pieces (any early or mid-season variety)
- Balanced liquid or water-soluble fertilizer
- Plant dolly or wheeled platform (optional but very useful)
- Soil pH test kit (optional but helpful)
Simple planting schedule: Drill holes and prepare can 1 to 2 weeks before your last frost date. Buy and pre-sprout seed potatoes in a bright, cool indoor spot for 1 to 2 weeks before planting (this speeds emergence). Plant after last frost, mound every 1 to 2 weeks as the plant grows, start liquid fertilizer at week 4, reduce watering when vines yellow, harvest when vines are fully dead, and cure before storing. That's genuinely all there is to it. Growing potatoes in a trash can is one of the most forgiving and satisfying container projects you can take on, and once you've done it once, you'll likely be setting up two or three cans the following spring.
FAQ
How many seed potatoes should I plant in a 32-gallon garbage can?
For a typical 32-gallon can, plan on 2 to 3 seed pieces. More pieces usually means tighter spacing, smaller tubers, and faster depletion of nutrients in the container mix, even with good fertilizing.
Can I use the same soil mix (or compost) in the can next year?
It is not recommended. Reuse often leads to disease buildup and compaction effects in containers. Instead, empty the can and start fresh with a new 50/50 potting mix and compost blend, then compost what you can.
Should I water less once flowers appear?
Don’t automatically cut water right when flowering begins. Keep moisture steady through the flowering and tuber-filling window, then taper only when vines start dying back. Sudden dryness during tuber development can increase cracking or misshapen tubers.
What if my tubers are green or exposed above the soil line?
If any tubers show a green tint, they got light exposure, which makes them undesirable to eat. Fix it next time by mounding enough so only foliage remains above the soil, and remove any clearly exposed tubers at harvest.
Is it okay to harvest “new potatoes” before the vines fully die?
Yes, after flowering you can do a careful side test dig for small new potatoes. Leave the rest to mature, and when you close up the can, add a little fresh mix if you disturbed the buried stems.
Why are my potatoes hollow inside or cracked?
Most cases come from irregular watering, especially drought followed by heavy soaking. Container plants swing moisture faster than in-ground beds, so aim for consistent moisture and water thoroughly until it drains, rather than frequent small top-ups.
How do I tell when it’s truly safe to cure and store potatoes?
Cure only when skins are set and vines are completely browned and collapsed. If you harvest while vines are still green and active, curing often fails, and you get higher rot rates in storage.
What should I do if I suspect late blight in my area?
Stop overhead watering and water the base only. If you see classic lesions, remove affected foliage immediately and do not compost it. If disease pressure is high, consider harvesting 2 to 3 weeks after vine death, which helps toughen tuber skins.
Can I grow potatoes in a garbage can indoors or on a balcony with limited sun?
You can grow them only if you can provide 6 to 8 hours of direct light daily. In low light, plants may produce foliage but fewer tubers. If sun is marginal, plan on using grow lights or choose a sunnier spot before filling the can with soil.
What’s the best way to prevent drainage holes from getting blocked?
Use coarse gravel only sparingly at the bottom, enough to keep soil from plugging holes, not to fill space. Also avoid overwatering early, because saturated mix can settle and compress around openings.
Can You Grow Potatoes on Mars The Martian Guide
Feasible guide to growing potatoes on Mars The Martian-style, covering systems, conditions, planting, yields, and home e