On a small farm or homestead plot, the crops most worth growing are high-value, fast-turning vegetables and herbs: salad greens, herbs like basil and cilantro, radishes, microgreens, garlic, cherry tomatoes, and summer squash. If you’re wondering what you can grow, many small farms focus on vegetables because they can grow vegetables on a farm with relatively tight spacing and consistent harvests. These give you the best return per square foot, sell well at farmers markets and to local restaurants, and fit realistically into a small-space operation. If your goal is profit, a good starter mix is salad mix, herbs, and one or two fruiting crops like cherry tomatoes or cucumbers. If you just want productive food for the table with some surplus to sell or trade, add garlic, beans, and winter squash. Either way, the key is matching what you grow to what your land, water, and schedule can actually support.
What to Grow on a Small Farm for Profit and Success

Start with your real constraints

Before you pick a single seed, be honest about four things: how much space you actually have to work, what climate zone and frost dates you're dealing with, how much water you can reliably deliver, and how many hours per week you can commit to field work. These aren't abstract planning questions. They directly determine which crops will succeed and whether you can realistically generate surplus or income.
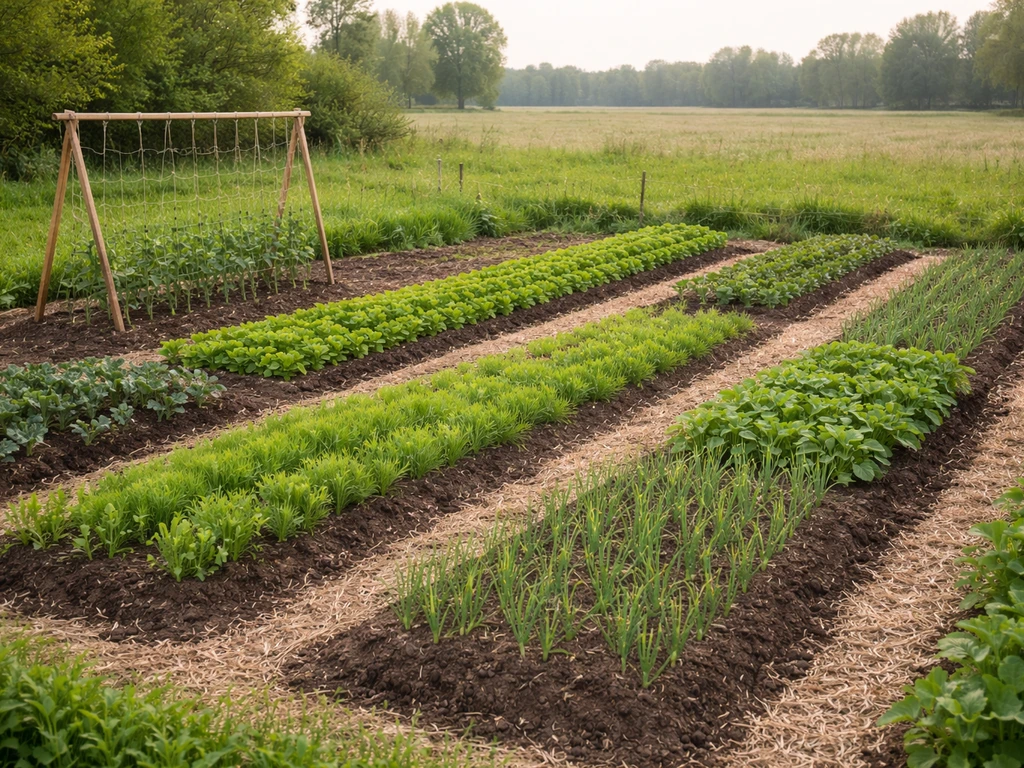
Space is the first filter. A quarter-acre is enough to run a serious market garden if it's well organized. A few raised beds totaling 200 to 500 square feet is enough for a productive food garden with some surplus. Below that, containers and vertical growing become your friend. Think in terms of square feet per crop, not acreage, and you'll make better decisions.
Climate shapes everything else. Your frost dates determine how long your season is, which crops can go in when, and whether season extension tools like hoop houses or row covers make financial sense. A hoop house can add roughly 6 to 8 weeks to your growing season, which is significant if you're in a short-season climate. Growing degree days (GDDs) are a more precise way to forecast crop maturity than the "days to maturity" label on a seed packet, because actual heat accumulation drives plant development, not calendar days.
Water access is often the constraint people underestimate. Vegetable crops need roughly 1 to 1.5 inches of water per week during the growing season, from April through September. If you're relying on rainfall alone, you'll have gaps. Drip irrigation is the most efficient delivery method for small farms and raised beds, and it pays for itself quickly in water savings and reduced disease pressure from wet foliage. If your water supply is limited or expensive, that steers you away from thirsty crops like corn or melons and toward efficient crops like greens and herbs.
Labor is the constraint most beginners get wrong. Salad greens, for example, need harvesting every 7 to 10 days during peak season. Tomatoes need staking, pruning, and regular picking. If you have limited time, lean toward lower-maintenance crops like garlic, winter squash, or beans that don't demand constant attention. Be realistic about your weekly availability before committing to high-maintenance, high-reward crops.
The shortlist: best crops for small farms by category
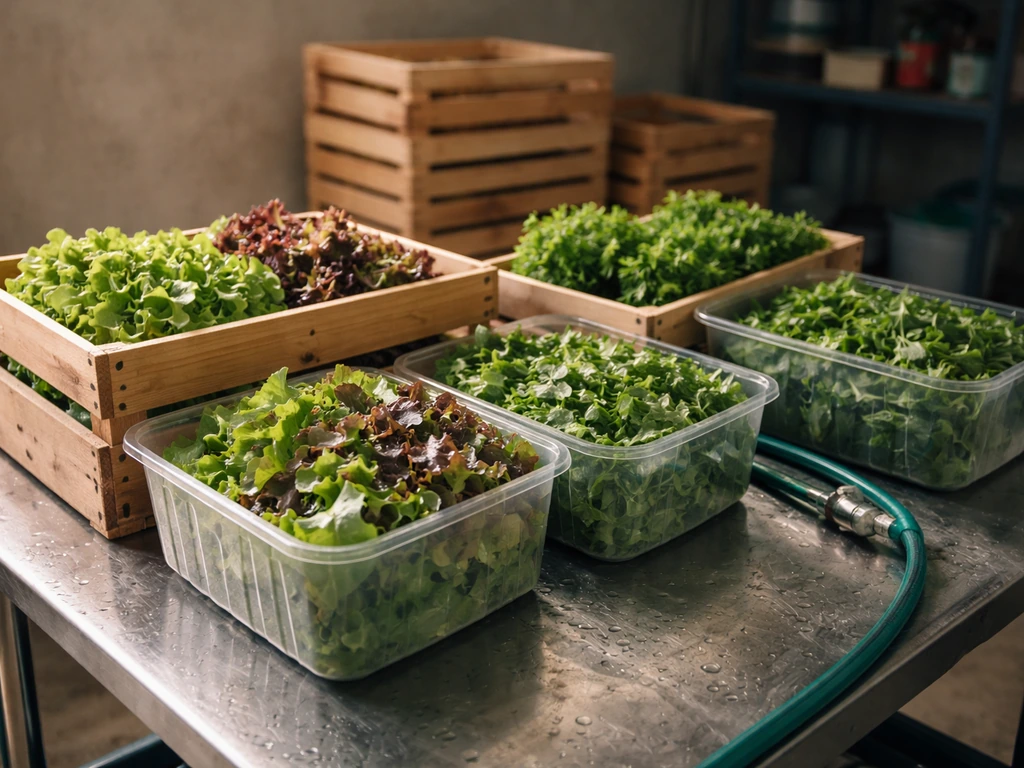
These are the crops that consistently perform well in small-farm and homestead settings, measured by yield per square foot, market value, ease of growing, and how reliably they sell. This isn't every crop you could grow, it's the ones most likely to justify the space and labor.
Salad greens and leafy crops
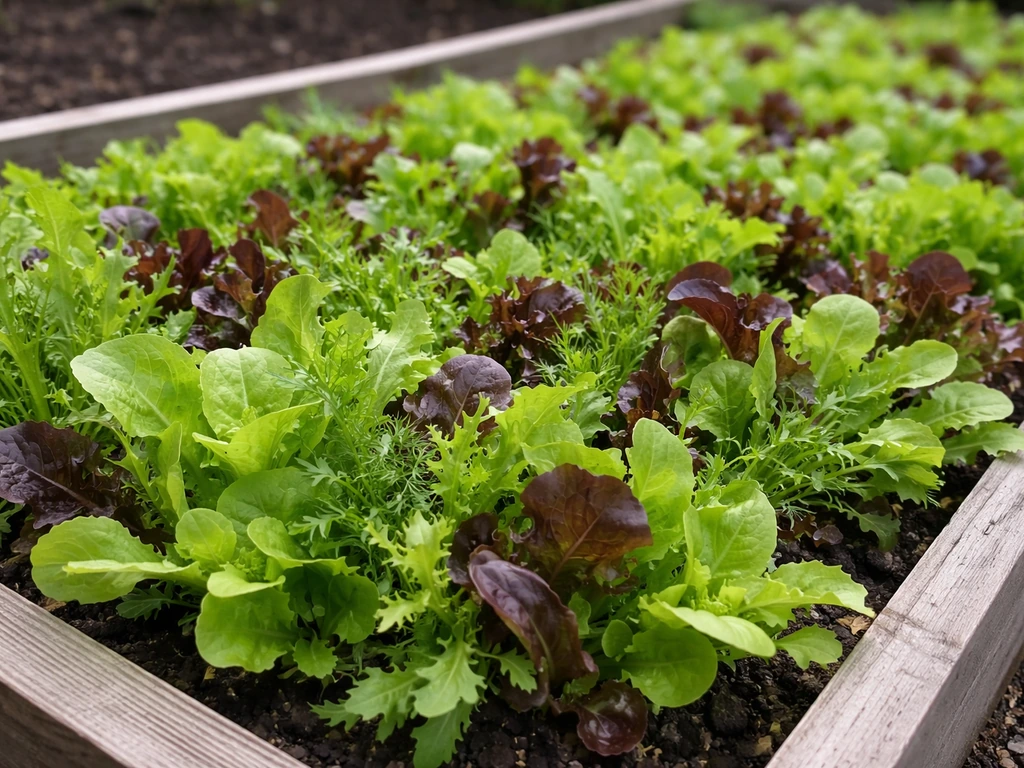
- Salad mix / mesclun: Fast-growing, can be harvested in 25 to 40 days, and commands strong farmers market prices. Baby leaf lettuce commonly sells for $8 to $13 per pound at direct markets.
- Spinach: Cool-season workhorse, excellent for spring and fall successions.
- Arugula: Quick turnaround, bolt-resistant varieties do well in shoulder seasons.
- Kale and Swiss chard: Longer harvest window, one planting can produce for months.
Herbs
- Basil: High value per pound, sells well fresh and in bunches. Needs heat and consistent moisture.
- Cilantro: Short cycle, succession plant every 2 to 3 weeks for continuous harvest.
- Parsley and chives: Perennial or biennial, low maintenance once established.
- Dill: Fast growing, doubles as a companion plant, popular at markets.
Microgreens
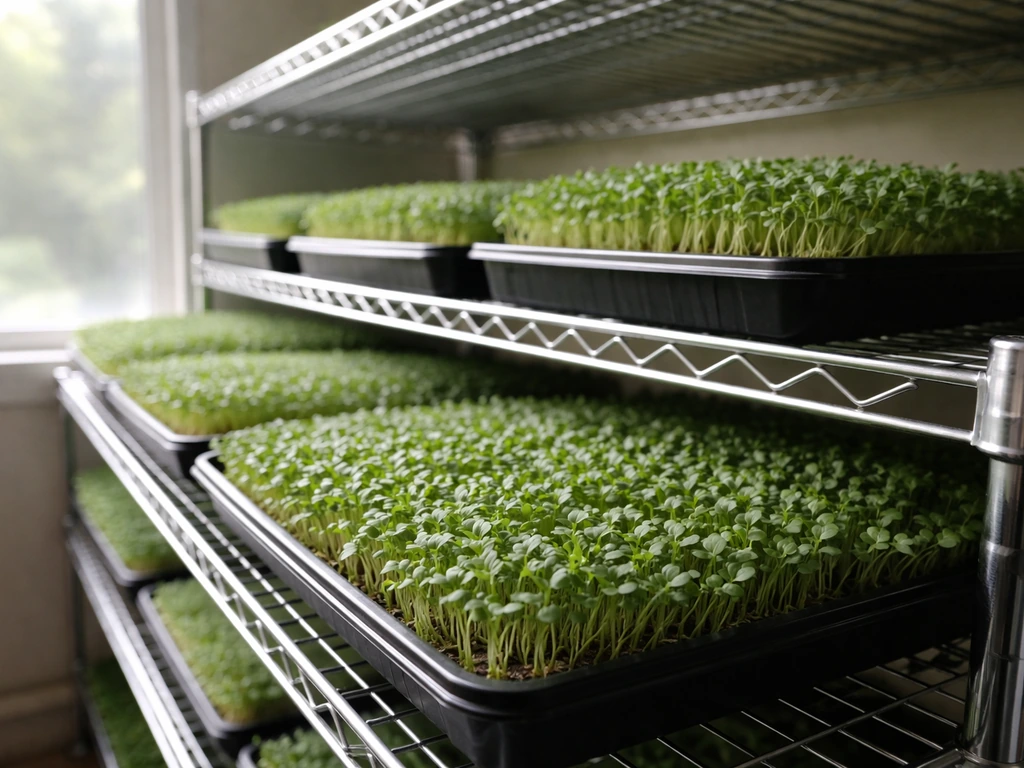
Microgreens are arguably the highest-value crop per square foot available to a small-scale grower. They can be grown indoors year-round in trays, with a typical turnaround of 7 to 14 days from seeding to harvest. Wholesale pricing to restaurants typically runs $25 to $35 per tray, while direct retail can reach $50 per living tray. Penn State Extension provides yield-per-tray data by variety to help estimate production. This is a strong option if outdoor space is limited but you have an indoor setup.
Fruiting vegetables
- Cherry tomatoes: High yield per plant, very popular at direct markets, longer harvest window than slicing types.
- Cucumbers: Fast producer, especially bush varieties suited to trellising in tight spaces.
- Summer squash and zucchini: Prolific producers, but watch market saturation; price can drop mid-summer.
- Peppers: Longer to maturity but excellent per-pound value, especially specialty varieties.
Root crops and alliums
- Garlic: Plant in fall, harvest in early summer. Low labor, long shelf life, and strong market demand. One of the best crops for beginner profitability.
- Radishes: Fastest return (25 to 30 days), great for filling gaps between slower crops.
- Carrots: Dense planting yields a lot per row foot, good storage and market life.
- Beets: Dual-use crop (roots and greens), steady demand.
Legumes
- Bush beans: Low input, fix their own nitrogen, good fresh and for preservation.
- Snap peas: Cool-season favorite, high-value fresh at markets, short productive window.
How to choose what's actually worth growing for your situation
Choosing crops for a small farm isn't just about what grows well. It's about matching demand, price, risk, and shelf life to your specific setup. Here's a simple framework for making that decision.
Local demand first
Check what's actually selling at your local farmers market before you plant anything. Walk the market in spring and note what vendors are running out of, what gets the most foot traffic, and what's missing entirely. Restaurant demand is another signal: call a few local chefs and ask what produce they struggle to source locally. Growing something with an existing buyer lined up is far better than growing a lot of something and then figuring out who wants it.
Price and realistic yield
USDA AMS publishes weekly farmers market price reports by region, and these are genuinely useful for reality-checking your expected income. The Center for Crop Diversification at the University of Kentucky offers free downloadable enterprise budgets for specialty crops at the small-scale level (100-row-foot units), which let you estimate costs and returns before you plant. Use these tools rather than guessing. For each crop you're considering, work out: expected yield per 100 square feet, your likely sale price per pound or bunch, total revenue, and your input costs for seed, amendments, and labor. If the math doesn't work on paper, it won't work in the field.
Shelf life and handling demands
Perishable crops like salad mix and fresh herbs need to move within 1 to 3 days of harvest. That means you need a reliable market outlet before you scale up production. Garlic, winter squash, dried beans, and storage onions have much longer shelf lives and give you more flexibility on timing your sales. For beginners, a mix of both is smart: one or two perishable, high-value crops for farmers markets, and one or two storage crops as insurance.
Risk and crop diversity
Don't grow only one thing. A late frost, a pest outbreak, or a market glut can wipe out a single-crop plan. On a small farm, growing 4 to 6 different crops is a reasonable hedge. Diversify by season (cool-season and warm-season crops), by type (greens, roots, fruiting), and by maturity time. That way you're harvesting something throughout the season, not gambling everything on one harvest.
Planting plans that actually work in small spaces
Small-space growing rewards planning more than large operations do, because every square foot counts. The goal is to keep beds productive as much of the season as possible, cycling through crops without leaving bare soil.
Raised beds and intensive spacing
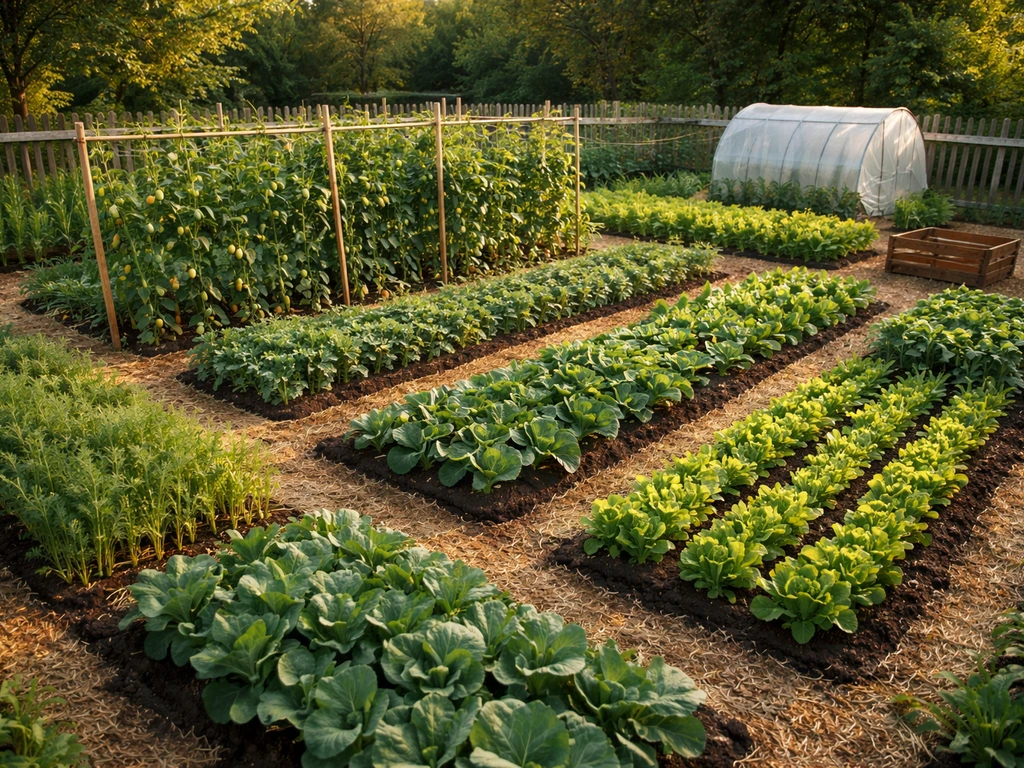
Raised beds let you plant much more densely than traditional row gardens because you never walk on the soil, keeping it loose and well-aerated. A 4-foot-wide bed allows easy reach from both sides. For salad mix, broadcast seeding across the full bed width gives far better yield than single rows. For tomatoes and peppers, 18 to 24 inch spacing in beds is workable with good staking or trellising. Dense planting also shades the soil, suppressing weeds and retaining moisture.
Succession planting
Succession planting is the single best tool for maximizing output from a small space. Instead of planting all your lettuce at once, plant a new bed every 2 to 3 weeks. This staggers your harvest so you have steady supply all season rather than a single glut followed by nothing. It works especially well for fast-cycling crops: lettuce, spinach, radishes, cilantro, and bush beans. Mark your planting dates and build a simple schedule at the start of each season.
A sample starter crop plan for a 500 square foot space
| Crop | Space Allocated | Planting Method | Key Notes |
|---|---|---|---|
| Salad mix | 100 sq ft (2 beds) | Broadcast seed, succession every 3 weeks | Fast ROI, harvest at 30 days |
| Cherry tomatoes | 80 sq ft (1 bed) | Transplants, staked or trellised | Long harvest window, high market demand |
| Basil | 30 sq ft | Transplants or direct seed after frost | Plant near tomatoes, harvest tips regularly |
| Garlic | 100 sq ft | Cloves planted in fall | Minimal labor, harvest in June/July |
| Bush beans | 80 sq ft | Direct seed in succession, 2 plantings | Self-fertilizing, easy to grow |
| Radishes/carrots | 60 sq ft | Direct seed into gaps and edges | Fill bare soil, fast cycle for radishes |
| Microgreens (indoor) | Tray-based, no outdoor space | Trays in any sheltered space | Year-round, very high value per sq ft |
Container and vertical growing
If your outdoor ground space is extremely limited, containers and vertical structures extend what's possible. Herbs thrive in containers. Cherry tomatoes do well in 5-gallon or larger pots. Cucumbers and beans can be grown vertically on a trellis, effectively doubling your growing surface. Containers require more frequent watering than ground beds, but they also give you control over soil quality from the start.
Soil, fertility, and the growing systems that do the heavy lifting
Good soil is the foundation of everything. Most vegetable crops do best at a soil pH of 6.0 to 6.8. Outside that range, nutrients become chemically unavailable to plants even if they're physically present in the soil. Get a soil test before your first season. Many university extension labs run complete analysis including pH and nutrient recommendations for around $8 to $15. It's the cheapest investment you can make.
For fertility, a blend of compost and a balanced organic fertilizer covers most crops for most of the season. Work 2 to 3 inches of finished compost into new beds before planting. For heavy feeders like tomatoes and squash, side-dress with a balanced fertilizer at transplanting and again at first flower. Light feeders like beans and herbs need little added fertility if your compost base is solid.
Drip irrigation is the most practical watering system for small farms and raised beds. A drip irrigation field guide like the MIFMA guide walks through practical steps for calculating drip tape quantities and converting bed layouts into system run parameters, including how to compute gallons per minute from drip tape flow characteristics and length. It delivers water directly to the root zone, reduces foliar disease by keeping foliage dry, and is far more water-efficient than overhead irrigation. Aim for 1 to 1.5 inches of water per week across the season, adjusting for rainfall, crop stage, and heat. University of Minnesota Extension recommends using soil moisture sensors to schedule irrigation precisely rather than relying on a fixed schedule or the finger-in-the-soil method, which is especially useful once your operation scales up.
Mulch is underrated. A 2 to 3 inch layer of straw or wood chip mulch around crops suppresses weeds, moderates soil temperature, and significantly reduces how often you need to water. Paired with drip irrigation and good compost, mulch reduces your maintenance time substantially.
Pest and disease prevention without a lot of complicated chemistry
Prevention is always cheaper and less stressful than dealing with an established problem. The two most practical tools for small-farm pest management are scouting and physical barriers.
Scout your beds at least twice a week during the growing season. Walk slowly, look at leaf undersides, check around stems and soil level, and look for entry signs like holes in leaves, wilting, and discoloration. Penn State Extension's IPM scouting approach covers the key culprits: aphids, flea beetles, cucumber beetles, Colorado potato beetles, and leaf miners. Catching a problem at 10 insects is very different from catching it at 1,000. Most small infestations can be knocked back by hand-picking, a strong spray of water, or spot application of insecticidal soap.
Row covers are your physical barrier against insects and also provide a few degrees of frost protection. Lightweight floating row cover (the kind rated for insect exclusion) can be laid directly over crops like brassicas and carrots at planting and left in place until you need pollination or harvest access. The key is putting it on before pests arrive, not after you see damage. Utah State Extension notes that timing is critical: the cover only works if it's deployed before the target pest reaches your crop.
Crop rotation, even on a small scale, meaningfully reduces disease carryover in the soil. Don't plant the same plant family in the same bed two years in a row. Rotate nightshades (tomatoes, peppers, eggplant), brassicas (kale, cabbage, broccoli), and alliums (garlic, onions) around your bed layout each season. It's simple to track with a rough map or notes.
Good airflow prevents most fungal diseases. Space plants according to their recommended distance, avoid overhead watering on foliage in the evening, and remove diseased plant material promptly rather than leaving it in the bed.
Harvesting, handling, and turning surplus into income
How you harvest and handle produce after it leaves the plant is just as important as how you grew it. Quality at point of sale determines whether customers come back, and sloppy post-harvest handling can turn a good crop into an unsellable one in hours.
Timing your harvest
Harvest in the early morning when field heat is lowest and crops are at their freshest. Leafy greens especially deteriorate quickly once they're cut, and harvesting in the heat of midday accelerates that decline. For cherry tomatoes, pick at full color but before they start to soften. Zucchini should be harvested small (6 to 8 inches) for best quality and to keep the plant producing. Garlic is ready when the lower leaves yellow and dry but a few green leaves remain at the top.
Cooling and storage
Remove field heat from perishable crops as quickly as possible after harvest. Leafy greens should be cooled to around 32°F with relative humidity of 90 to 95 percent as fast as you can manage it. At those conditions, they'll hold for up to 1 to 2 weeks, but in practice mixed salad greens are best moved within 1 to 2 days of harvest for peak quality. Wash in very cold water, spin or dry gently, and get them into cold storage immediately. The FDA recommends keeping cut leafy greens at 41°F or below to limit pathogen risk, with 32 to 35°F being the target range for maximum shelf life.
Storage crops like garlic, winter squash, and dried beans are much more forgiving. Cure garlic in a warm, dry, well-ventilated space for 3 to 4 weeks before storage. Winter squash cures at 80 to 85°F for 10 days, then stores in a cool, dry place for months. These crops give you the luxury of timing your sales around market conditions, which perishables don't.
Selling your surplus
The most accessible direct-market channel for most small farms is the local farmers market. It requires a vendor permit (costs vary by market), a table, basic signage, and consistent product. Start with one market before committing to two or three. Community-supported agriculture (CSA) shares are another model: customers pay upfront at the start of the season for weekly boxes, which gives you cash flow early and a guaranteed outlet for whatever you grow. Selling directly to local restaurants is higher-effort to set up but usually gets you better prices and larger volume orders than retail markets.
On the question of whether small-farm growing can actually make money: yes, but the math depends entirely on your cost structure and what you're selling. Microgreens and salad mix from 100 square feet can generate meaningful income if you have reliable buyers at direct-market prices. Garlic from a 100-foot row can net several hundred dollars with minimal labor. The University of Kentucky's Center for Crop Diversification publishes free enterprise budgets for small-scale specialty crop production that break down costs and returns per 100 row feet, which is one of the most practical tools available for running the numbers on any crop you're considering. Use those before you scale up anything.
If you want to go deeper on income-focused crop selection, the question of what to grow on a farm to make money is worth exploring separately, especially once you've got a season or two of baseline experience behind you. If you want a more specific plan for what to grow on a farm to make money, you can use the crop selection and pricing steps in the rest of this guide. Once you know your climate, space, and buyers, it helps to focus your planning on what to grow on a farm to make money. If you're wondering what to grow on a farm, start by matching crops to your space, climate, and the buyers you can reach locally. That's where decisions about scaling, adding crop diversity, and chasing specific market niches start to make sense.
Where to start this week
If you're standing at the beginning of this process, here's what to actually do in the next few days. Get a soil test if you haven't. Look up your last frost date and first fall frost date and write them down. Walk or visit your local farmers market and note what's selling and what's missing. Sketch a rough layout of your growing space with measurements. Then pick three to five crops from the shortlist above that fit your climate, your space, and your market, and order seeds or transplants for those specifically. Start small, track what works, and add crops in your second season once you understand how your particular land and market behave. That's how every productive small farm actually gets built.
FAQ
What to grow on a small farm if I have very little outdoor space (like 50 to 100 square feet)?
Focus on crops with fast turnover and strong per-square-foot value, like salad mix, baby greens, radishes, cilantro, and microgreens. Use succession planting (new sowing every 2 to 3 weeks) and reserve your highest-price sales channel, usually direct retail or a single restaurant account, for the bulk of your harvest.
Which crops are best for beginners who can only work 3 to 5 hours per week?
Choose low-maintenance storage and resilient crops first, garlic, winter squash, and dried beans, then add one easy perishable like a small patch of herbs. Avoid planning tomatoes or salad greens as a primary crop if you cannot harvest frequently, since greens need repeated picking and tomatoes need regular support and checks.
If my climate has short summers, should I stick to cool-season crops only?
Not only. Use cool-season crops for early and late production (greens, radishes, cilantro) and add one or two warm-season crops you can start reliably, such as cherry tomatoes with transplants. If you can use season extension, row covers or hoop tunnels can turn a “short summer” into a workable window without expanding acreage.
How do I decide between growing microgreens indoors versus outdoors when I’m not sure what will sell?
Start with a small outdoor test bed for 1 to 2 perishable crops and a limited indoor tray count for microgreens. Compare actual sell-through and shelf-life needs, microgreens usually move quickly and can be ordered in smaller lots, while outdoor greens may require tighter delivery timing to keep quality high.
Is it worth planting tomatoes on a small farm if I have water limitations?
It can be, if you manage it with drip irrigation and consistent moisture, but prioritize water-efficient trellised varieties and mulch. Plan for trellising and pruning labor too, tomatoes also require frequent harvesting, if you cannot pick on schedule, quality losses can wipe out the price advantage.
What are common mistakes people make when choosing crops for a small farm for profit?
The most common is selecting crops based on what grows well rather than what you can sell within the required timeframe. Another is skipping a basic cost-and-revenue estimate per bed size, then realizing seed, amendments, and labor exceed what farmers market pricing supports.
How many different crops should I grow to reduce risk without making my operation chaotic?
A practical target is 4 to 6 crops across multiple harvest windows, mixing fast growers with at least one storage crop for flexibility. Organize them by season, cool-season versus warm-season, so a single frost or pest event does not remove all harvesting at once.
What should I do if my farmers market sells out too fast one week and slows down the next?
Treat it like a demand signal and adjust using succession timing. For salad greens and herbs, stagger plantings every 2 to 3 weeks, for tomatoes or other fruiting crops, scale gradually and watch whether customers want a steady weekly supply or occasional larger quantities.
How do I prevent disease on a small farm when I can’t increase spacing or airflow much?
Use the tools you can control, drip irrigation to keep foliage dry, remove diseased plants promptly, and rotate plant families so the same bed does not carry the same disease pressure each year. Also avoid working wet plants, because moving through wet rows spreads fungal spores quickly.
Can I grow storage crops like garlic and winter squash if I’m selling only a few times per month?
Yes, that is one of their advantages. Because they tolerate longer storage, you can harvest, cure if needed (garlic and winter squash), and sell in batches. Still, plan curing space and ventilation, poor curing is the most common failure mode for long-term storage crops.
What post-harvest steps matter most if I’m trying to keep produce sellable at the market?
For leafy greens, the biggest lever is cooling quickly to near-freezing conditions and keeping humidity high, then getting into cold storage fast. For tomatoes and zucchini, harvest at the right maturity and handle gently, bruising is a fast path to price discounts or returns.
Do I need soil amendments every season, or can I rely on compost only?
Compost helps most beds, but heavy feeders usually need extra fertility at key growth stages. A simple rule, if your crop is fruiting and large (tomatoes, squash), side-dress at transplanting and early flowering; if it is light-feeding (beans, herbs), a compost base plus proper pH is often sufficient.
What to Grow on a Farm: Crop Guide for First Season
Pick the best first-season crops for your farm by climate, space, soil, and goals with rotation and planting steps.