Yes, a computer can grow your food right now, today, not just in the future. Whether you're picturing a Raspberry Pi wired up to soil sensors in a raised bed, a plug-and-play smart controller running your indoor hydroponic system, or a sleek countertop grow pod that handles everything automatically, the hardware and software to make it happen are already affordable and beginner-accessible. The real question isn't whether it's possible, it's which setup fits your space, budget, and skill level, and how to get something actually running without overcomplicating it.
This Computer Will Grow Your Food in the Future: Setup Guide

Marcus Hendrick
6 May 2026
What 'this computer will grow your food' actually means (and which version you want)
When people search this phrase, they're usually coming from one of two directions. Either they've seen a video or product that automates growing and want to know if it's real and practical, or they're a hands-on builder type who wants to wire up their own DIY controller. Both are valid, and both work. Let's separate them clearly.
Smart agriculture controllers (plug-and-play)
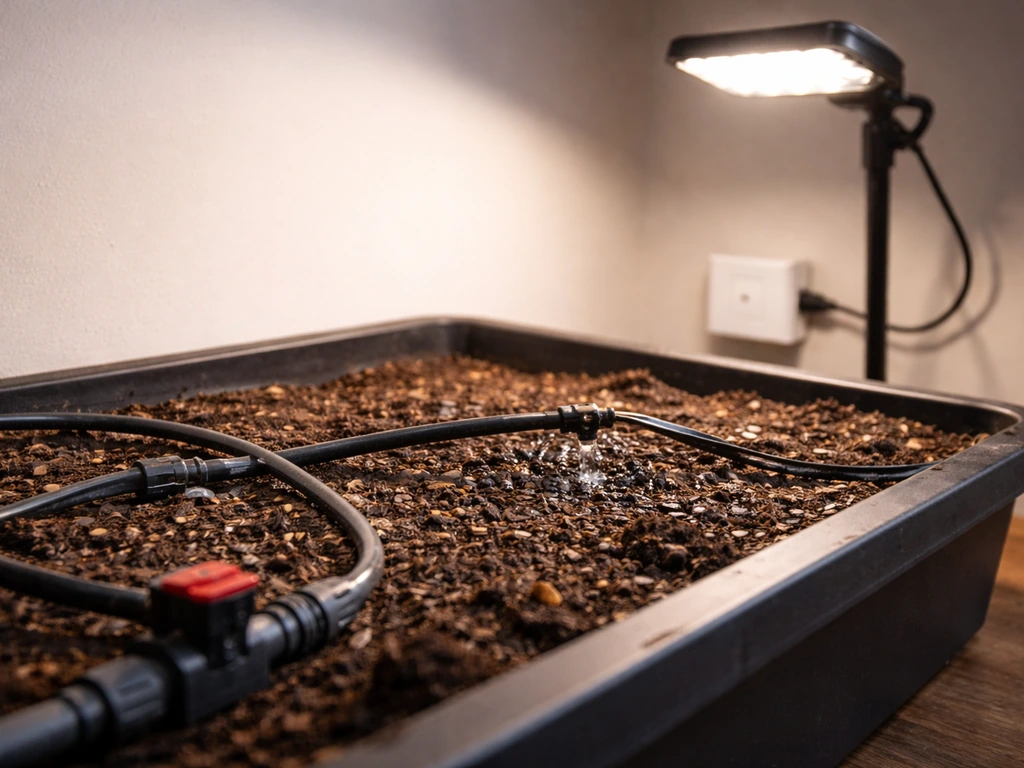
These are purpose-built platforms that monitor and automate a grow environment without you needing to write a single line of code. GroLab, for example, is a grow controller that handles temperature, humidity, airflow, lighting, and irrigation simultaneously, with real-time monitoring through its own software dashboard. Its PowerBot module comes with built-in temperature and humidity sensors, connects to irrigation devices, and even supports flood and leak detection as a safety safeguard.
Autogrow's SATUGROW goes further for hydroponics, offering real-time EC and pH monitoring with dosing pumps connected to output modules. OpenSprinkler is another popular option, especially for irrigation-focused setups, and it's described as an open-source, web-based smart irrigation controller that works for lawns, gardens, and hydroponics alike. These systems talk to your Wi-Fi, send email or MQTT alerts, and log every event automatically.
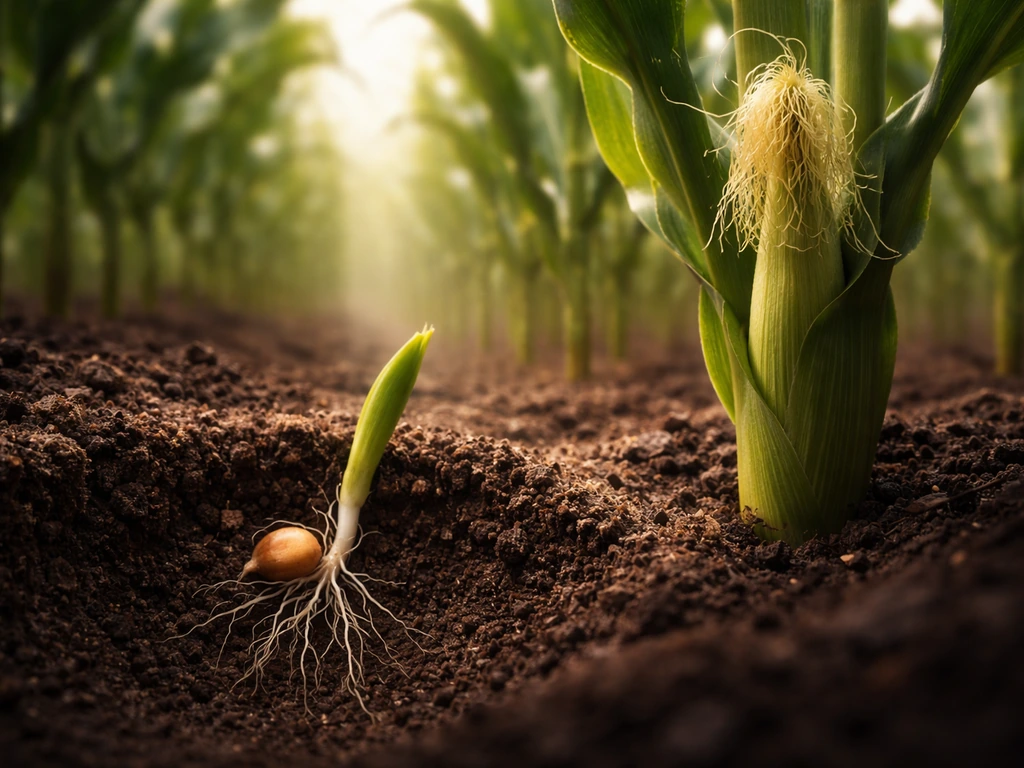
If you want a quick visual walkthrough of what to build and how the setup performs over time, check out how does corn grow video as a related reference alongside these plug-and-play controllers.
DIY computer controllers (build-your-own)
On the DIY side, a Raspberry Pi or Arduino paired with soil moisture sensors, relay modules, and grow lights can absolutely run a functioning automated food garden. OpenSprinkler Pi is literally an open-source board designed for the Raspberry Pi, and it's been called one of the cheapest and most configurable systems of its type. The community has built weather-responsive irrigation logic, soil moisture triggers, and full dashboards onto it. This path costs more of your time but less of your money, and you end up understanding every part of the system intimately, which matters a lot when something breaks at 2 a.m.
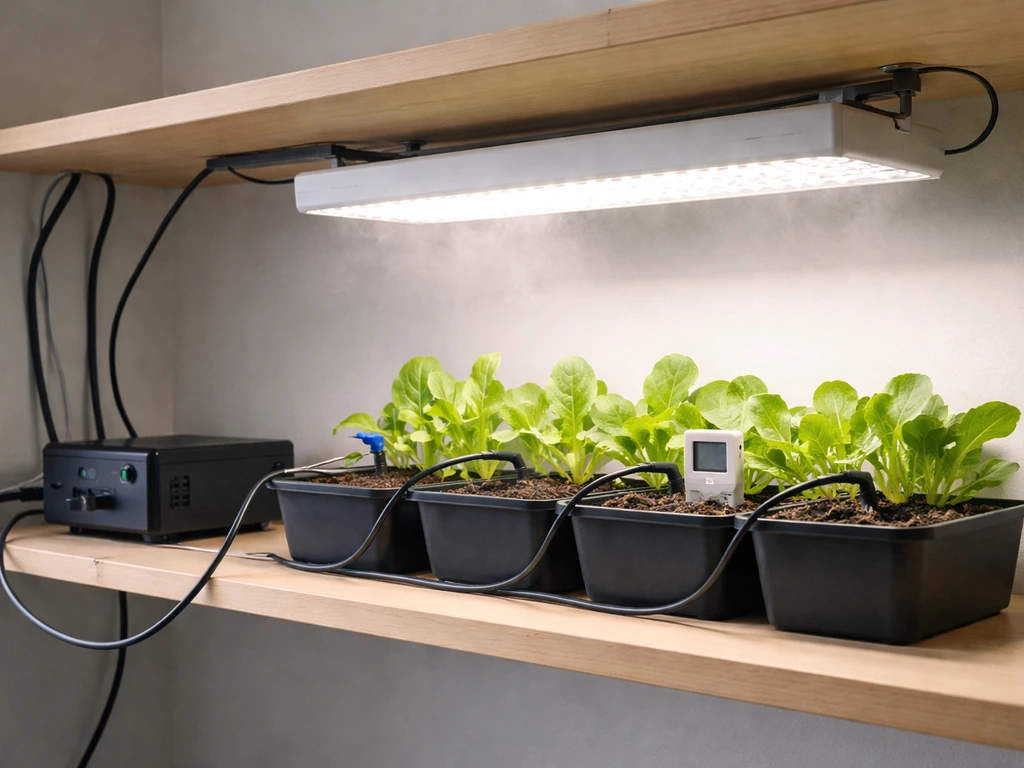
Countertop grow pods (fully hands-off)
A third category sits between the two: consumer grow pods like Groo, which are countertop growth chambers that water, light, and climate-control plants automatically while logging every sensor reading and capturing timelapse photos in an app. Groo's 'Workflow Wizard' is a visual interface where you customize light cycles and irrigation patterns without touching any code. These are the most beginner-friendly option but also the most limited in terms of what and how much you can grow.
How to pick the right system for your actual situation
Before buying anything, answer four questions honestly: What's your budget? How much space do you have? What's your local climate like? And how technical are you willing to get? Your answers will eliminate most of the options immediately.
| Your situation | Best fit | Budget range |
|---|---|---|
| Apartment, no outdoor space | Countertop grow pod or small indoor hydro with smart controller | $200–$600 |
| Raised bed or container garden, outdoors | OpenSprinkler or OpenSprinkler Pi for irrigation automation + soil sensors | $80–$250 |
| Small indoor grow tent or closet setup | GroLab PowerBot or full GroLab Pro kit | $300–$700 |
| Backyard greenhouse, serious production | GroLab Pro + autodosing hydro system | $700–$4,000+ |
| DIY-first, Raspberry Pi builder | OpenSprinkler Pi + Home Assistant + InfluxDB/Grafana stack | $100–$400 depending on sensors |
Climate matters more than most beginners expect. If you're in a hot zone and running an outdoor automated garden, your controller needs to handle heat-triggered irrigation adjustments, not just a fixed schedule. OpenSprinkler supports weather-based control that adjusts irrigation based on local conditions, which is genuinely useful. If you're in a cold climate and running an indoor or greenhouse setup, temperature automation becomes the priority and platforms like GroLab that control heating, ventilation, and lighting together make more sense.
Skill level is the other big filter. If you've never set up a Raspberry Pi, don't start there when you're also learning hydroponics at the same time. Pick one complexity and get good at it first. A plug-and-play controller like OpenSprinkler with a simple web interface is a much better starting point than a full Home Assistant stack with InfluxDB and Grafana, even though the latter gives you incredible long-term data. Start simple. Upgrade once you know what you actually need.
The core setup: sensors, automation logic, and environment controls
Regardless of which platform you choose, every automated food growing system has the same basic building blocks. Understanding these makes it much easier to shop, troubleshoot, and upgrade intelligently.
Sensors: what the system needs to 'see'
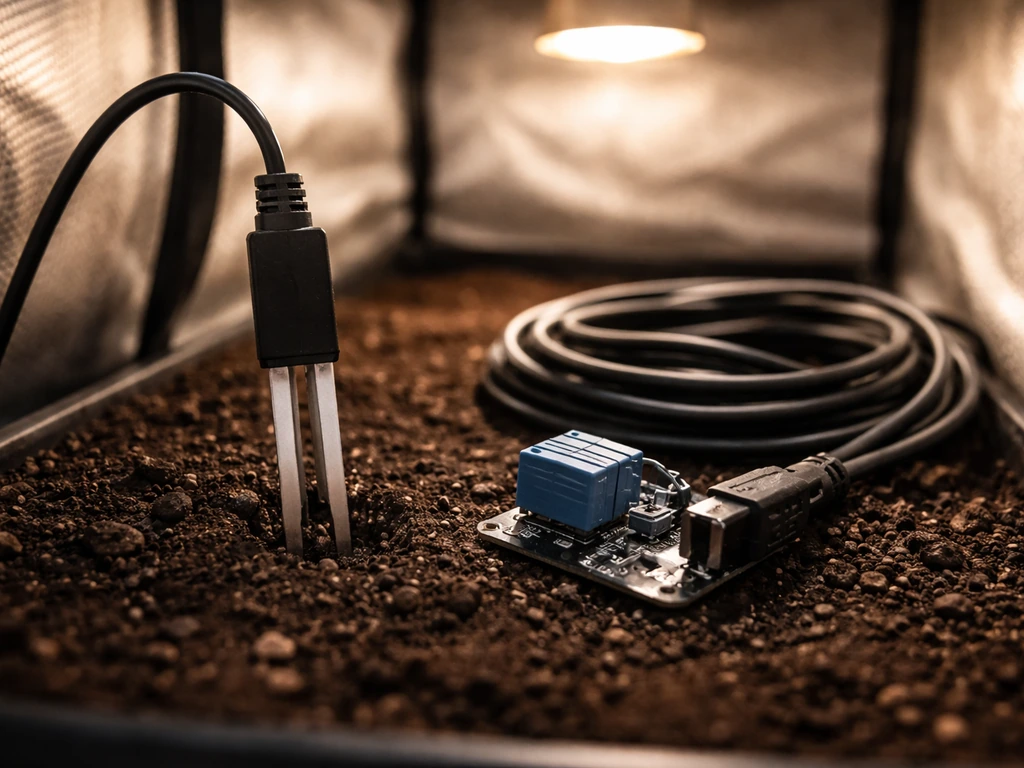
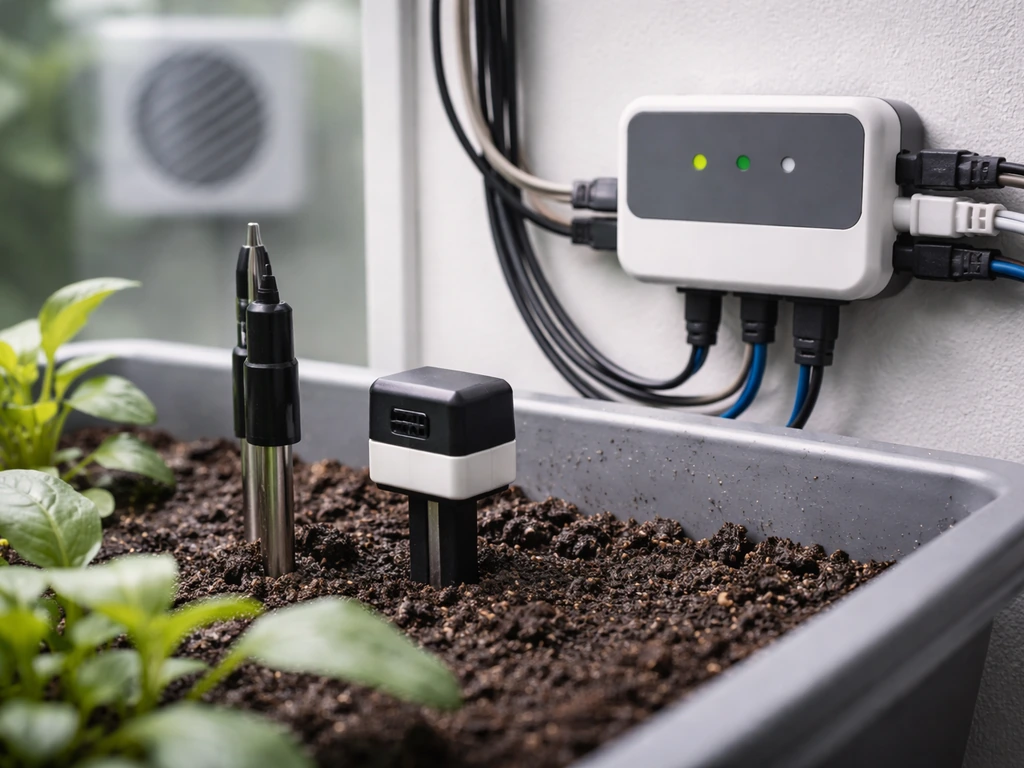
- Soil moisture or volumetric water content (VWC) sensor: tells the controller when to water and when to stop. OpenSprinkler supports VWC sensor data to trigger irrigation programs rather than relying only on fixed schedules.
- Temperature and humidity sensor: essential for indoor and greenhouse grows. The GroLab PowerBot has these built in. For DIY setups, a DHT22 or SHT31 sensor costs under $10.
- EC and pH sensors: critical for hydroponics. These tell you whether your nutrient solution is at the right concentration and acidity. Without them, you're flying blind with hydro crops.
- Flow sensor: measures how much water is actually moving through your irrigation lines. OpenSprinkler supports flow sensors, though note that very low flow rates reduce accuracy because the firmware calculates flow over a 30-second window.
- Flood/leak sensor: a safety item, not optional. The GroLab PowerBot explicitly supports flood sensor inputs and can automate responses to excess water, which matters if you're running any kind of indoor irrigation.
- Light sensor (optional but useful): helps verify your grow lights are actually cycling correctly and logs any failures.
Actuators: what the system controls
- Irrigation valves or pumps: the most common automated output. These open and close based on schedule or sensor input.
- Grow lights (via relay or smart plug): automated on/off based on time of day or light cycle program.
- Fans and ventilation: temperature or humidity-triggered, especially important in grow tents and greenhouses.
- Dosing pumps: for hydroponics, these add nutrients or pH-adjusting solutions automatically based on EC/pH sensor readings.
- Heaters or CO₂ controllers: GroLab Pro supports CO₂ automation and uses power contactors to extend control to high-amperage devices.
The automation logic layer
The 'computer' part of this equation is whatever ties sensors to actuators with rules. On OpenSprinkler, you create Programs that run on a schedule, or that trigger based on sensor state (like soil moisture dropping below a threshold). On GroLab, the automation logic is configured through its own software interface and handles multiple variables simultaneously, not just irrigation. On a DIY Raspberry Pi setup running Home Assistant, you write automations in YAML or use the visual flow editor. All three approaches support the same fundamental logic: IF this sensor reads X, THEN trigger this device. The complexity is in how many variables you're juggling at once and how the system handles conflicts between rules.
One practical note: if you're using a cloud-dependent automation system like Pulse Grow integrated with OpenSprinkler, be aware that running automations requires an active network connection for both the hub and the controller. A Wi-Fi outage can stop your irrigation. For food crops that can't miss a watering, build in a backup: either local-only scheduling as a fallback, or at minimum an alert so you know when the system goes offline.
Software and workflows: planning, monitoring, and staying on top of problems
Hardware is only half the job. The software side is where you actually manage crops over time, catch problems before plants die, and build the institutional knowledge of what works in your specific setup.
Planning your crops and schedules
Most controller platforms let you set up recurring Programs with flexible scheduling: weekly intervals, odd/even day restrictions, specific station runtimes, and time-of-day windows. OpenSprinkler's scheduling interface covers all of this and also lets you restrict programs to avoid watering during rain events or on certain days. Before planting, map out each crop's requirements and create a named program for each zone or container. Label everything clearly in the software so you can troubleshoot without guessing which zone is running when something goes wrong. A simple spreadsheet tracking plant-in date, expected harvest window, and irrigation program name is genuinely helpful and takes five minutes to set up.
Real-time monitoring and dashboards
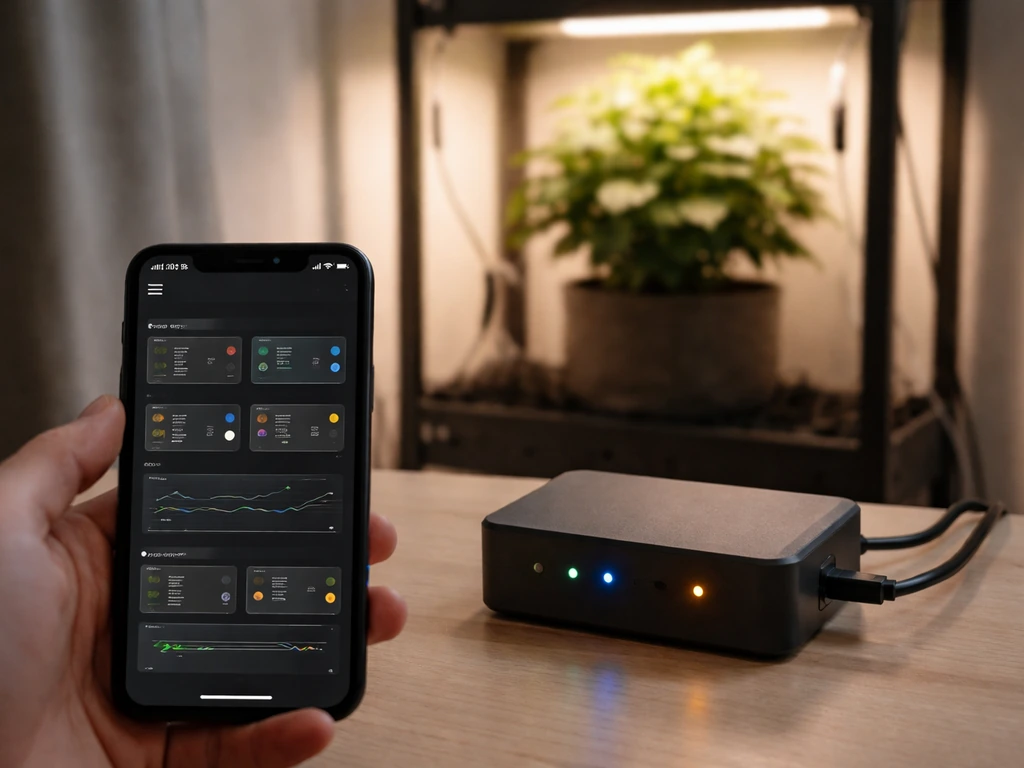
For basic setups, most controllers have a built-in web dashboard you access from your phone or browser. For more serious data tracking, Home Assistant paired with InfluxDB stores sensor readings long-term and you can build custom Grafana dashboards to visualize temperature trends, moisture levels, and irrigation history.
Grafana Labs maintains a dashboard that visualizes Home Assistant state changes in Grafana, which is often backed by an external database such as InfluxDB Grafana dashboards to visualize temperature trends, moisture levels, and irrigation history. This combination is genuinely powerful for diagnosing problems: if your lettuce bolted unexpectedly, you can go back and see that the grow tent hit 88°F on three consecutive afternoons. That's the kind of insight that's impossible without logging.
Groo's consumer approach to this is elegant: it logs every sensor reading and photo in a simple app, so even complete beginners can see growth trends without configuring a database.
Alerts and failure notifications
Set up notifications before anything breaks, not after. OpenSprinkler supports email, MQTT, and IFTTT-style alerts for program starts, sensor state changes, skipped programs, and other events. Critically, alert states persist until you manually clear them, which is a good design choice because it means you can't ignore a flood sensor trigger by just walking away from your phone. At minimum, you want alerts for: irrigation program failure, sensor offline, temperature out of range, and (for hydroponics) pH or EC out of bounds. Most platforms make this straightforward once you know to look for it.
Logs and maintenance routines
Every serious controller platform logs zone activity, sensor events, flow volumes, and watering percentages over time. OpenSprinkler even has a log export script for pulling raw data for deeper analysis. Build a simple monthly maintenance routine: review last month's logs for anomalies, calibrate sensors (EC and pH sensors especially drift and need regular recalibration), clean irrigation emitters, and update your crop schedule for the next planting. It takes under an hour and prevents the slow drift of a system that 'used to work' but has quietly degraded.
Crops and growing methods that actually work in automated setups
Not every food crop is a good fit for automation, especially when you're starting out. The best candidates are fast-growing, forgiving, and don't need a lot of hands-on intervention beyond what sensors and actuators can provide. If you also plan to grow a tree, it helps to know how many bonemeal to use based on your tree type and the pot or planting hole size how many bonemeal to grow a tree.
Best crops for automated indoor or controlled setups
- Leafy greens (lettuce, spinach, arugula, kale): fast turnover (25–45 days to harvest), low nutrient demands, and very forgiving of minor EC or pH variation. Perfect for beginner hydro or automated container setups.
- Herbs (basil, cilantro, mint, parsley): compact, high-value per square foot, and perform excellently under automated LED lighting with consistent moisture.
- Radishes: possibly the easiest food crop to automate, with harvest in 22–30 days and minimal intervention needed.
- Bush beans and peas: work well in automated raised bed or container setups with drip irrigation. More calorie-dense than greens if food security is the goal.
- Cherry tomatoes: more demanding but achievable in a controlled greenhouse or grow tent with temperature and irrigation automation. Higher payoff than leafy greens for effort invested.
- Microgreens: extremely fast (7–14 days), high value, and can be cycled continuously with minimal automation complexity.
Growing methods ranked for automation compatibility
Deep water culture (DWC) hydroponics is widely considered the most beginner-friendly hydro method for automated setups because it has few moving parts, works well for leafy greens and herbs, and is forgiving of beginner mistakes. An air pump, a reservoir, net pots, and a basic nutrient solution get you started for well under $100. Add an EC/pH sensor and a dosing pump later and you have a fully automated system. Other hydro methods like NFT (nutrient film technique) or aeroponics work but are less forgiving of equipment failure, which matters a lot in automated setups where no one is watching 24/7.
For outdoor raised beds or containers, automated drip irrigation with soil moisture sensors is the easiest win. You're not replacing your soil growing method, you're just removing the daily watering task and getting smarter about when and how much water actually goes in. If you want to grow corn with the right nutrient program, you also need to dial in nitrogen amounts for healthy growth how much nitrogen to grow corn.
This pairs naturally with companion planting strategies and conventional soil growing while freeing up significant time. If you're thinking about crops like corn or rice in this context, those are more resource-intensive and harder to automate at home scale, though the principles of irrigation scheduling still apply. If you scale up to rice, the same idea applies: you typically need sensors, irrigation controls, and some software to manage water, nutrients, and growing conditions crops like corn or rice.
Cost, timelines, and what automation actually delivers (and doesn't)
Let's be honest about expectations. An automated growing system is not a magic box that produces unlimited food for free. It's a tool that reduces labor, improves consistency, and gives you better data. That's genuinely valuable, but it has real limits.
Realistic cost breakdown

| Setup type | Entry cost | What you get | What you don't get |
|---|---|---|---|
| Automated drip irrigation (raised bed) | $80–$150 | Consistent watering, soil moisture monitoring, schedule-based control | Climate control, lighting, nutrient management |
| OpenSprinkler Pi + sensors (DIY) | $100–$250 | Full irrigation automation, weather response, logging, custom alerts | Pre-built UI, plug-and-play ease, tech support |
| GroLab PowerBot (grow tent) | $300–$500 | Temp/humidity/irrigation/ventilation automation, leak detection, real-time dashboard | Hydro nutrient dosing, advanced CO₂ control |
| GroLab Pro kit (small greenhouse) | $600–$900 | Full climate + CO₂ + lighting + irrigation automation | Automatic nutrient dosing without add-ons |
| Full hydro autodosing system | $1,500–$4,000 | EC/pH/temp real-time control, automatic nutrient top-off, remote monitoring | The food itself, the growing knowledge, the payback time |
What automation actually delivers
- Labor savings: a good automated irrigation and lighting system can save 30–60 minutes of daily tending time once fully set up.
- Consistency: plants get the right amount of water at the right time regardless of whether you're home, on vacation, or just forgot. This alone significantly improves yield and plant health.
- Better data: logged sensor data lets you identify patterns (your grow tent gets too hot every afternoon in July) and make meaningful improvements season over season.
- Lower water use: sensor-triggered irrigation typically uses significantly less water than manual or timer-only watering, because it only runs when the plant actually needs it.
- Peace of mind for indoor grows: leak detection and offline alerts mean a failed pump doesn't ruin your floor or your crop before you notice.
What it won't do
- Replace your judgment: a system can water on a schedule or moisture trigger, but it can't tell you that your tomatoes have a calcium deficiency or that your basil has spider mites.
- Pay for itself immediately: a $400 grow controller growing lettuce will take years to break even on hardware costs alone. The value is in learning, consistency, and food security, not pure economics at small scale.
- Work without maintenance: sensors drift, emitters clog, pumps fail. Automation reduces daily labor but adds a new category of periodic technical maintenance.
- Handle every crop equally: automated systems excel with predictable, fast-cycling crops. Tree fruits, perennials, and heavy feeders like corn require much more nuanced management.
Your practical starting plan
- Pick one growing area to automate first, not your whole garden. One raised bed, one grow tent, or one hydro reservoir.
- Choose a controller that matches your skill level. If you're not a tinkerer, start with OpenSprinkler's standard web-based controller or a GroLab PowerBot, not a Raspberry Pi from scratch.
- Add sensors one at a time. Start with soil moisture or temperature and humidity. Get comfortable interpreting that data before adding EC/pH or CO₂ sensors.
- Grow forgiving crops first. Lettuce, herbs, and radishes will give you fast feedback cycles (harvest in 3–6 weeks) so you learn quickly what the system needs to be tuned.
- Set up at least two alerts before you rely on the system: one for sensor offline, one for irrigation failure.
- Run one full growing cycle manually alongside your automation to validate that the system is doing what you think it's doing. Compare your manual observations to the sensor logs.
- Once your first setup is stable and producing consistently, add one more sensor or automation layer. Expand only after what you have is working reliably.
The technology to grow your food with a computer isn't coming in the future. It's already here, it's affordable, and the learning curve is genuinely manageable if you start small and build deliberately. The growers who succeed with these systems aren't the ones with the fanciest hardware. They're the ones who understood their plants first and used the technology to do the repetitive work more reliably.
FAQ
If I’m new to automated growing, what’s the safest first setup to build?
Start with a single “zone” and a single crop that matches your automation comfort level, for example herbs or leafy greens in a simple deep water culture setup. When you can reliably keep pH and EC in range for 2 to 3 weeks, then add the next sensor or station, instead of buying a multi-zone controller and building everything at once.
Do I really need sensors, or can I just schedule watering and lighting?
No, you should not rely on a fixed watering schedule alone. Even with smart controllers, use sensor-triggered logic (like soil moisture thresholds or reservoir level) and include at least one time window to prevent constant cycling. Also, set conservative thresholds so you get alerts early rather than waiting for plants to suffer.
What tends to go wrong over time with automated grow controllers?
Yes, most systems can lose water or dosing accuracy after setup. The biggest causes are sensor drift (especially pH and EC), clogged emitters, and float or level sensor failures. That’s why you should plan a short calibration and emitter inspection routine before each planting cycle, not only after problems show up.
How should I handle sensor or power failures so my plants do not get damaged?
For failure prevention, prioritize safety rules that fail “closed” or “safe.” For example, if a flood sensor triggers, stop irrigation immediately, and if a temperature sensor goes offline, switch to an alternate control mode (like enabling ventilation/heating only) rather than continuing normal schedules blindly.
What happens if Wi-Fi or the cloud service goes down, and how do I protect my crops?
If you use any cloud-linked platform, expect some automation downtime during internet issues. Mitigate this by enabling local-only scheduling where available, and by turning on alerts for “sensor offline” and “program skipped.” If your controller cannot operate locally, plan a manual fallback watering routine for outages.
Which controller type should I choose if my main goal is irrigation, nutrients, or data tracking?
Pick the approach that matches what you want to control most. If your goal is irrigation timing and you want quick setup, a web-based irrigation controller is usually easiest. If your goal is tight nutrient management with dosing, prioritize systems that support EC/pH monitoring and dosing pumps. If you want custom data workflows, plan on a local hub and logging.
How do I prevent automation rule conflicts (like two programs turning the same valve on)?
Yes, conflicts happen when you have multiple rules targeting the same output, like an irrigation schedule and a soil moisture trigger both turning a valve on. To avoid chaos, define priority logic (for example, sensor-trigger overrides schedule), add cooldown intervals between starts, and keep the number of simultaneous “owners” per device small.
What notifications are most important to set up first?
You should create alerts before you trust the system. Use persistent alerts for the highest risk events: irrigation program failure, sensor offline, temperature out of range, and for hydroponics pH or EC out of bounds. Also include a “skipped program” alert so you know the system is not running when it should.
How should outdoor automation change during rain or extreme heat?
For outdoor raised beds, use weather-aware logic so rain events reduce irrigation, and add soil-moisture thresholds to prevent overwatering after storms. Also account for heat waves, where you may need shorter, more frequent watering windows rather than longer sessions that waste water and increase runoff.
How do I switch programs when I change crops or plantings?
Yes, but only if you design for it. Start by mapping each crop’s requirements to a named program (zone, container, or tray). Track planting date, expected harvest window, and the program name used, then adjust thresholds gradually after you see how that crop responds in your specific conditions.
Where should I place sensors, and how do I avoid misleading readings?
Sensor placement matters as much as calibration. For soil moisture, place probes near the root zone but avoid direct contact with hot/cold surfaces and keep them consistent across containers. For hydroponics sensors, ensure adequate mixing around probe locations so readings reflect the nutrient solution, not a stagnant pocket.
What regular maintenance should I do to keep automation reliable?
Plan on a modest maintenance schedule, then treat it like a habit. A practical baseline is monthly log review, sensor calibration checks (more frequent for pH/EC), and cleaning or flushing irrigation emitters to remove mineral buildup. If you use nutrient dosing, also inspect tubing and check pump dosing performance periodically.
What are the most common “I bought the wrong hardware” mistakes in automated growing?
Many beginners focus on the cheapest parts and then spend more later fixing compatibility issues. Before buying, confirm you have the right electrical control method (relay, solid state relay, or valve interface), correct power ratings, and sensors that match your controller inputs. If you plan irrigation valves, make sure the controller can drive the solenoid type you intend to use.
Next Article
How Does Corn Grow Video: Seed to Harvest Guide
Step-by-step seed-to-harvest corn guide with video-style checkpoints for germination, planting, pollination, ear set, ha