Beans need nitrogen, phosphorus, and potassium as their primary macronutrients, plus a supporting cast of micronutrients including calcium, magnesium, iron, sulfur, boron, and zinc. But here's the thing that makes beans different from most vegetables: they can manufacture their own nitrogen if you set them up correctly. That one fact changes almost everything about how you feed them. Get it right and you save money, skip a fertilizer step, and grow healthier plants. Get it wrong and you either starve your beans of nitrogen or accidentally prevent them from fixing it themselves.
What Nutrients Do Beans Need to Grow? Soil and Care Guide

Marcus Hendrick
24 Mar 2026

The core nutrients beans actually need
Let's run through the full nutrient picture so you know what you're working with before you spend a dollar on fertilizer.
Macronutrients: N, P, and K
Nitrogen (N) drives leafy growth and overall plant vigor. Phosphorus (P) is critical early on for root establishment, and again during flowering and pod development. Potassium (K) supports pretty much everything behind the scenes: water regulation, disease resistance, and especially pod fill in the later stages. Of these three, phosphorus is often the most limiting nutrient for dry beans in home gardens, and many soils already have enough potassium naturally. Colorado State University Extension even notes that most soils contain sufficient K and sulfur for bean production without any additions. That doesn't mean you should assume yours does, but it means you shouldn't automatically throw K at your beans either.
Micronutrients that matter for beans
The micronutrients most commonly causing problems in bean production are boron, sulfur, zinc, and iron. Calcium and magnesium round out the list of secondary nutrients worth keeping an eye on, especially in sandy or highly acidic soils. Iron deficiency is a notable cause of chlorosis (yellowing) in beans, particularly when new growth is affected first. Boron and zinc deficiencies are less common but show up in specific soil types, especially high-pH soils or those with very low organic matter. Dry beans have been documented to show deficiencies mainly in N, P, and K, with boron, sulfur, and zinc as secondary concerns worth knowing about.
How beans get their nitrogen (and when you should stay out of the way)
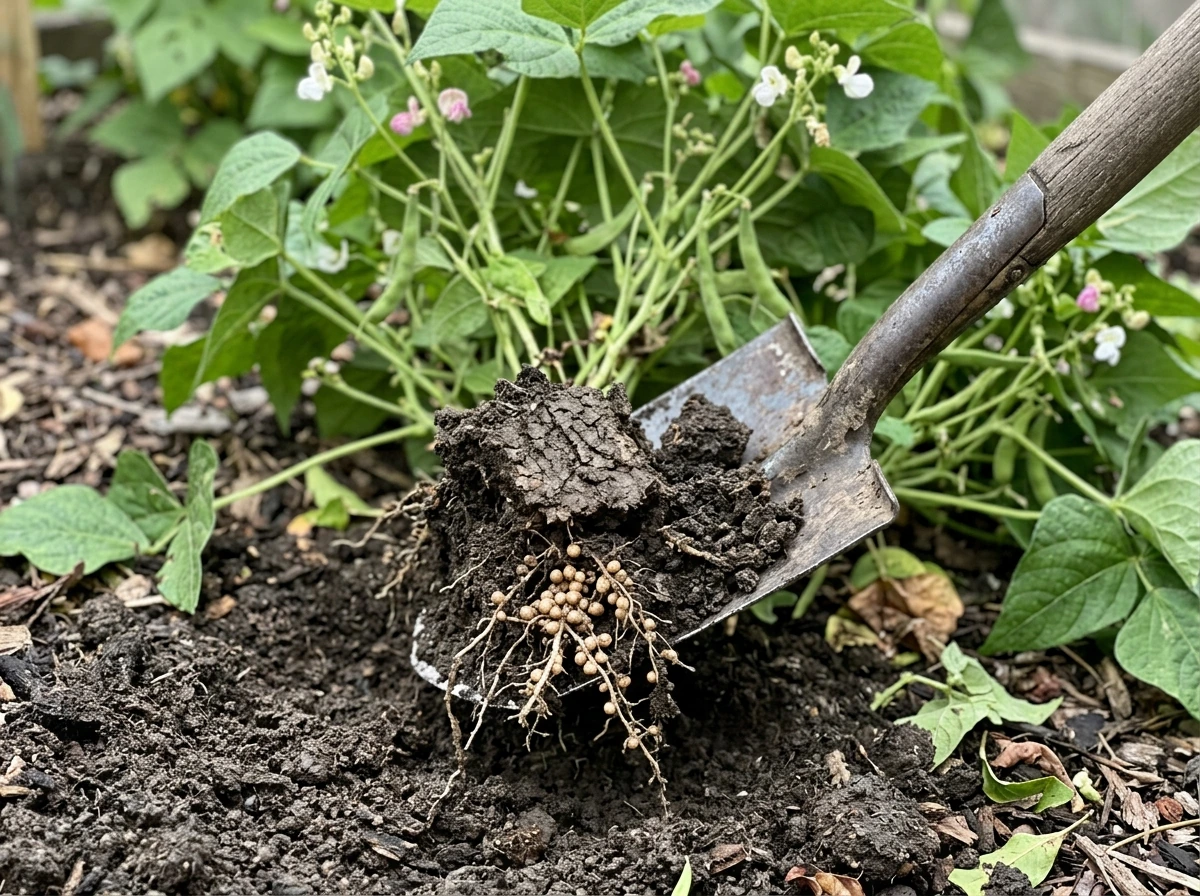
Beans are legumes, which means they can form a partnership with soil bacteria called Rhizobium (specifically Rhizobium phaseoli or Bradyrhizobium for common beans) to fix atmospheric nitrogen directly from the air. The bacteria live in small root nodules, and inside those nodules, they convert nitrogen gas into a form the plant can use. When this works, it's essentially free nitrogen. When it doesn't work, your beans will look pale and hungry no matter how rich your soil is.
How to encourage nodulation
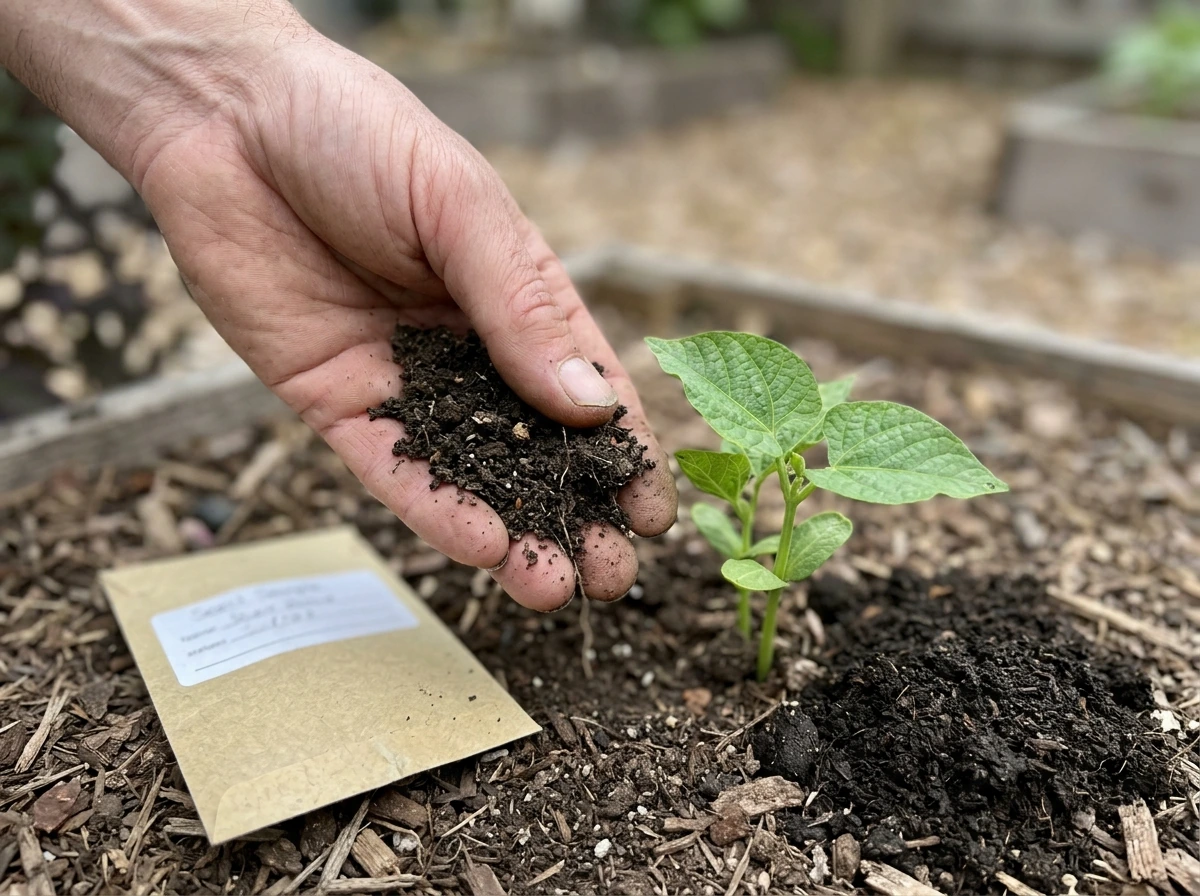
The most important thing you can do is inoculate your seed with the correct rhizobium strain before planting. A peer-reviewed study on Oxford Academic (FEMS Microbiology Ecology) explains that rhizobia can elicit nitrogen-fixing root nodules on legume roots including Phaseolus vulgaris rhizobium strain.
Using the wrong inoculant for beans (say, one intended for soybeans or clover) won't produce proper nodules. Buy an inoculant specifically labeled for Phaseolus vulgaris (common beans) and coat your seeds with it right before sowing. A peer-reviewed genomic study reported that rhizobial strains, including Rhizobium phaseoli, can establish symbiosis with legumes and colonize [Phaseolus vulgaris](https://link. springer.
com/article/10. 1186/s12864-016-3053-z) root nodules. Keep the seed moist and in the soil at a temperature that supports germination, because dry topsoil is one of the top reasons nodulation fails. Also make sure your soil pH is close to neutral (around 6.
0 to 7. 0) before planting, because extremely acidic or alkaline soils inhibit both rhizobia survival and nutrient availability. Lime should be applied to correct pH well before planting inoculated seed.
One more thing: don't apply synthetic fertilizers or chemicals directly on or immediately after inoculated seed. Chemical fertilizers and some pesticides can kill the rhizobia before they ever colonize the roots. If you're adding any pre-plant fertilizer, apply it in a band a few inches away from the seed rather than in direct contact with it.
The nitrogen fertilizer trap
Here's the counterintuitive part: adding nitrogen fertilizer to beans can actually suppress nodulation and reduce nitrogen fixation. When the plant senses plenty of available nitrogen in the soil, it has no incentive to maintain the energy-expensive relationship with rhizobia. So if you pour on nitrogen, you end up with beans that depend on you for all their nitrogen instead of doing the job themselves. That's less efficient and more expensive.
There are two situations where you might legitimately add nitrogen. First, if your beans are following a crop that received heavy nitrogen fertilization, there may be residual N in the soil, and you don't need to add more. Second, if you pull up your plants mid-season and find no nodules (or only small, pale, inactive ones) and you're seeing clear nitrogen deficiency symptoms, a modest top-dressed nitrogen application is a legitimate rescue move. But treat it as a fix for a failed inoculation, not standard practice.
Test your soil before you do anything else
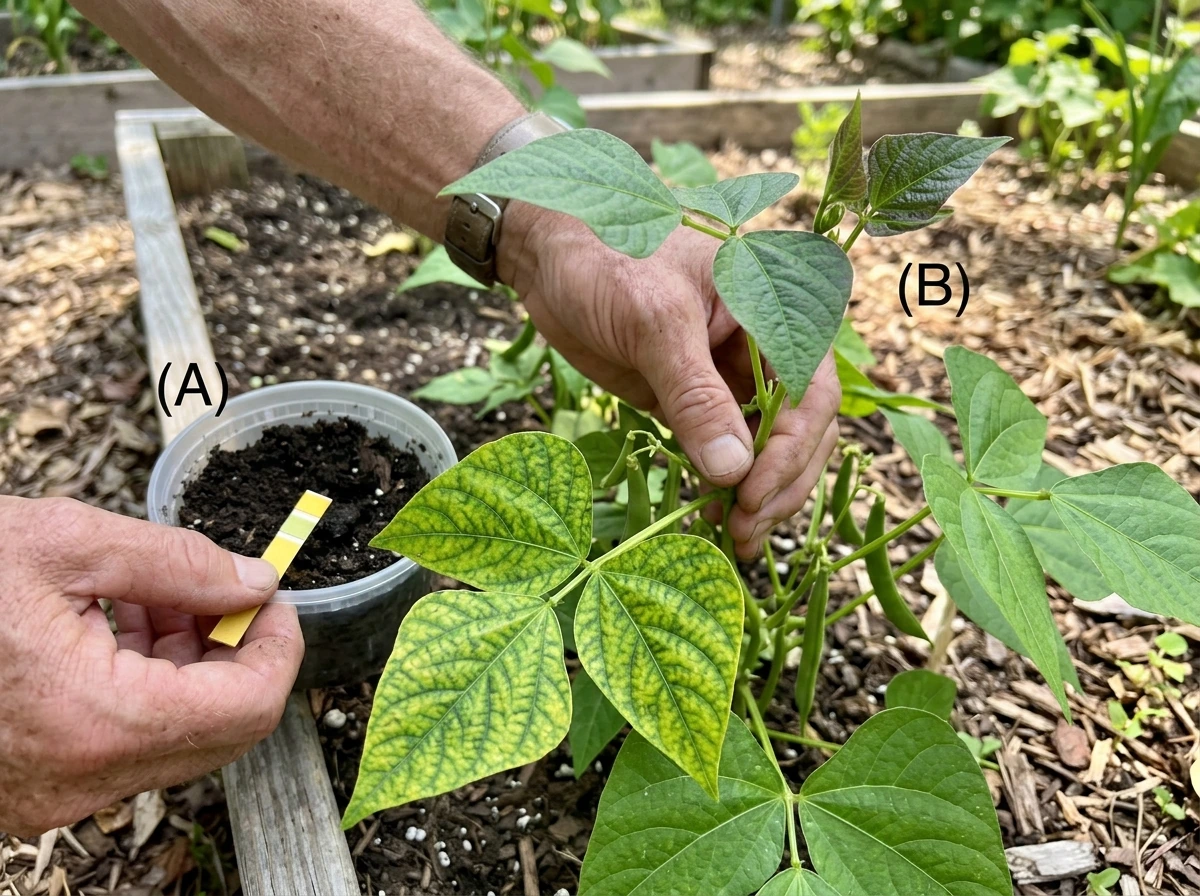
I know soil testing feels like an extra step, but it's the single best thing you can do to avoid both under-feeding and over-feeding your beans. A basic soil test from your local extension service or a mail-in lab will cost you around $15 to $30 and gives you numbers for pH, phosphorus, potassium, and often calcium, magnesium, and organic matter. That's enough to make smart decisions.
Reading the results correctly
The tricky part is that interpretation depends on which extraction method the lab uses. The most common methods for home garden tests are Mehlich-3, Bray P1, and Olsen. The numbers you get for phosphorus and potassium are not interchangeable between methods, so you have to use the interpretation guide that matches your specific test. Your lab report should tell you which method was used and then give category ratings (very low, low, medium, high, excessive) alongside the raw numbers. When the report says your phosphorus is 'medium,' that's the number you act on, not the raw ppm figure alone. If you get results from one lab and switch labs next year, be aware the numbers may not be directly comparable.
Also watch out for one common error: if you recently applied phosphorus in a banded application near where you're sampling, the test results can read artificially high in that zone. Try to sample from multiple spots in the bed and avoid sampling right on a fertilizer band.
What you're aiming for
For beans specifically, you want a soil pH between 6.0 and 7.0. Below 6.0, phosphorus becomes less available and rhizobia struggle. Above 7.0, iron, zinc, and manganese availability drops, which is why iron chlorosis is so common in alkaline soils. For phosphorus, beans respond to fertilizer additions when soil test P is in the medium or lower range. Very low to low potassium also warrants attention, but if K comes back medium or higher, you can skip it entirely.
Fertilizer options and when to apply them
The goal is to front-load phosphorus (and potassium if needed) before or at planting, minimize nitrogen to protect nodulation, and then only intervene mid-season if you're seeing clear deficiency symptoms.
At planting
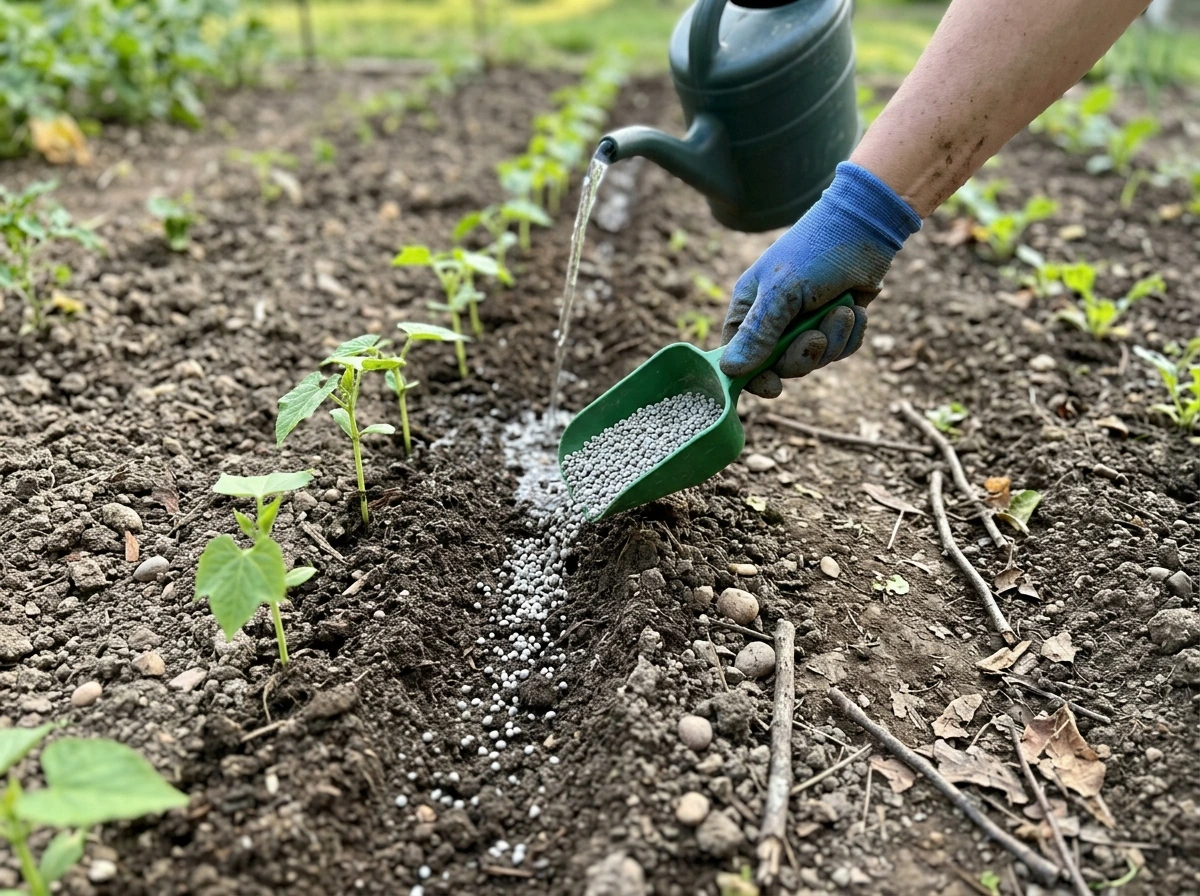
If your soil test shows low or medium phosphorus, work a phosphorus-focused fertilizer into the soil before planting, or apply it in a band a few inches to the side of and below the seed row. Bone meal (slow-release, organic) or a conventional superphosphate or triple superphosphate both work well. If potassium is also low, a balanced amendment like a 5-10-10 or a small dose of potassium sulfate works here. Avoid putting potassium fertilizer in direct contact with the seed since it can interfere with germination.
If your soil has received compost or aged manure, you may already have adequate phosphorus and potassium without adding anything. Compost also improves soil organic matter, which helps with moisture retention and nutrient availability, and reduces the chance of micronutrient problems linked to low organic matter and coarse soil textures.
Side-dressing mid-season
In most cases, beans don't need side-dressing if your pre-plant nutrition was adequate and nodulation is working. Beans usually do benefit from some support, especially for pole types and in windy conditions. If nodules failed and you see nitrogen deficiency (pale, yellowing older leaves, slow growth), a light side-dress of a balanced or nitrogen-focused fertilizer applied a few inches from the stem base and watered in can help. Keep the rate conservative; you're trying to correct a deficit, not push lush leafy growth at the expense of pods.
Foliar feeding: when it makes sense
Foliar applications are best reserved for micronutrient problems that need a fast fix. Iron and zinc deficiencies in particular can be corrected faster with a foliar spray than through soil amendments, especially in alkaline soils where those nutrients lock up quickly. For zinc, a dilute zinc sulfate solution applied to the foliage can turn things around within a week or two. For iron, chelated iron sprays work better than iron sulfate in high-pH soils because chelated iron stays plant-available longer. Don't use foliar feeding as a routine practice on beans; it's a targeted tool.
Phosphorus and potassium through each growth stage
Bean nutrient needs aren't constant. Understanding what the plant is prioritizing at each stage helps you time and target your inputs more intelligently.
| Growth Stage | Primary Nutrient Priority | What's Happening | Key Consideration |
|---|---|---|---|
| Germination to seedling | Phosphorus | Root development, early establishment | P must be available in the root zone from the start; seed inoculant goes on at this stage |
| Vegetative growth | Nitrogen (from fixation), P | Leaf and stem expansion, nodule activity ramps up | Don't add N; support nodules; ensure pH is correct for nutrient availability |
| Flowering | Potassium, P | Flower initiation and pollination | K demand rises; inadequate nutrition here leads to fewer flowers and poor pod set |
| Pod fill | Potassium, calcium, magnesium | Pods expand, seeds develop | K moves from leaves to pods; deficiency may show in foliage only after pod set begins |
| Maturity | Minimal | Nutrients redistributed internally | No fertilizer needed; focus on water management |
The window around flowering is when potassium demand peaks. Research on bean tissue at the bloom stage shows K concentration in the plant running anywhere from 1.5% to 3.3% of dry weight, which illustrates how actively the plant is pulling in potassium at that point. If your soil K was borderline low and you didn't apply any pre-plant, you may start to see leaf edge scorch or poor pod set appearing right around bloom. There's still time to side-dress potassium at early flowering, but it's better to have it in the soil already.
Spotting and fixing common nutrient deficiencies
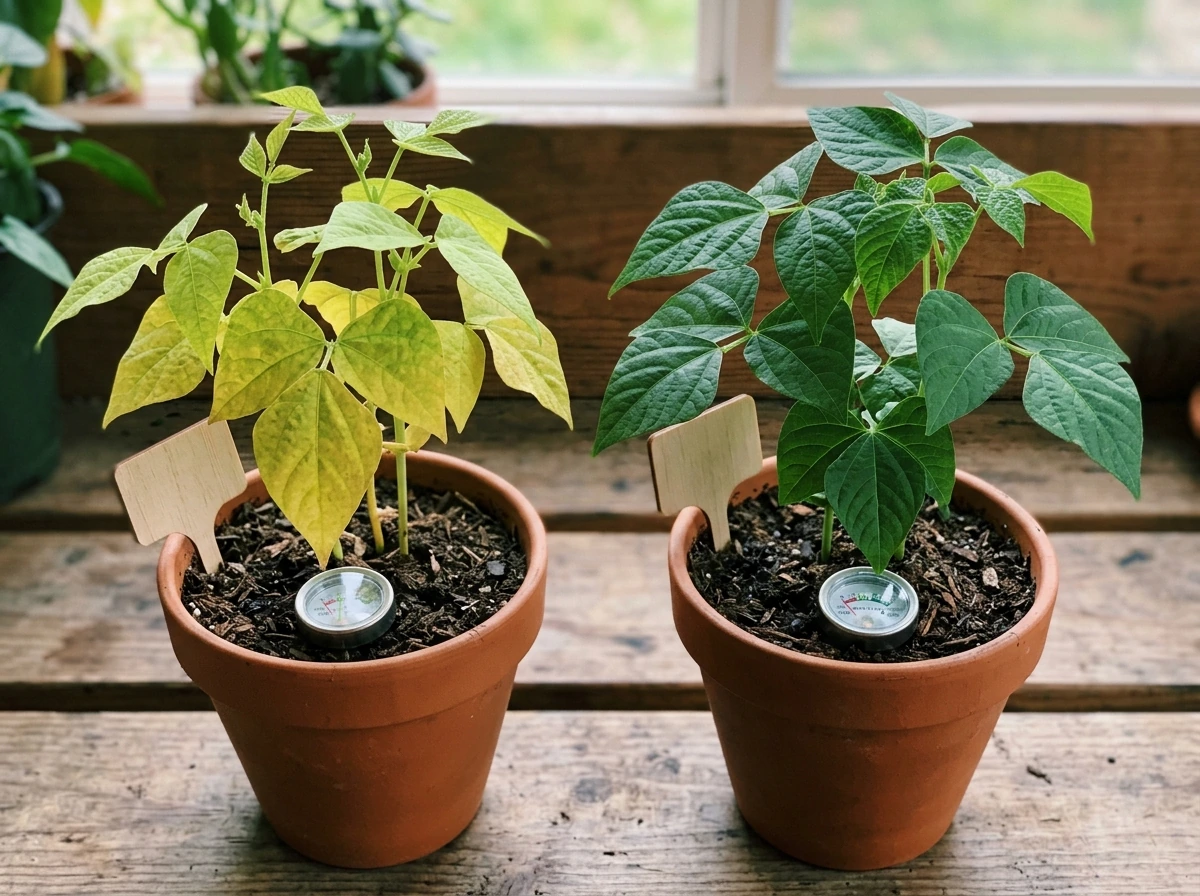
Nutrient deficiency symptoms in beans can mimic disease, drought stress, or pest damage, so you need to look carefully at the pattern, not just the symptom. The key question is: which leaves are affected, and what does the coloring look like?
- Nitrogen deficiency: General yellowing starting on older (lower) leaves first, moving upward. Plants look pale overall and grow slowly. Fix: confirm nodulation failure first by gently pulling a plant and checking roots; if no pink nodules are present, apply a light balanced fertilizer or dilute fish emulsion.
- Phosphorus deficiency: Stunted plants, sometimes with purplish or reddish coloring on leaves and stems due to anthocyanin accumulation. Often seen early in cool, wet springs when P uptake is reduced even in well-amended soils. Fix: soil temperature and warmth usually help; a pre-plant band of phosphorus fertilizer prevents this.
- Potassium deficiency: Yellowing or brown scorching along the outer edges of older leaves. Plants may look OK early but show symptoms during or after pod set when K is being redirected to developing seeds. Fix: side-dress with potassium sulfate or wood ash (lightly) and water in well.
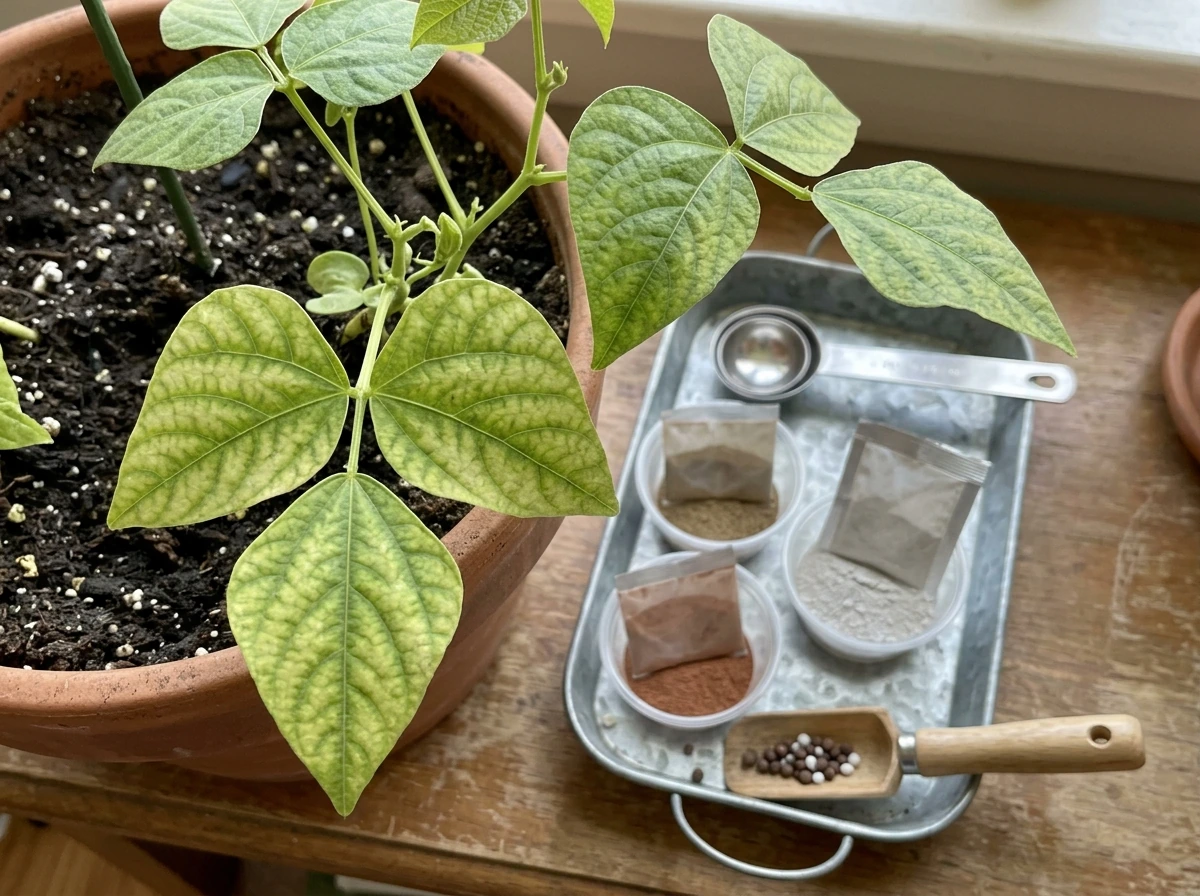
- Iron deficiency (chlorosis): Yellowing between the veins of new, young leaves while veins remain green. Common in alkaline (high pH) soils or waterlogged conditions. Fix: lower soil pH with sulfur amendments over time; apply chelated iron as a foliar spray for a faster response.
- Zinc deficiency: Small, puckered, or distorted new leaves; interveinal chlorosis similar to iron but affecting newer growth. More common in sandy, low-organic-matter soils or high-pH conditions. Fix: foliar zinc sulfate spray.
- Boron deficiency: Distorted growing tips, hollow stems, poor pod set. Less common but can occur in leached sandy soils or after drought. Fix: very small amounts of borax applied to soil carefully (boron toxicity is easy to trigger, so don't overdo it).
- Sulfur deficiency: Uniform yellowing of young leaves (different from N deficiency which starts on old leaves). Rare in most home gardens with any organic matter. Fix: apply gypsum (calcium sulfate) or elemental sulfur.
When symptoms are unclear, don't guess with expensive amendments. If you've already got a soil test and symptoms still don't match a clear deficiency, a plant tissue test sent to a lab is the most accurate next step. Trying to fix the wrong nutrient problem can make things worse, especially with micronutrients where the line between deficiency and toxicity is thin.
What to do right now: a checklist by setup
Here's how to translate everything above into immediate action, depending on where you're growing. These steps assume you're either planting soon or already have beans in the ground.
If you're growing in a garden bed
- Get a soil test if you haven't in the past 2 to 3 years. Submit samples to your local extension lab or a reputable mail-in service. Make sure you know which extraction method they use so you can interpret P and K correctly.
- Check your pH result. If it's below 6.0, apply lime and wait at least 2 to 4 weeks before planting if possible. If it's above 7.5, plan for potential iron and zinc availability issues and have chelated iron on hand.
- If soil P is low or medium, work in a phosphorus amendment (bone meal, superphosphate) before planting or apply in a band 2 to 3 inches to the side of the seed row.
- Purchase an inoculant specifically for Phaseolus vulgaris (common beans). Coat seeds just before planting and keep them moist. Don't apply chemical fertilizers directly on inoculated seeds.
- Skip the nitrogen fertilizer unless you had a previous crop that depleted N heavily, or you discover nodulation failed mid-season.
- At flowering, gently pull one plant and check roots for nodules. Pink or red inside means active fixation. White or absent means fixation isn't happening; consider a light nitrogen side-dress.
- After pod set, watch leaf edges for potassium deficiency signs. If K was borderline on your soil test, side-dress with potassium sulfate now.
If you're growing in containers
- Use a quality potting mix with compost already blended in. Most fresh potting mixes have some phosphorus and potassium included.
- Still inoculate your seed before planting, even in containers. Rhizobia can establish in potting mix.
- Containers leach nutrients faster than garden beds, so watch for deficiency signs sooner. Light feeding with a balanced liquid fertilizer (low-N, like a 5-10-10 diluted to half strength) every 3 to 4 weeks from the vegetative stage onward is reasonable.
- For iron chlorosis in containers, add a small amount of chelated iron to your watering can once or twice during the season, especially if your water is alkaline.
- Don't let containers dry out completely; dry conditions are one of the main reasons nodulation fails and also reduce uptake of phosphorus and potassium.
If your beans are already in the ground and showing symptoms
- Identify whether symptoms are on old leaves (lower) or new leaves (upper). Old leaves first usually means N, K, or Mg. New leaves first usually means iron, zinc, boron, or sulfur.
- Check for root nodules before adding any nitrogen. Pull one plant carefully and look for pink nodules on the roots.
- Match the symptom pattern to the deficiency descriptions above. If it's clear-cut, treat it. If it's not, get a tissue test before spending money on amendments.
- For a quick foliar fix on iron or zinc chlorosis: mix chelated iron or zinc sulfate in water according to package directions and spray on the foliage in the early morning or evening, avoiding hot midday application.
- Improve organic matter for next season to reduce the likelihood of micronutrient lockup and improve moisture retention, both of which directly support better nodulation and nutrient uptake.
Beans are genuinely one of the easier crops to feed once you understand the nitrogen fixation piece. Let the rhizobia do their job, make sure phosphorus is available from the start, don't neglect potassium around flowering, and keep an eye on pH so micronutrients stay accessible. That's really the whole strategy. The soil test just helps you confirm which parts of it actually need your attention in your specific garden, and which parts you can skip entirely. what causes green beans to grow flat. do beans need support to grow
FAQ
How can I tell if my beans are actually fixing nitrogen or just growing pale from another problem?
Check for root nodules when you can, not just leaf color. Healthy nodules are usually firm and pinkish inside, while failed nodules are small or pale. If nodules are present but leaves still yellow, look first at pH and iron availability (chlorosis on new growth often points to iron issues rather than nitrogen deficiency).
Do bush beans and pole beans need different nutrient amounts?
They usually need the same core nutrients, but pole beans have a longer season so deficiencies show up later and can persist longer. Plan on adequate phosphorus at planting, and if your soil K is borderline, consider having potassium available before flowering so pod fill does not suffer mid-season.
Can I use compost tea or liquid organic fertilizers instead of soil-applied phosphorus or potassium?
Liquid inputs often deliver nitrogen and can reduce nodulation if they add meaningful available N at the wrong time. If you use liquids, prioritize micronutrient needs that you have confirmed, and rely on soil testing for P and K because those nutrients are less reliably supplied through teas.
What’s the safest way to correct low phosphorus if I already planted?
If planting is already done, avoid broadcasting high-rate phosphorus that lands near the seed row. A conservative banded application to the side and slightly below the root zone works better, then water in. If you can, confirm with another soil sample or a tissue test before increasing rates.
Is bone meal a good choice for phosphorus on high-pH soil?
Bone meal can still help, but on alkaline soils phosphorus can become less available, so timing and placement matter. If your soil test shows high pH and low to medium P, consider incorporating it and keeping the material off direct seed contact. In severe cases, chelated or fast-available sources may be more effective, but decide based on your lab results.
Should I stop watering after adding fertilizer to prevent nutrient issues?
No, watering is part of moving nutrients into the active root zone. After any fertilizer banding, water enough to settle soil and start uptake, especially for phosphorus. Avoid repeated drought cycles after application, since dry soil can limit movement of nutrients to roots.
How much nitrogen is too much for beans?
The article approach is to avoid nitrogen unless there is evidence nodulation failed. If you must rescue, use a modest rate and treat it as temporary support, then stop increasing N. Excess nitrogen can suppress further nodulation, leaving you dependent on continued additions and potentially reducing pod efficiency.
What soil pH should I aim for if my beans keep getting iron chlorosis?
Target roughly neutral conditions (about 6.0 to 7.0). If your soil tests above that range and you see yellowing especially in new growth, focus on pH adjustment and consider a chelated iron foliar option for a faster correction while the soil amendment works.
Can I trust phosphorus and potassium numbers if I use a different lab next year?
Only with caution. Different extraction methods produce values that are not interchangeable, even when the labels look similar. Use the interpretation categories from the report that matches that lab and method, and avoid comparing raw ppm values across labs without matching methodology.
What causes “fertilizer burn” or poor emergence after inoculating seed?
It’s usually either contact with concentrated fertilizer, seed being kept dry after inoculation, or inoculant being killed by chemicals. Keep inoculated seed moist and in the soil, and place any pre-plant fertilizer a few inches away and not directly on top of the seed.
If my soil test shows medium phosphorus and medium potassium, do I still need any starter fertilizer?
Often you can skip it, especially if compost or aged manure is already present. Starter may still help with early root establishment, but the goal is to avoid unnecessary nitrogen and avoid nutrient contact with seed. If you do add anything, focus on a low phosphorus or balanced, placed-away approach rather than heavy blanket feeding.
How do I tell whether scorched leaf edges are potassium deficiency or something else?
Look at timing and pattern. Potassium-related problems often appear around flowering and can include poor pod set. If scorching is accompanied by wilting during hot dry periods, drought stress can mimic deficiency, so compare leaf condition after rewatering and also cross-check your soil K category.
When should I use a plant tissue test instead of guessing with amendments?
Use it when symptoms do not match what your soil test predicts or when multiple issues could overlap (pH problems, disease-like spots, mixed nutrient deficiencies). Tissue testing is especially helpful for micronutrients where the line between deficiency and toxicity can be narrow.
Next Article
Is Beans Grow Food? How to Grow Edible Beans at Home
Yes, beans are edible food you can grow at home: pick bush or pole types, plant, manage pests, harvest green or dry bean